The Beginning of the End

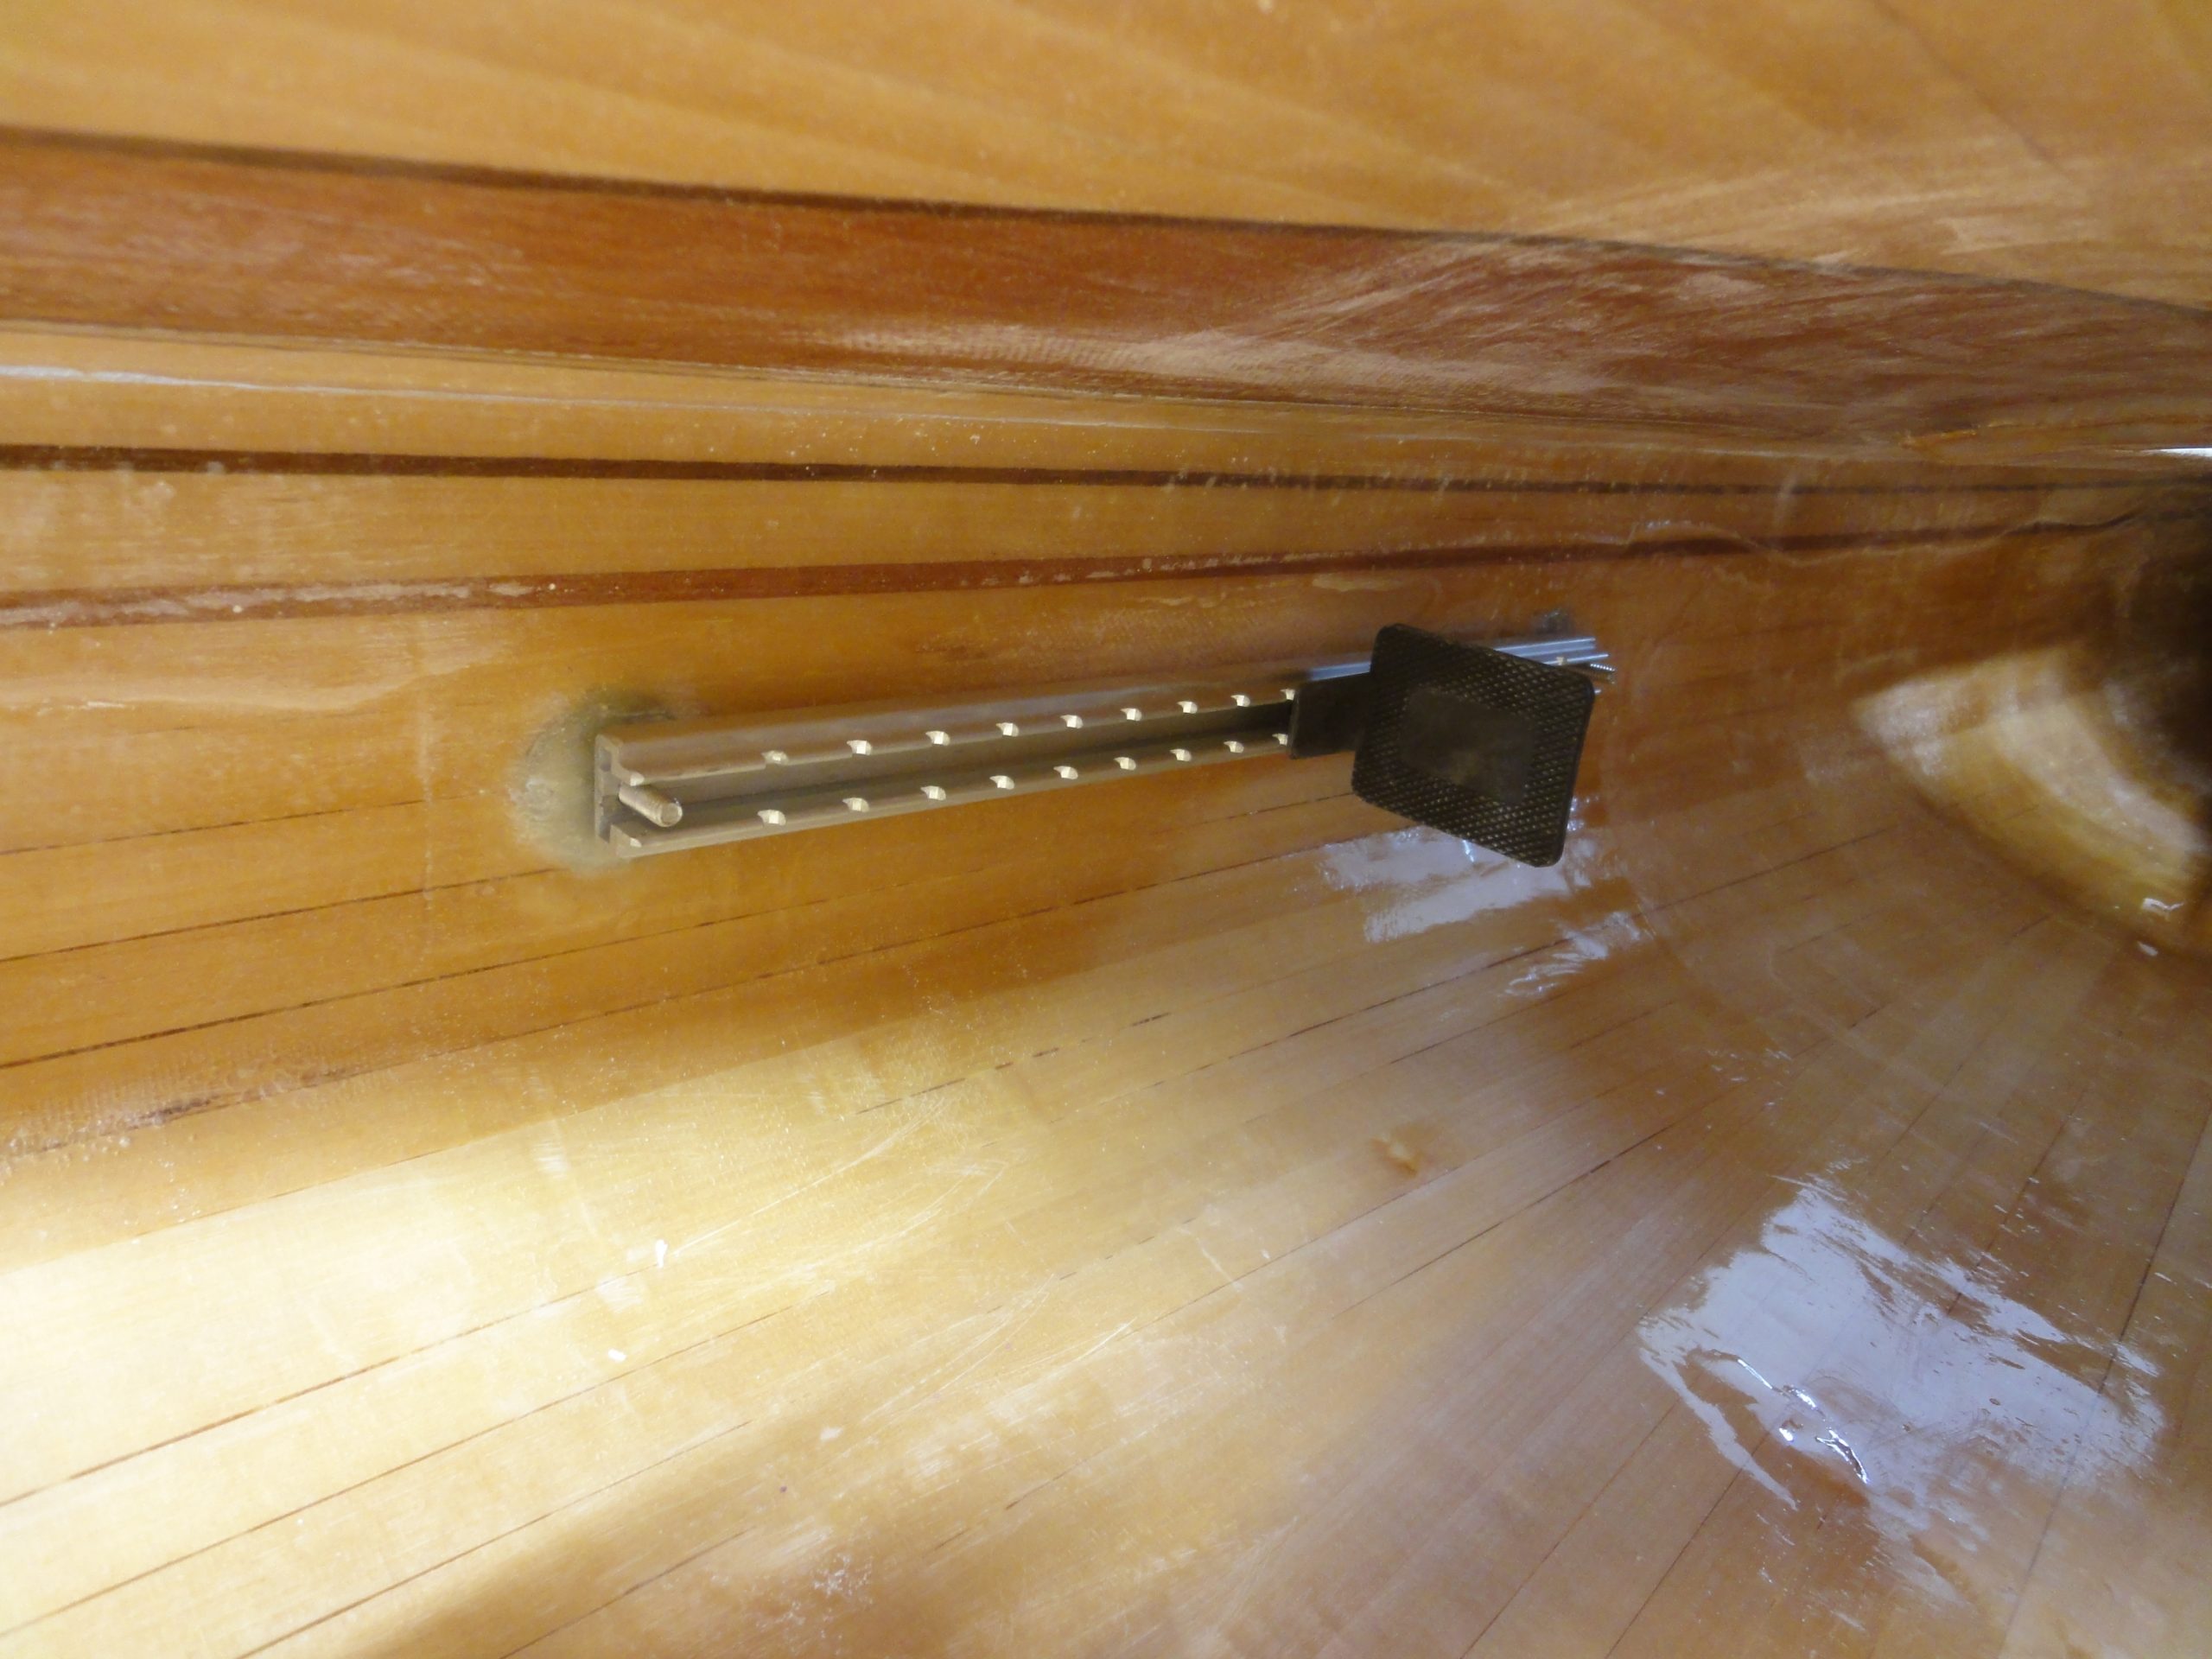
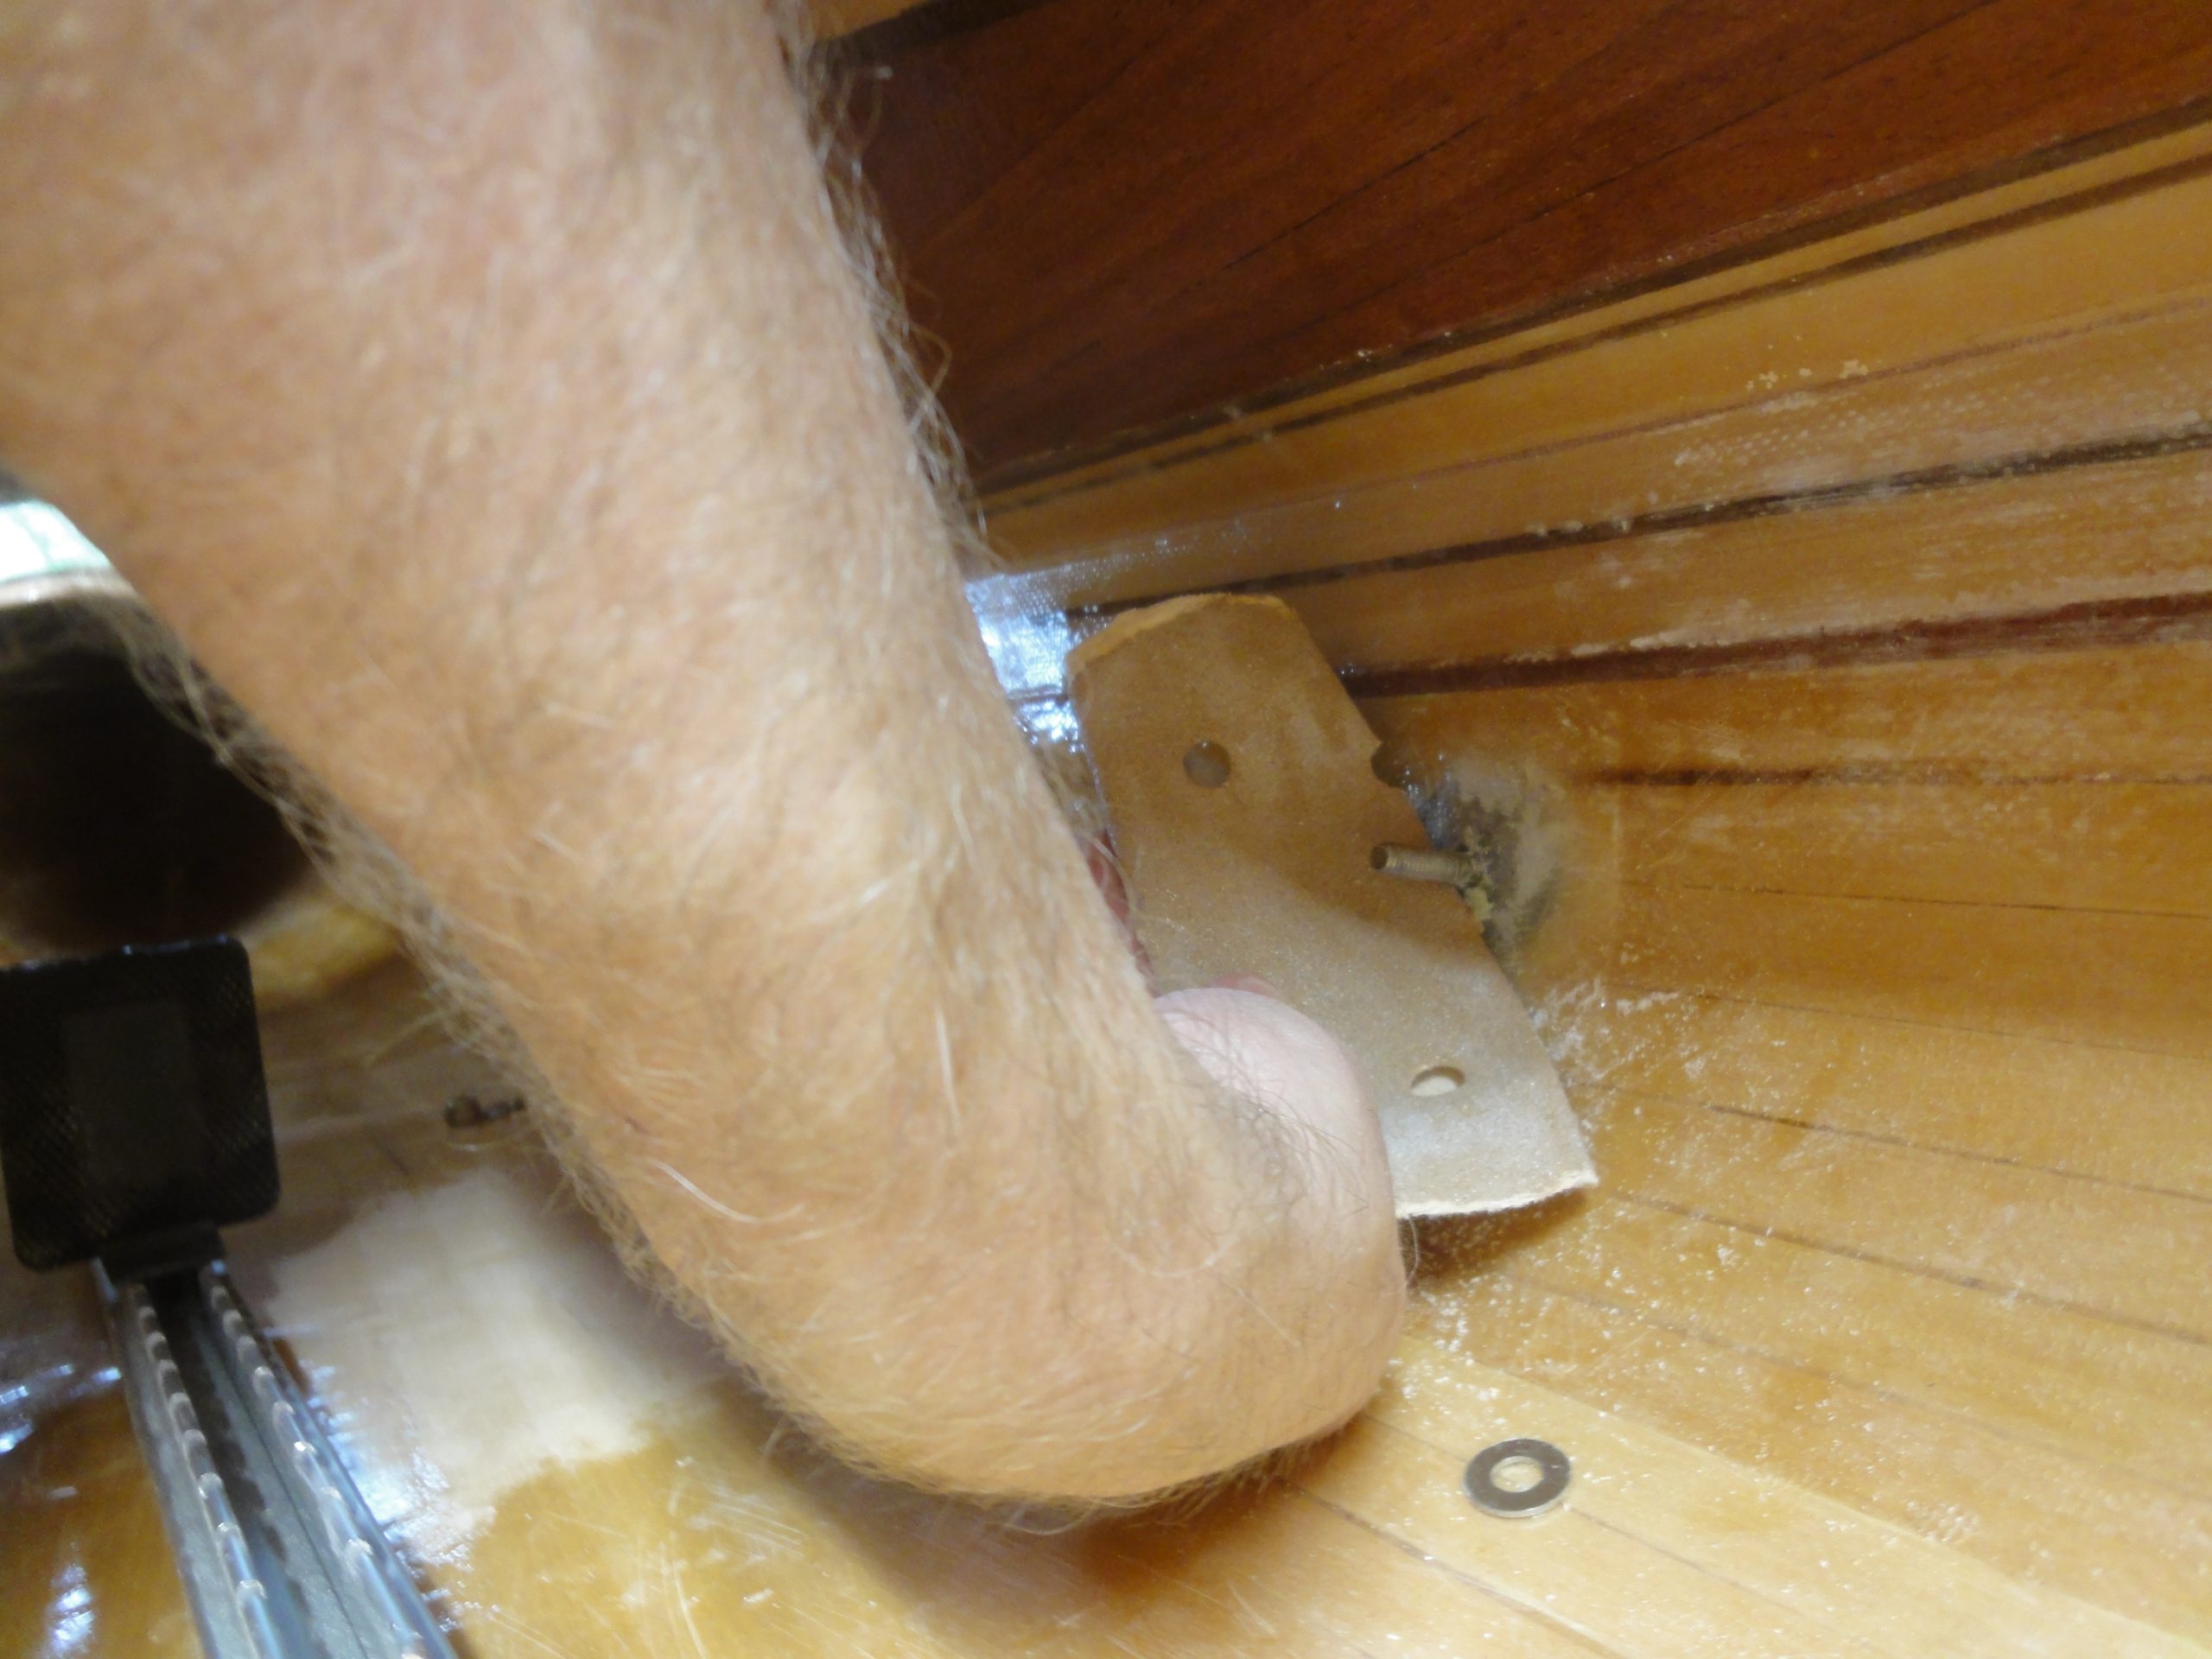
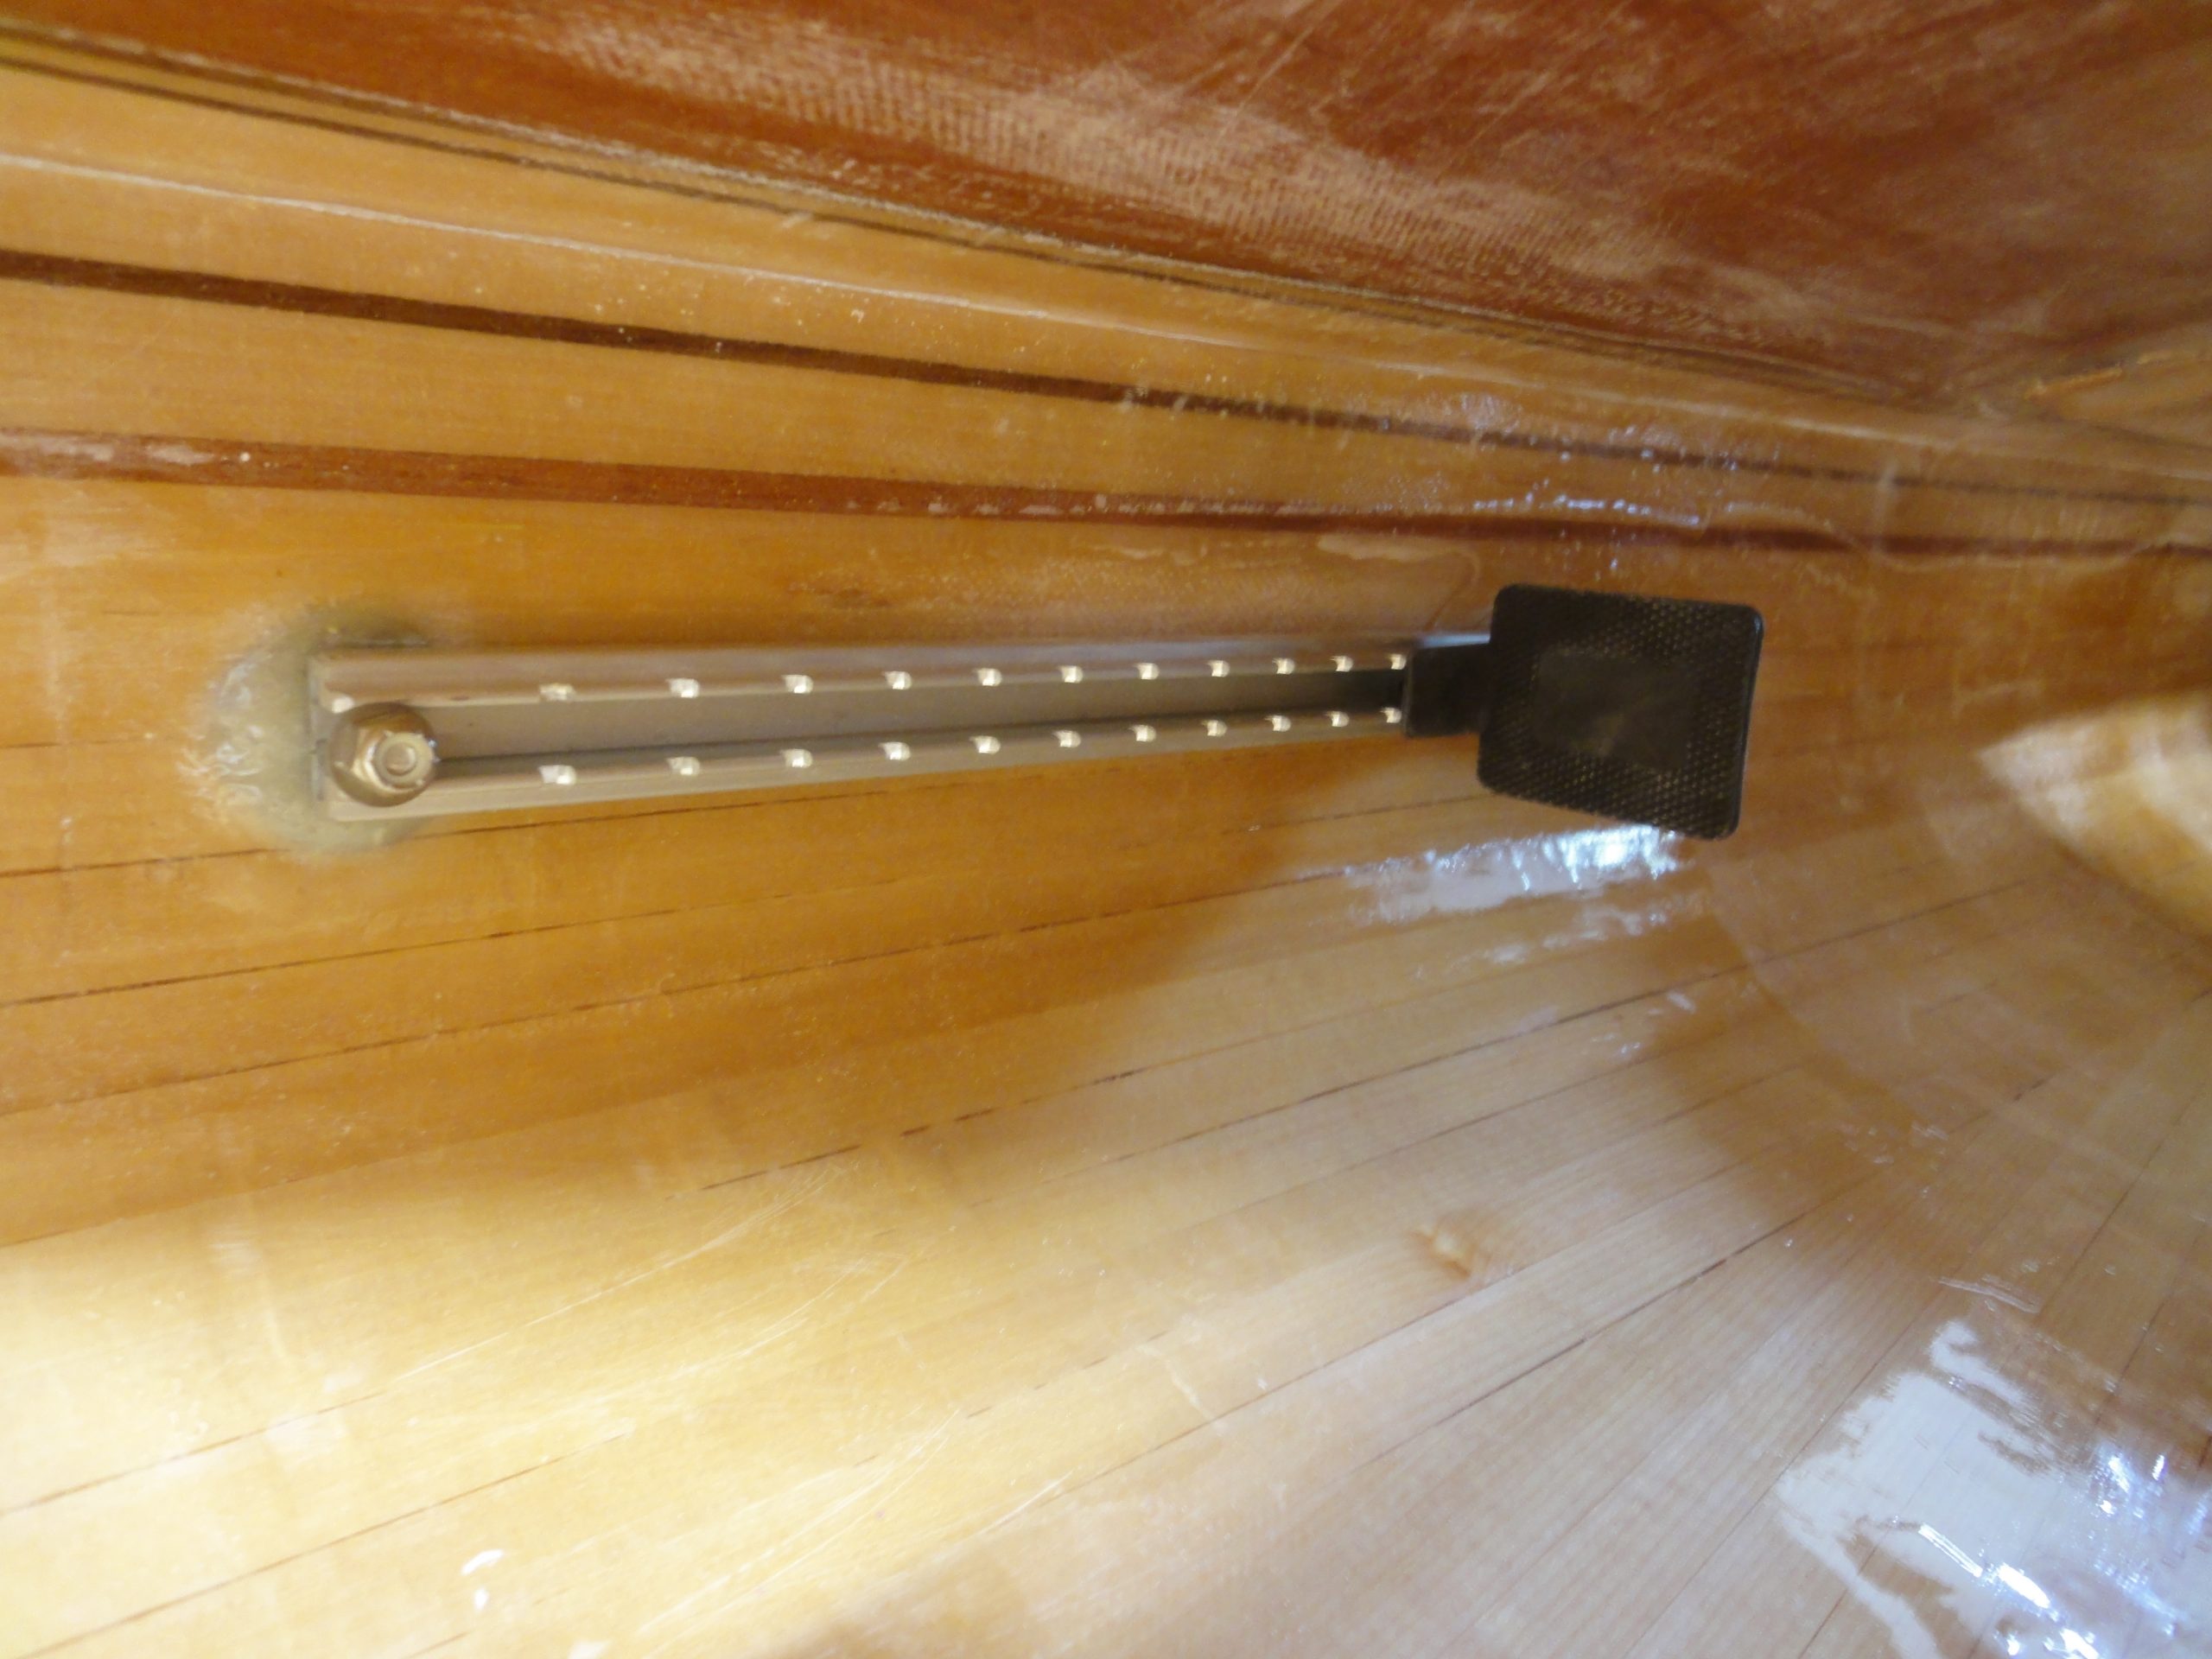
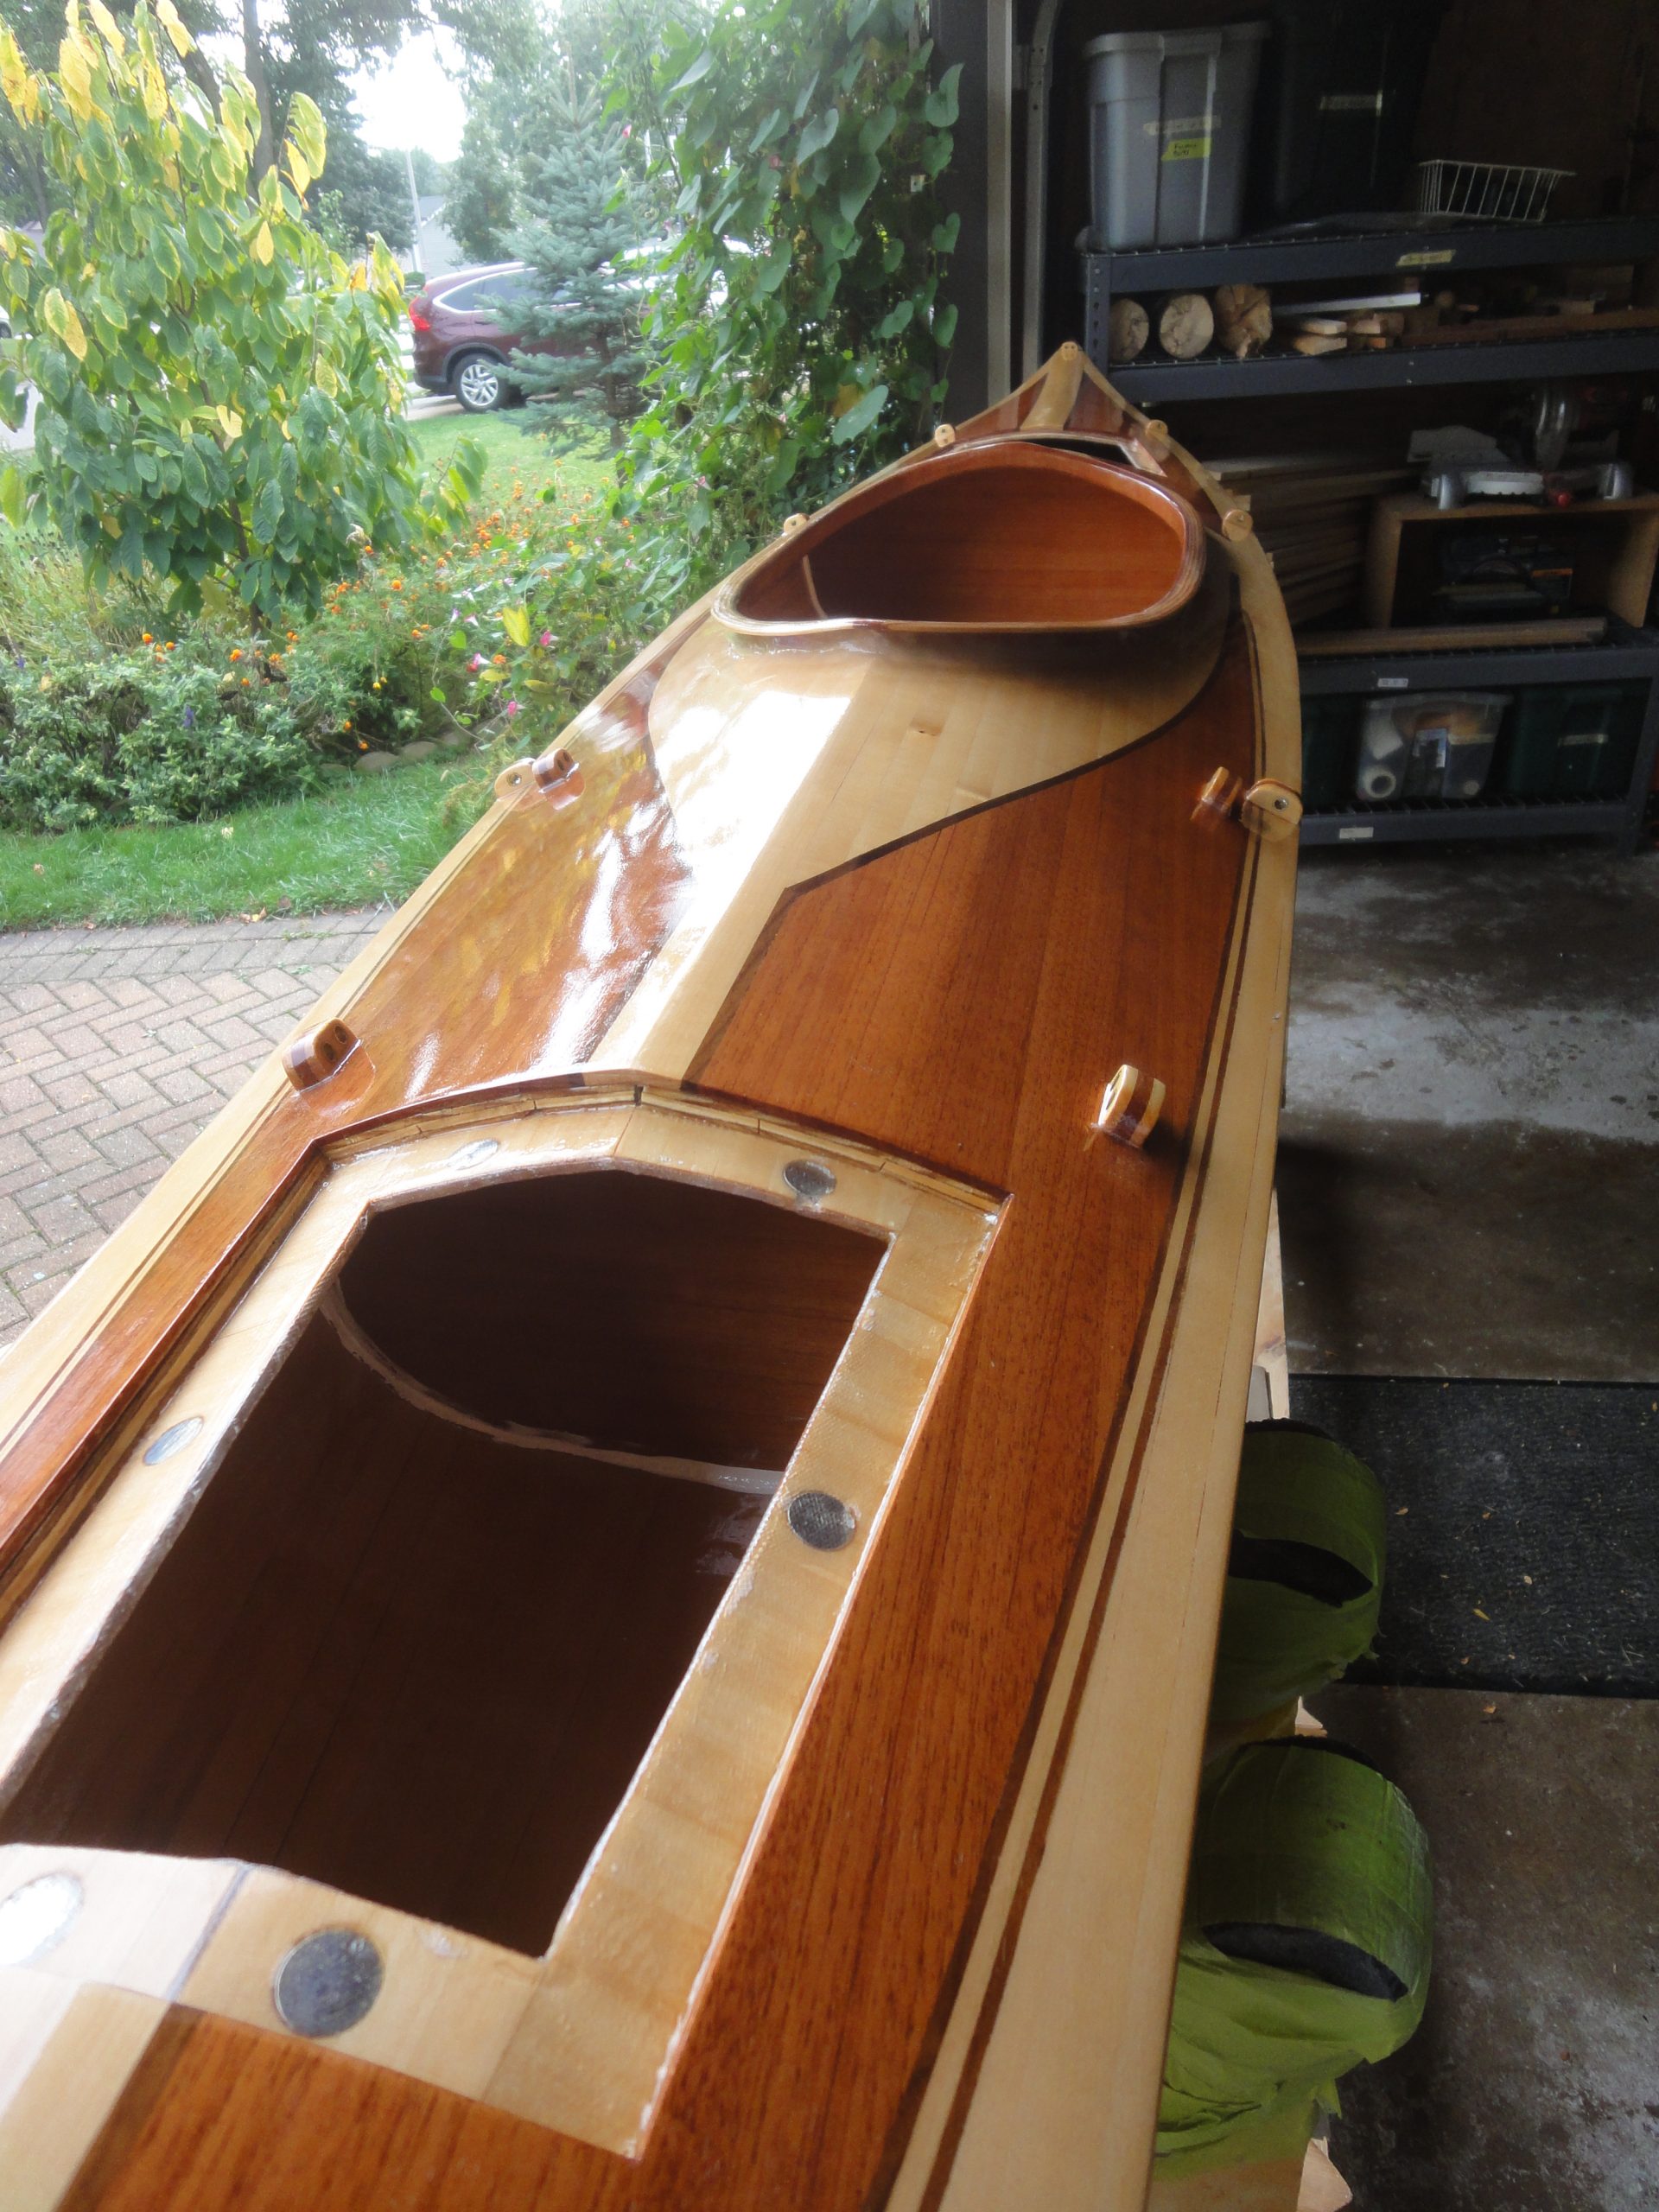
Lots of progress. First off I was only able to get in 15-30 minutes a few nights the past week but that was enough to effectively finish the bulkheads and hatch pulls. Both sides of the bulkheads are fully varnished and done. The insides of the hatches are complete and the pulls were attached. A simple hole was predrilled from the under side and a single screw was added for strength after I epoxied the pulls to the outside of the hatch lids. The inside of the screw head was covered in epoxy and the pulls and surrounding lid area received a couple coats of epoxy over a few days. All that’s left to do is sand them.

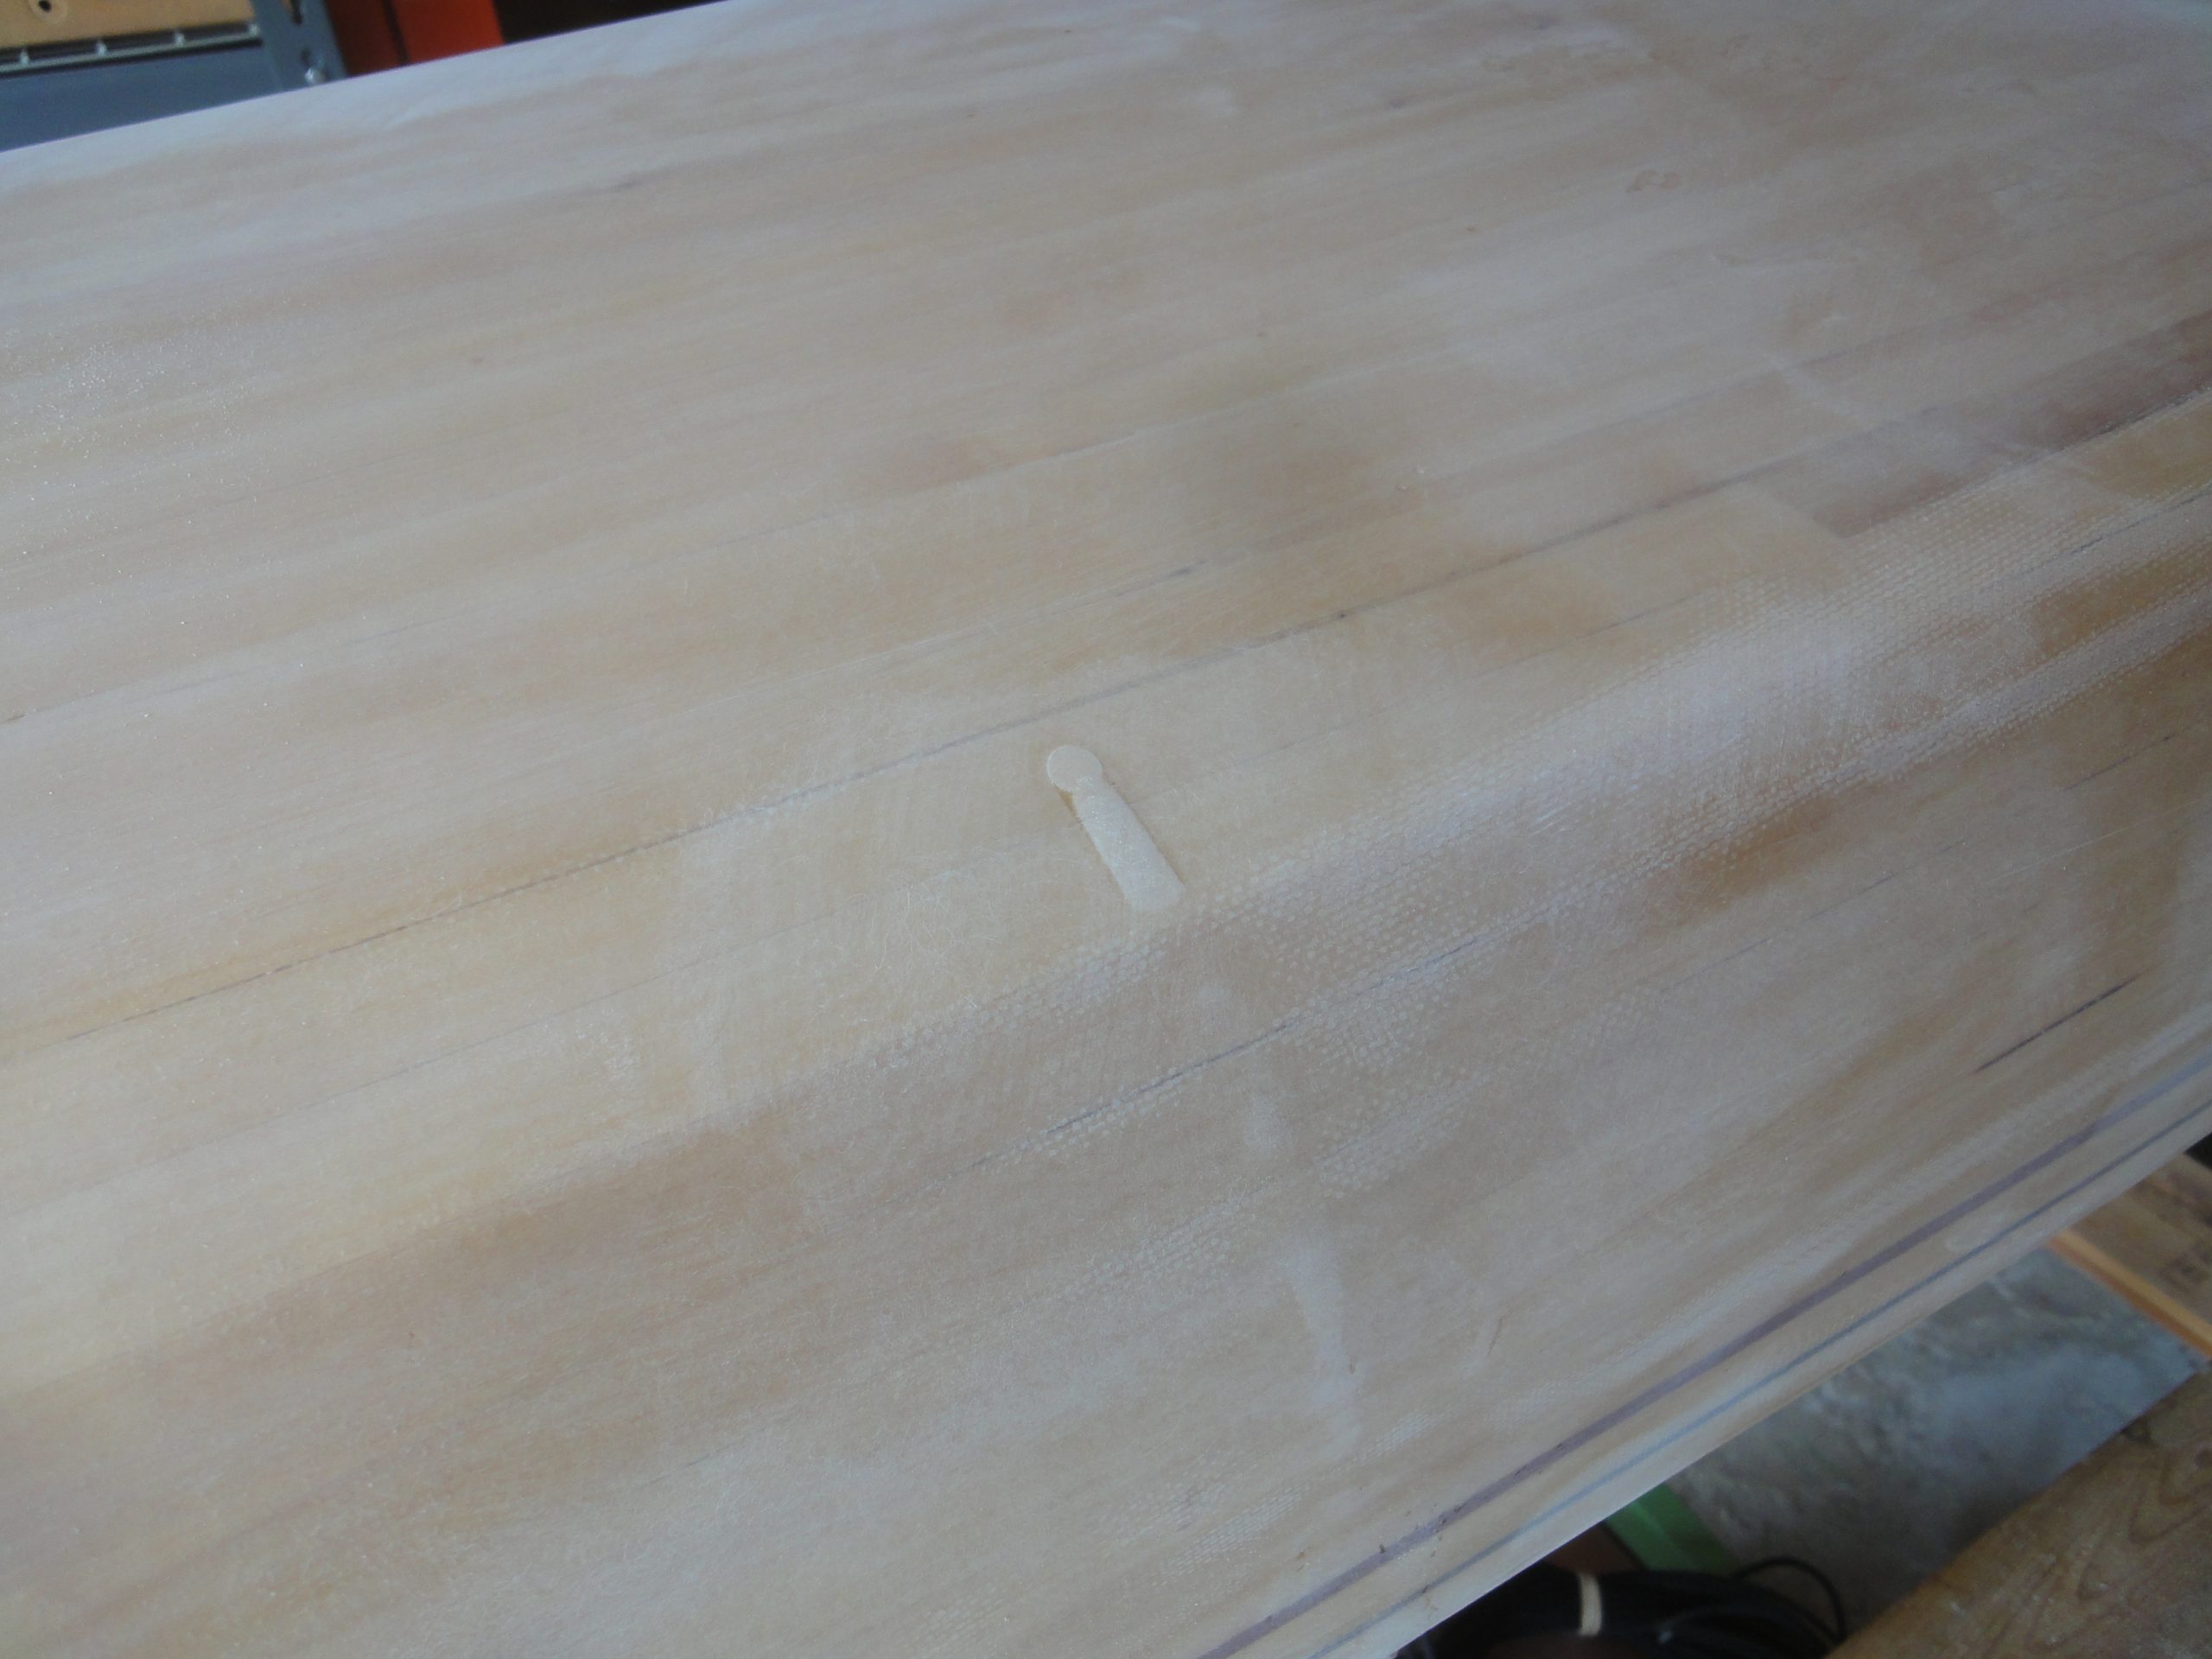
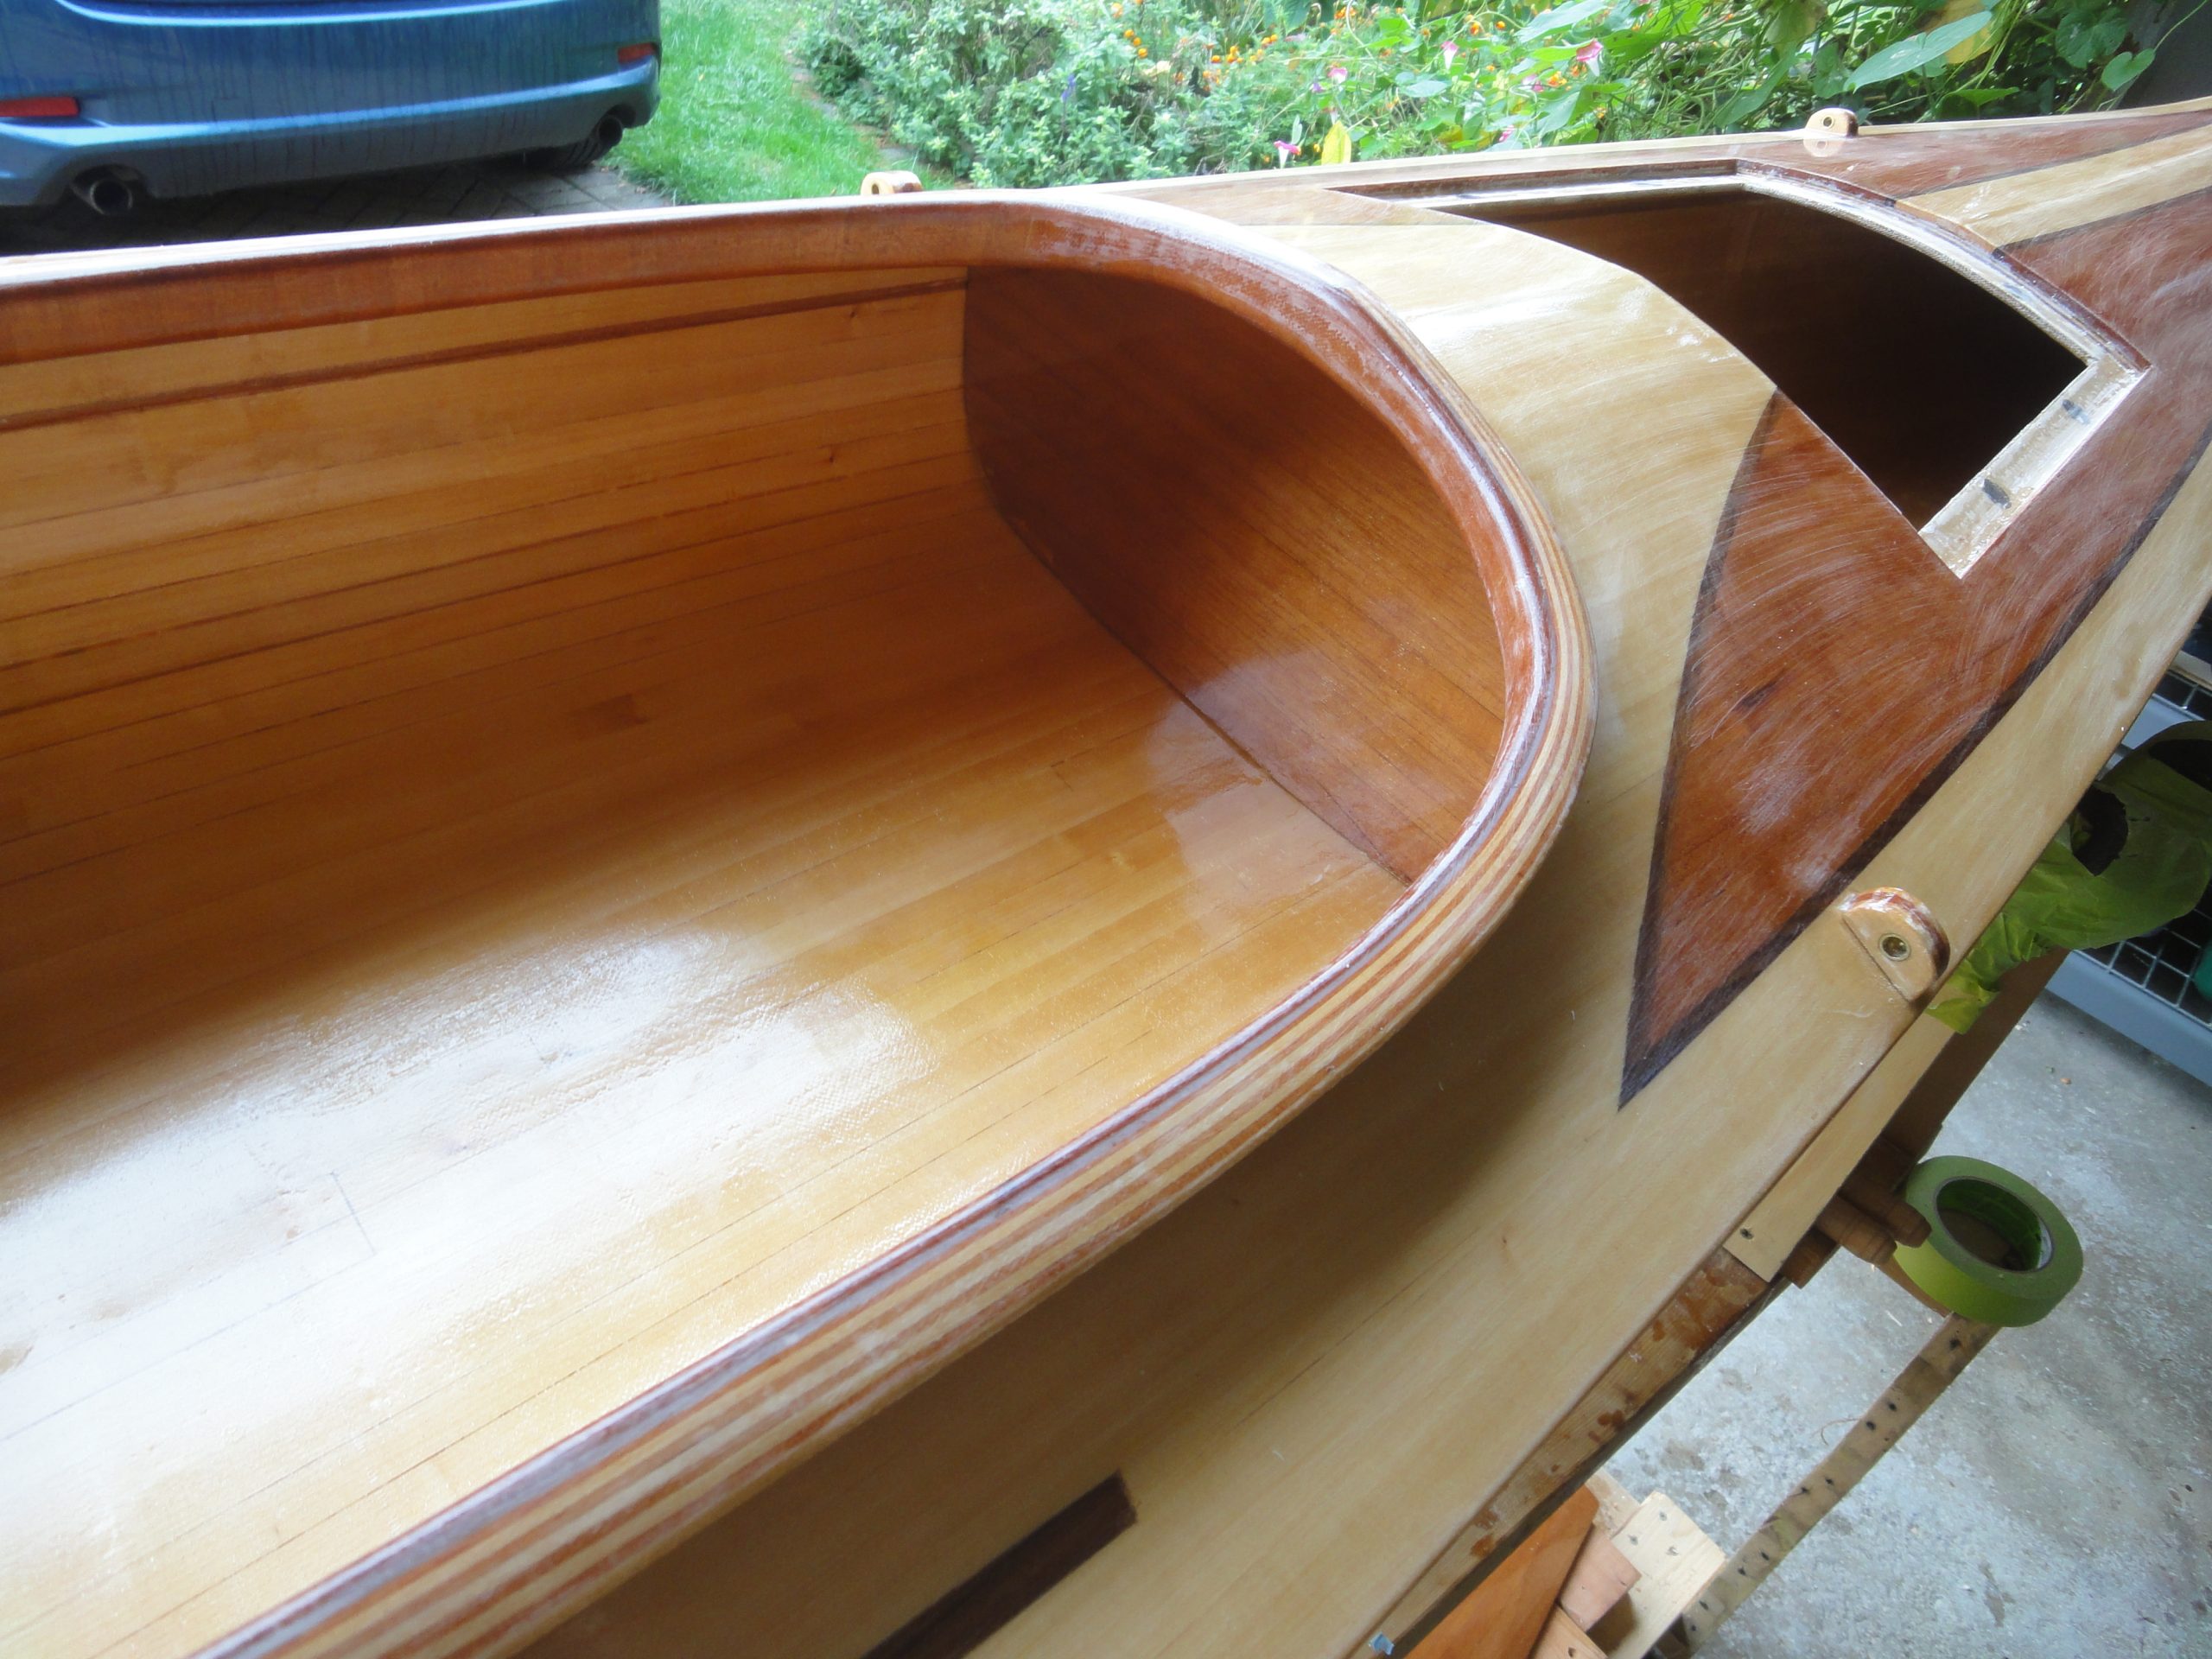
You should also notice now the hatches don’t quite sit nicely. Some of this will resolve when the foam seal is installed, and some I will probably have to live with. It’s really noticeable in a close up shot like this but not obvious from a standard viewing distance. The pulls will sanded smooth along with any epoxy on the lids around them going through the grits up to 220 like everything else.

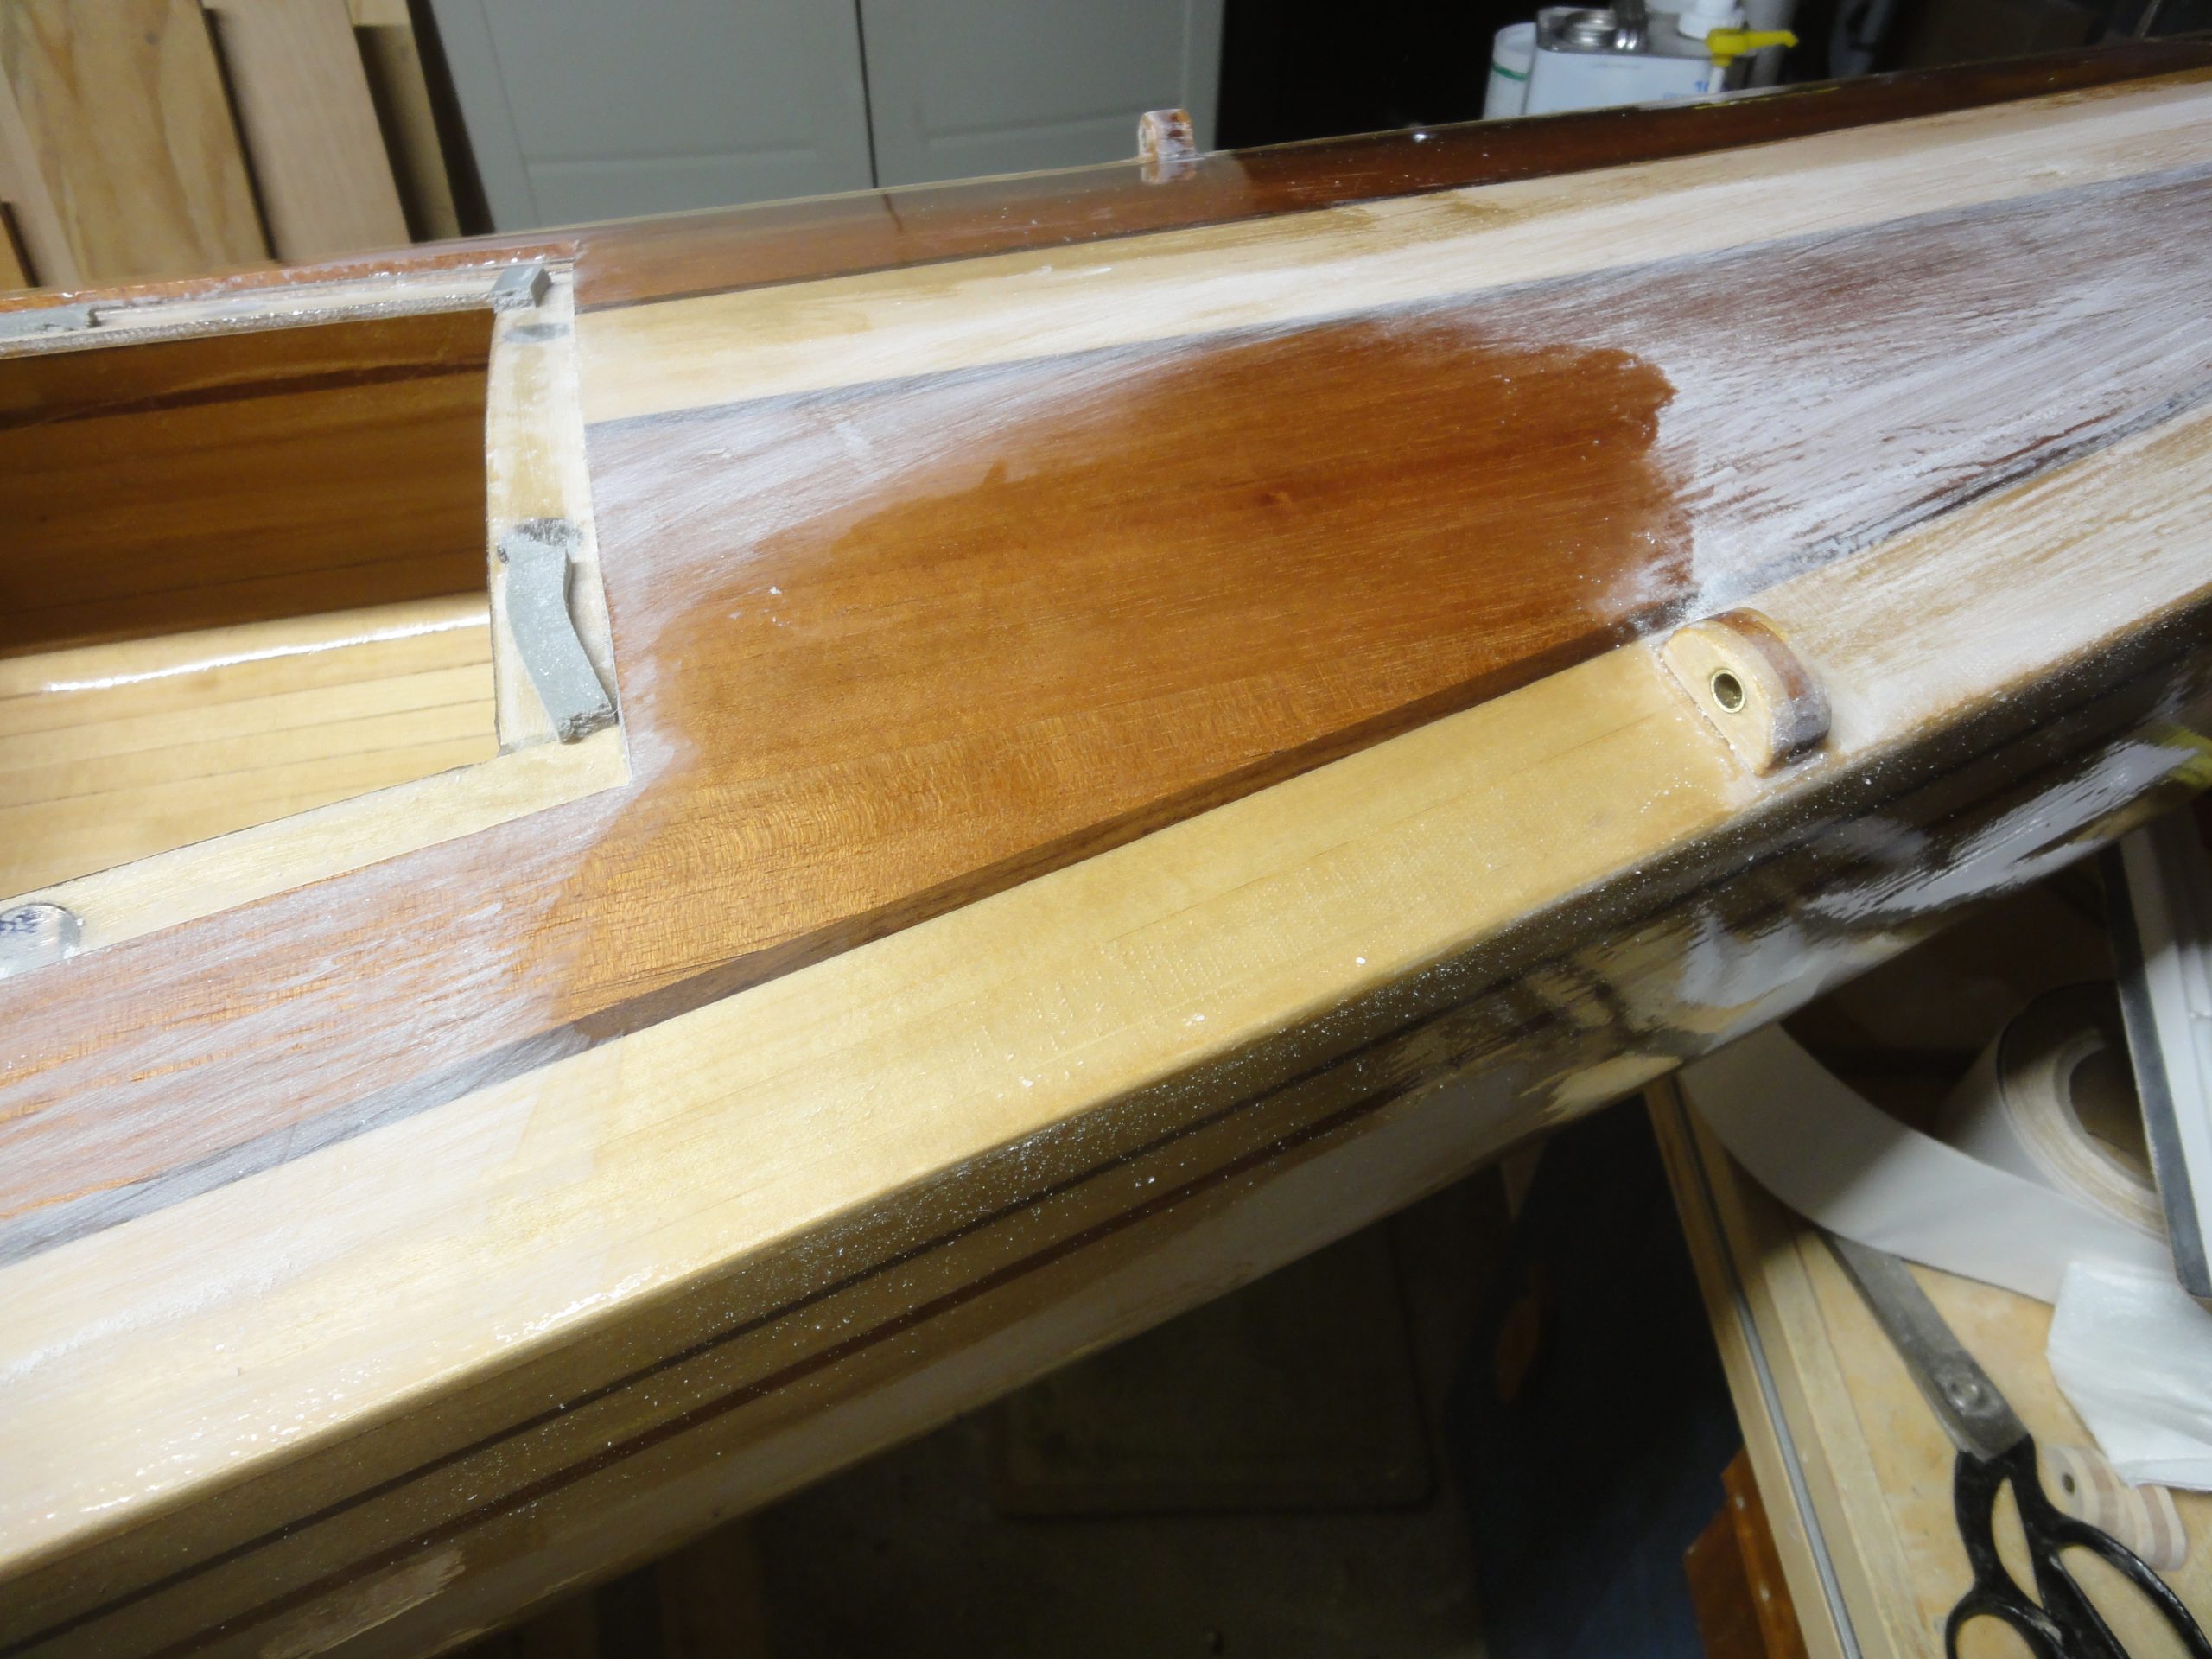
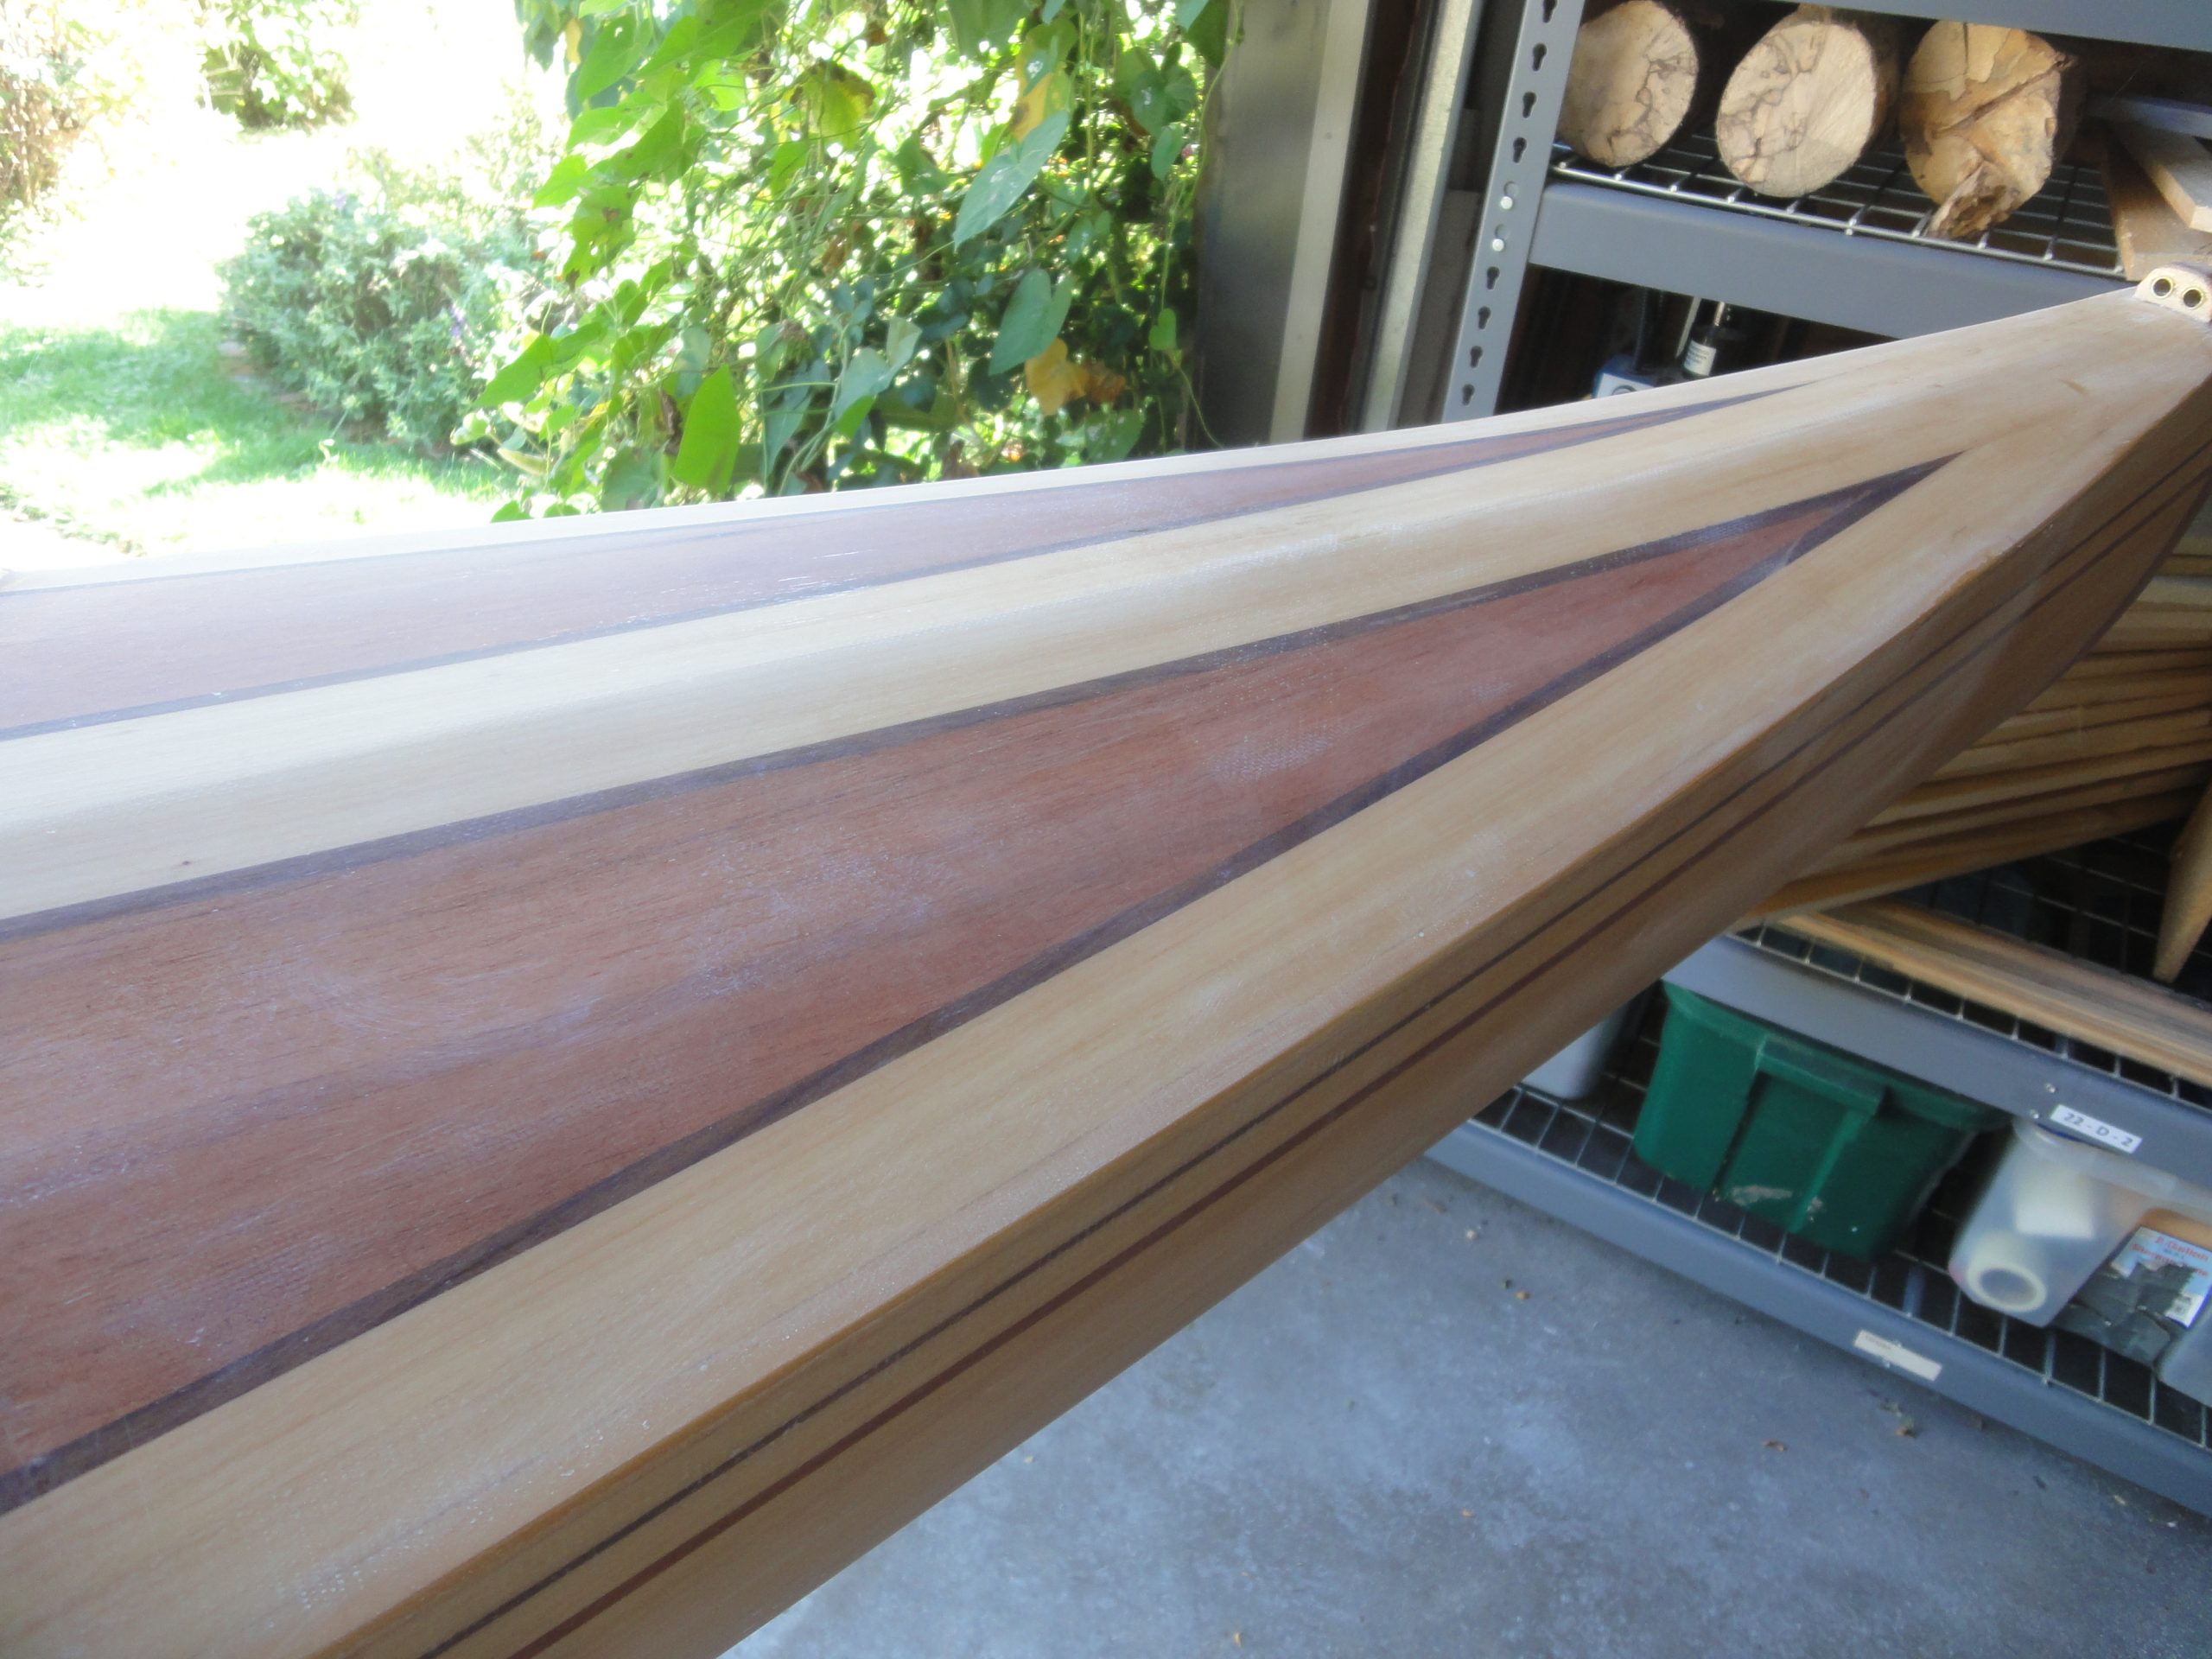
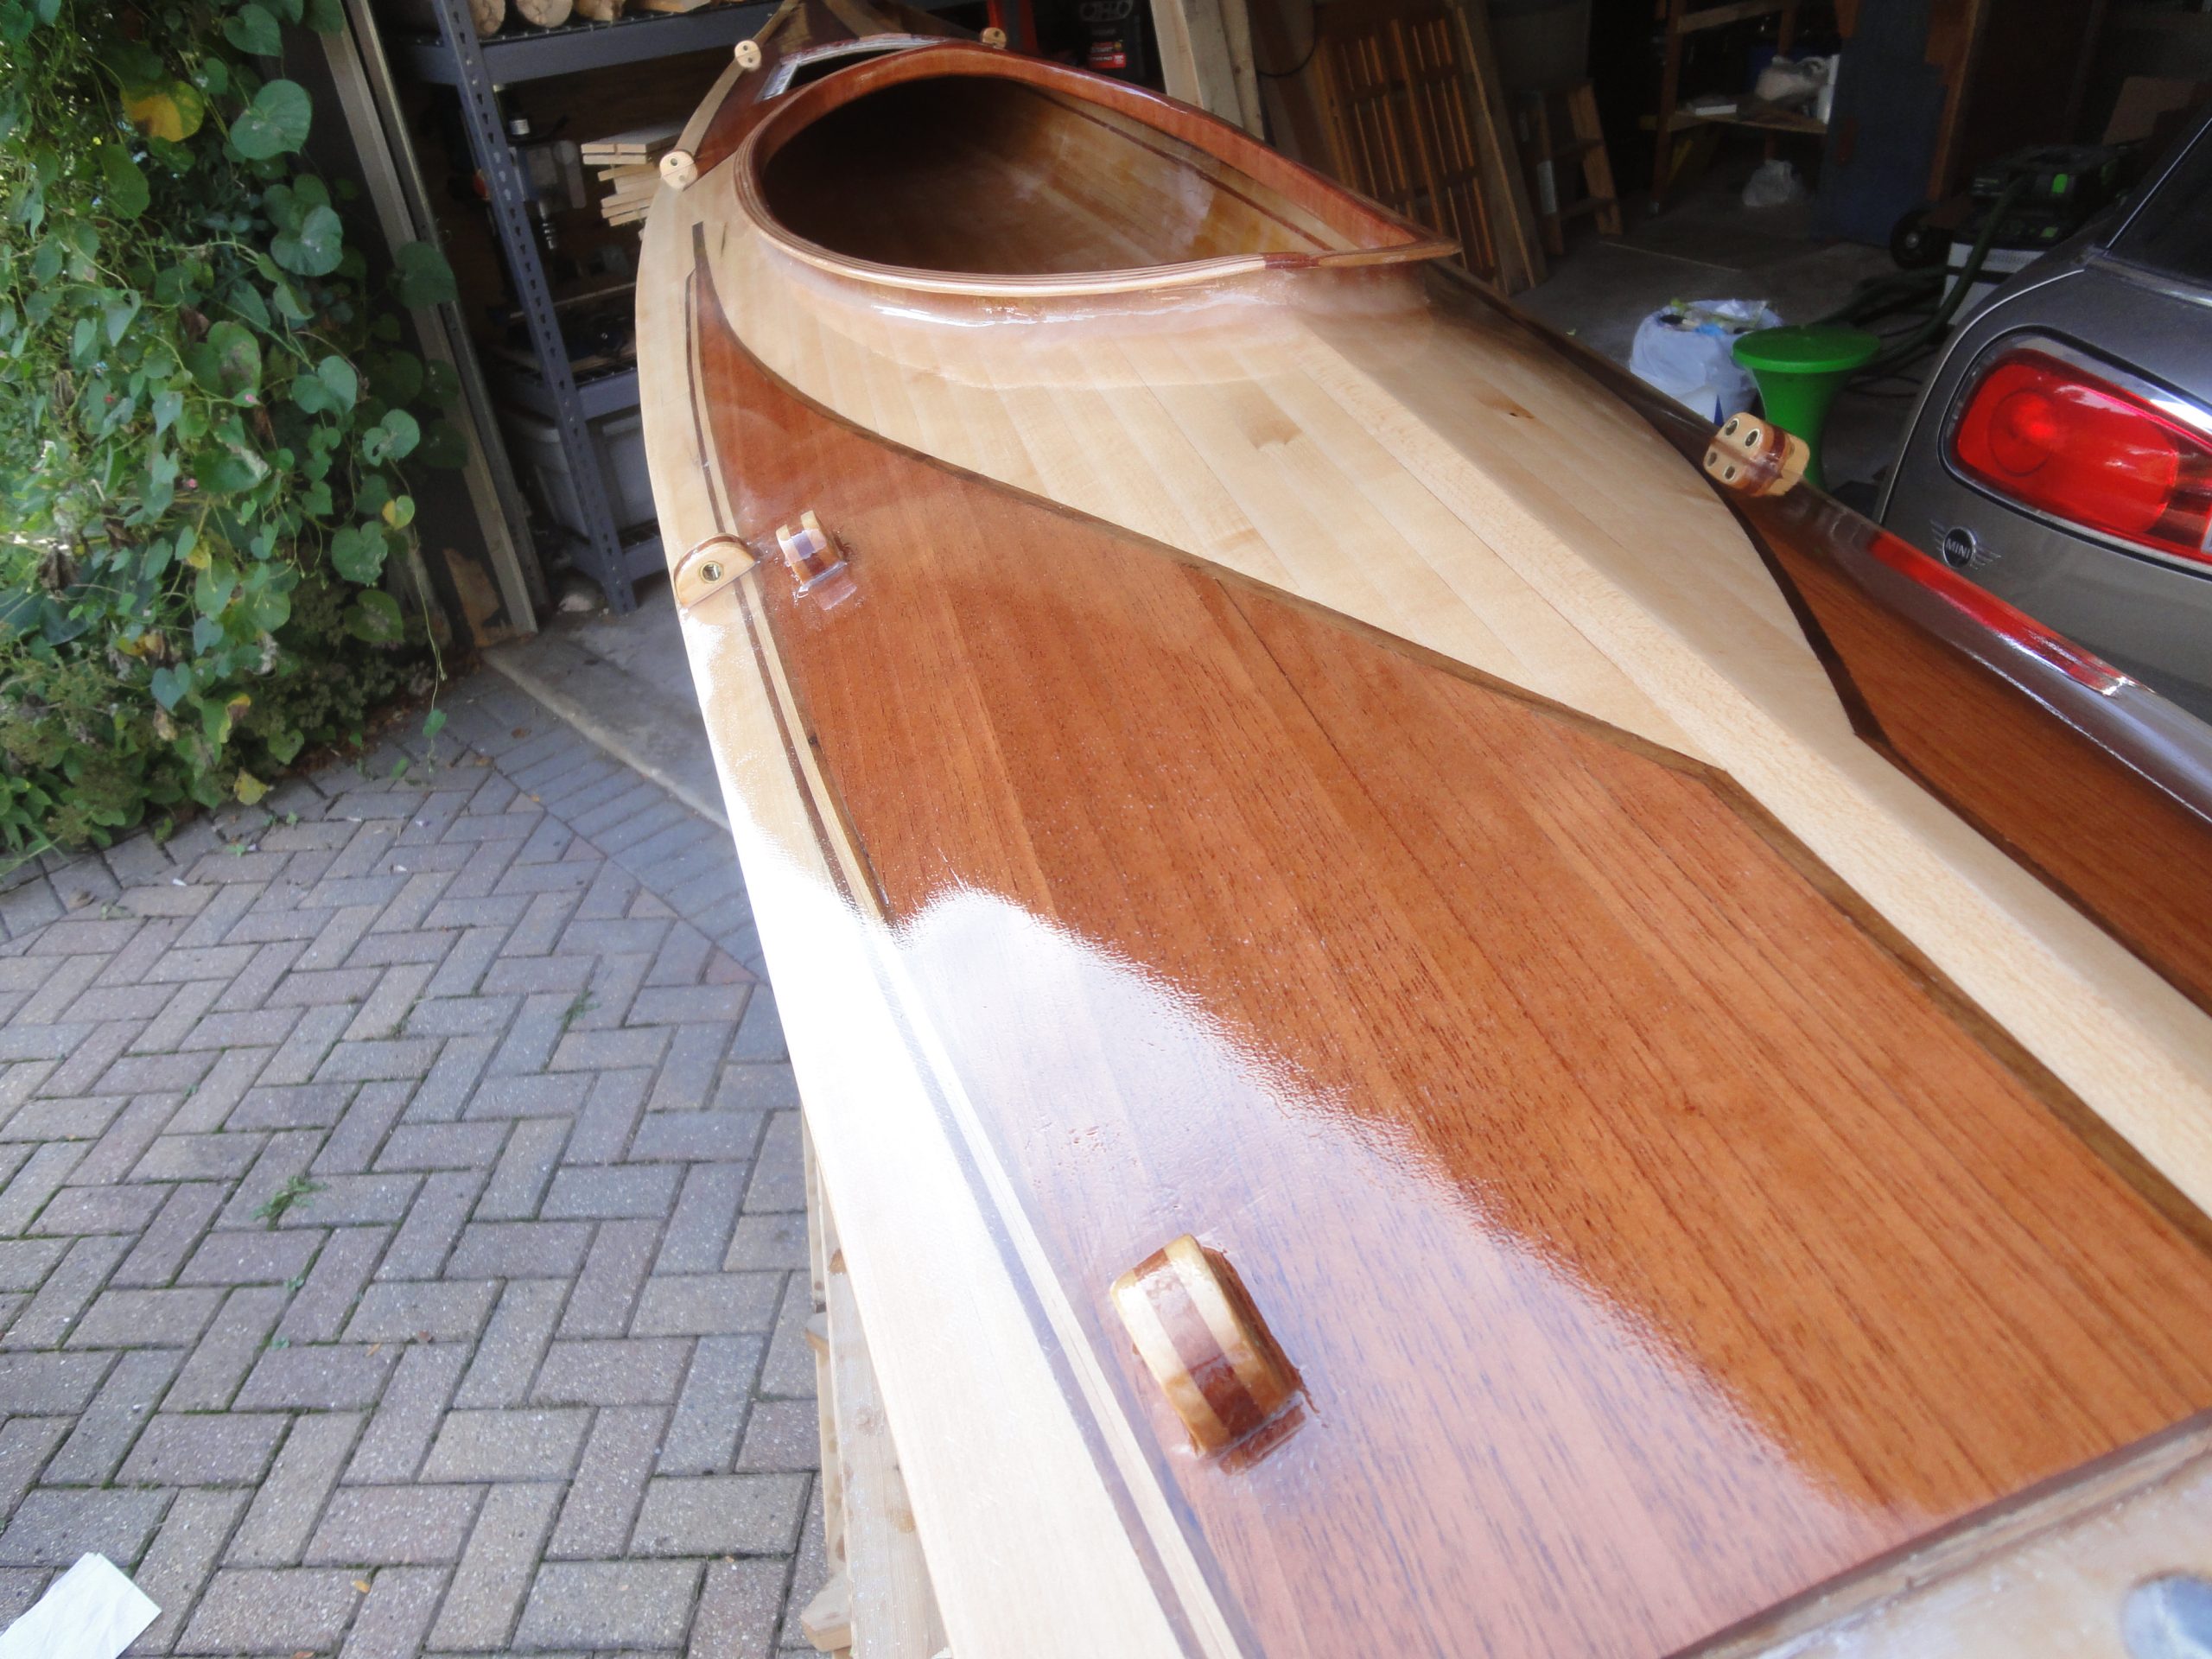
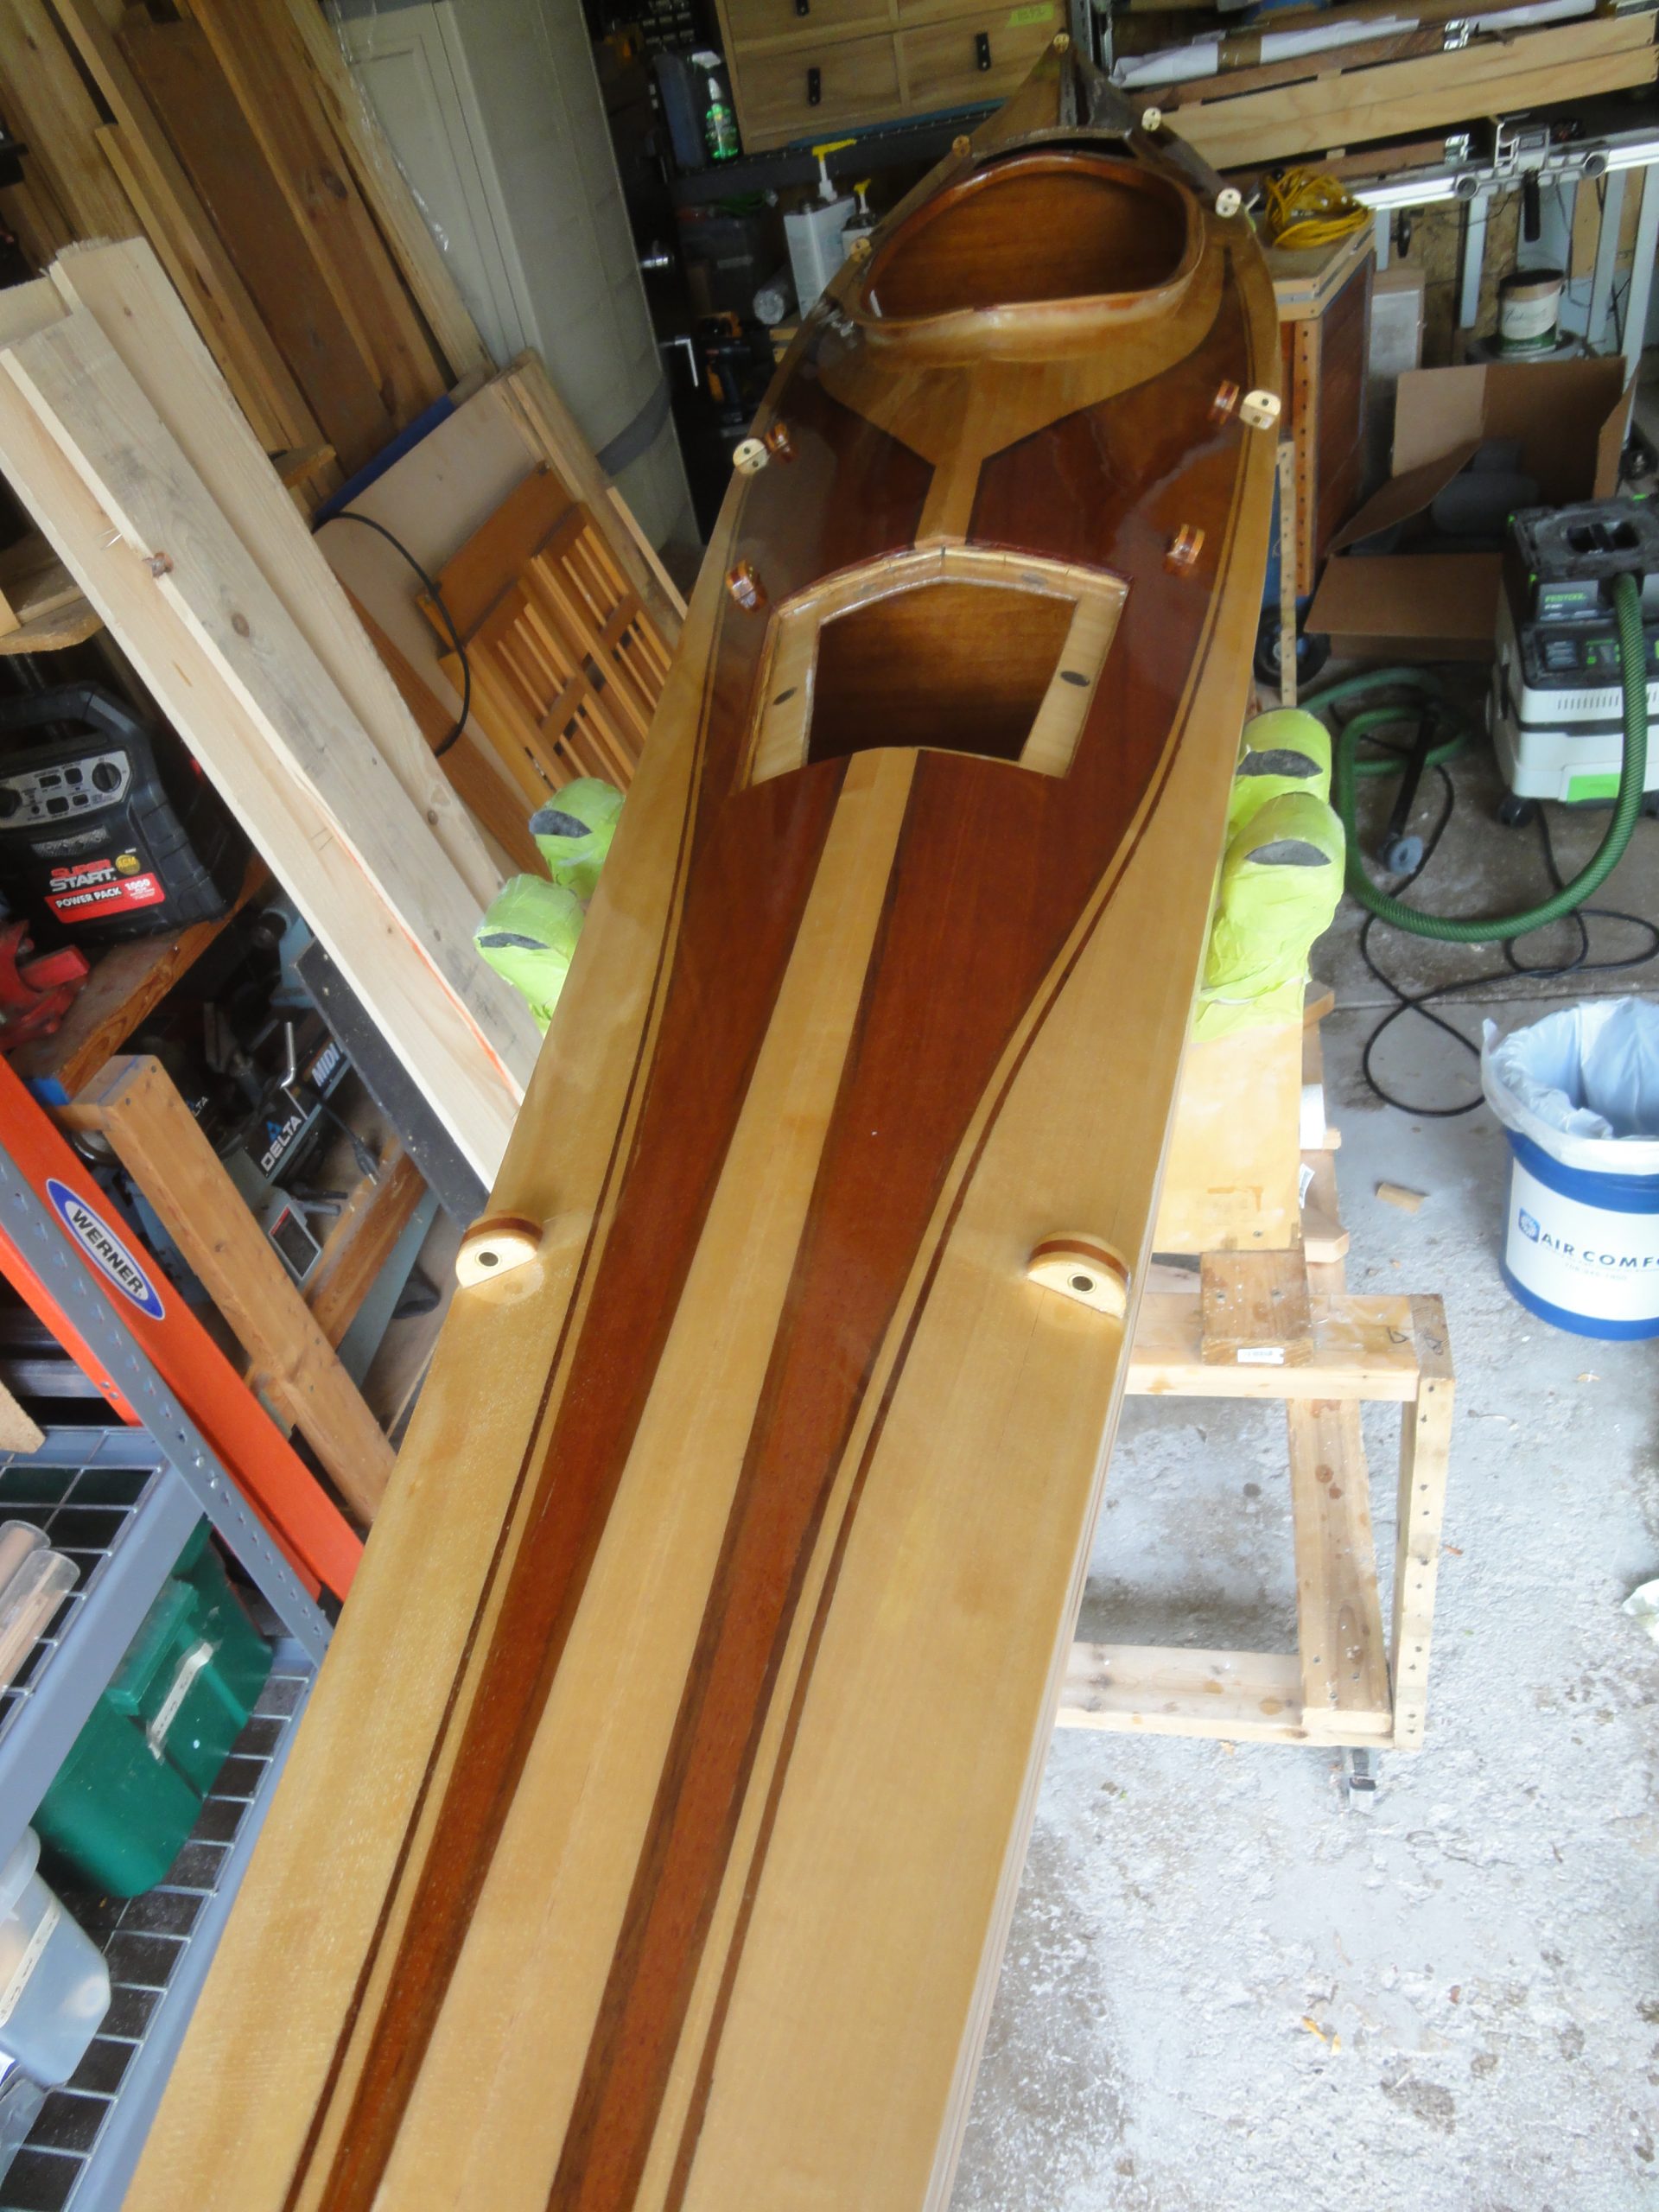
On Saturday, after a final wipe down I started to apply the varnish to the deck and the outside of the hatches. Using the same pattern as before, back and forth to apply it, up and down to evenly distribute it and then back and forth once more with a light touch to break the bubbles and blend it. Always finish by going from dry to wet with the final strokes. I’d do a foot or two section on one side, switch to the other side, do the same section, then the next and then switch back and repeat. This way I never left a wet edge for more than a minute or two before blending into it.

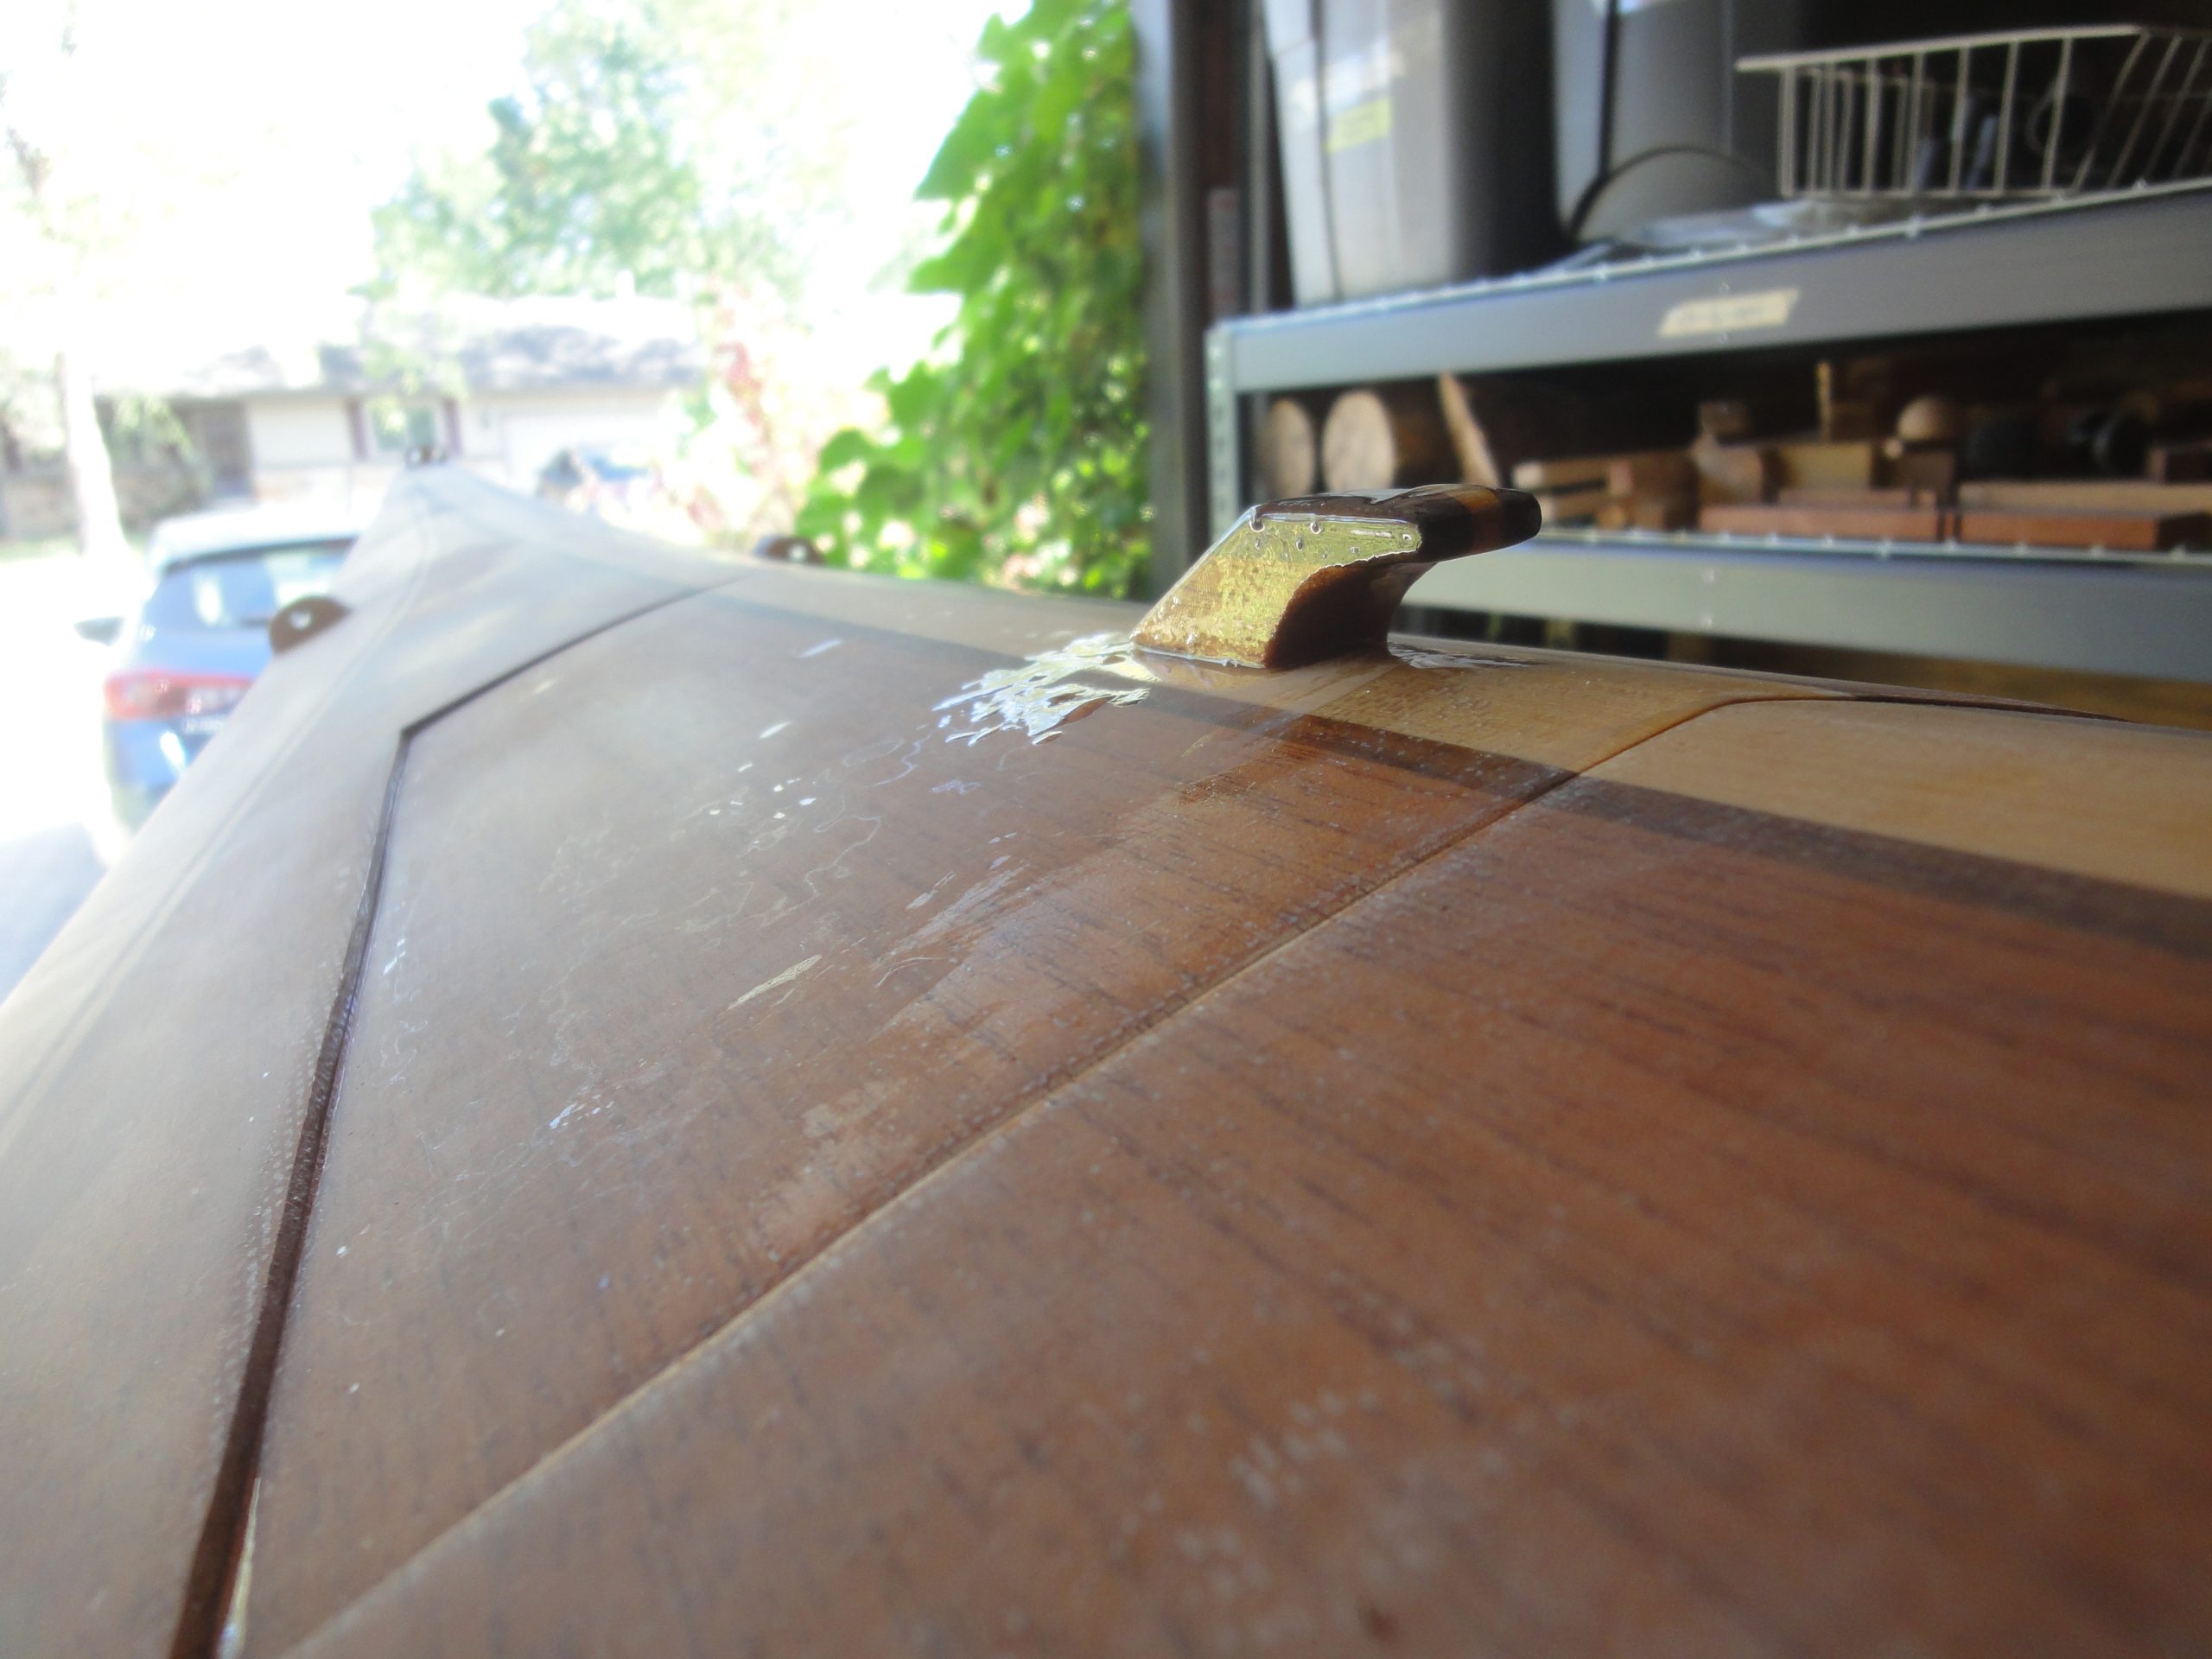
Even though it’s just the first coat the color pop was simply amazing to me.

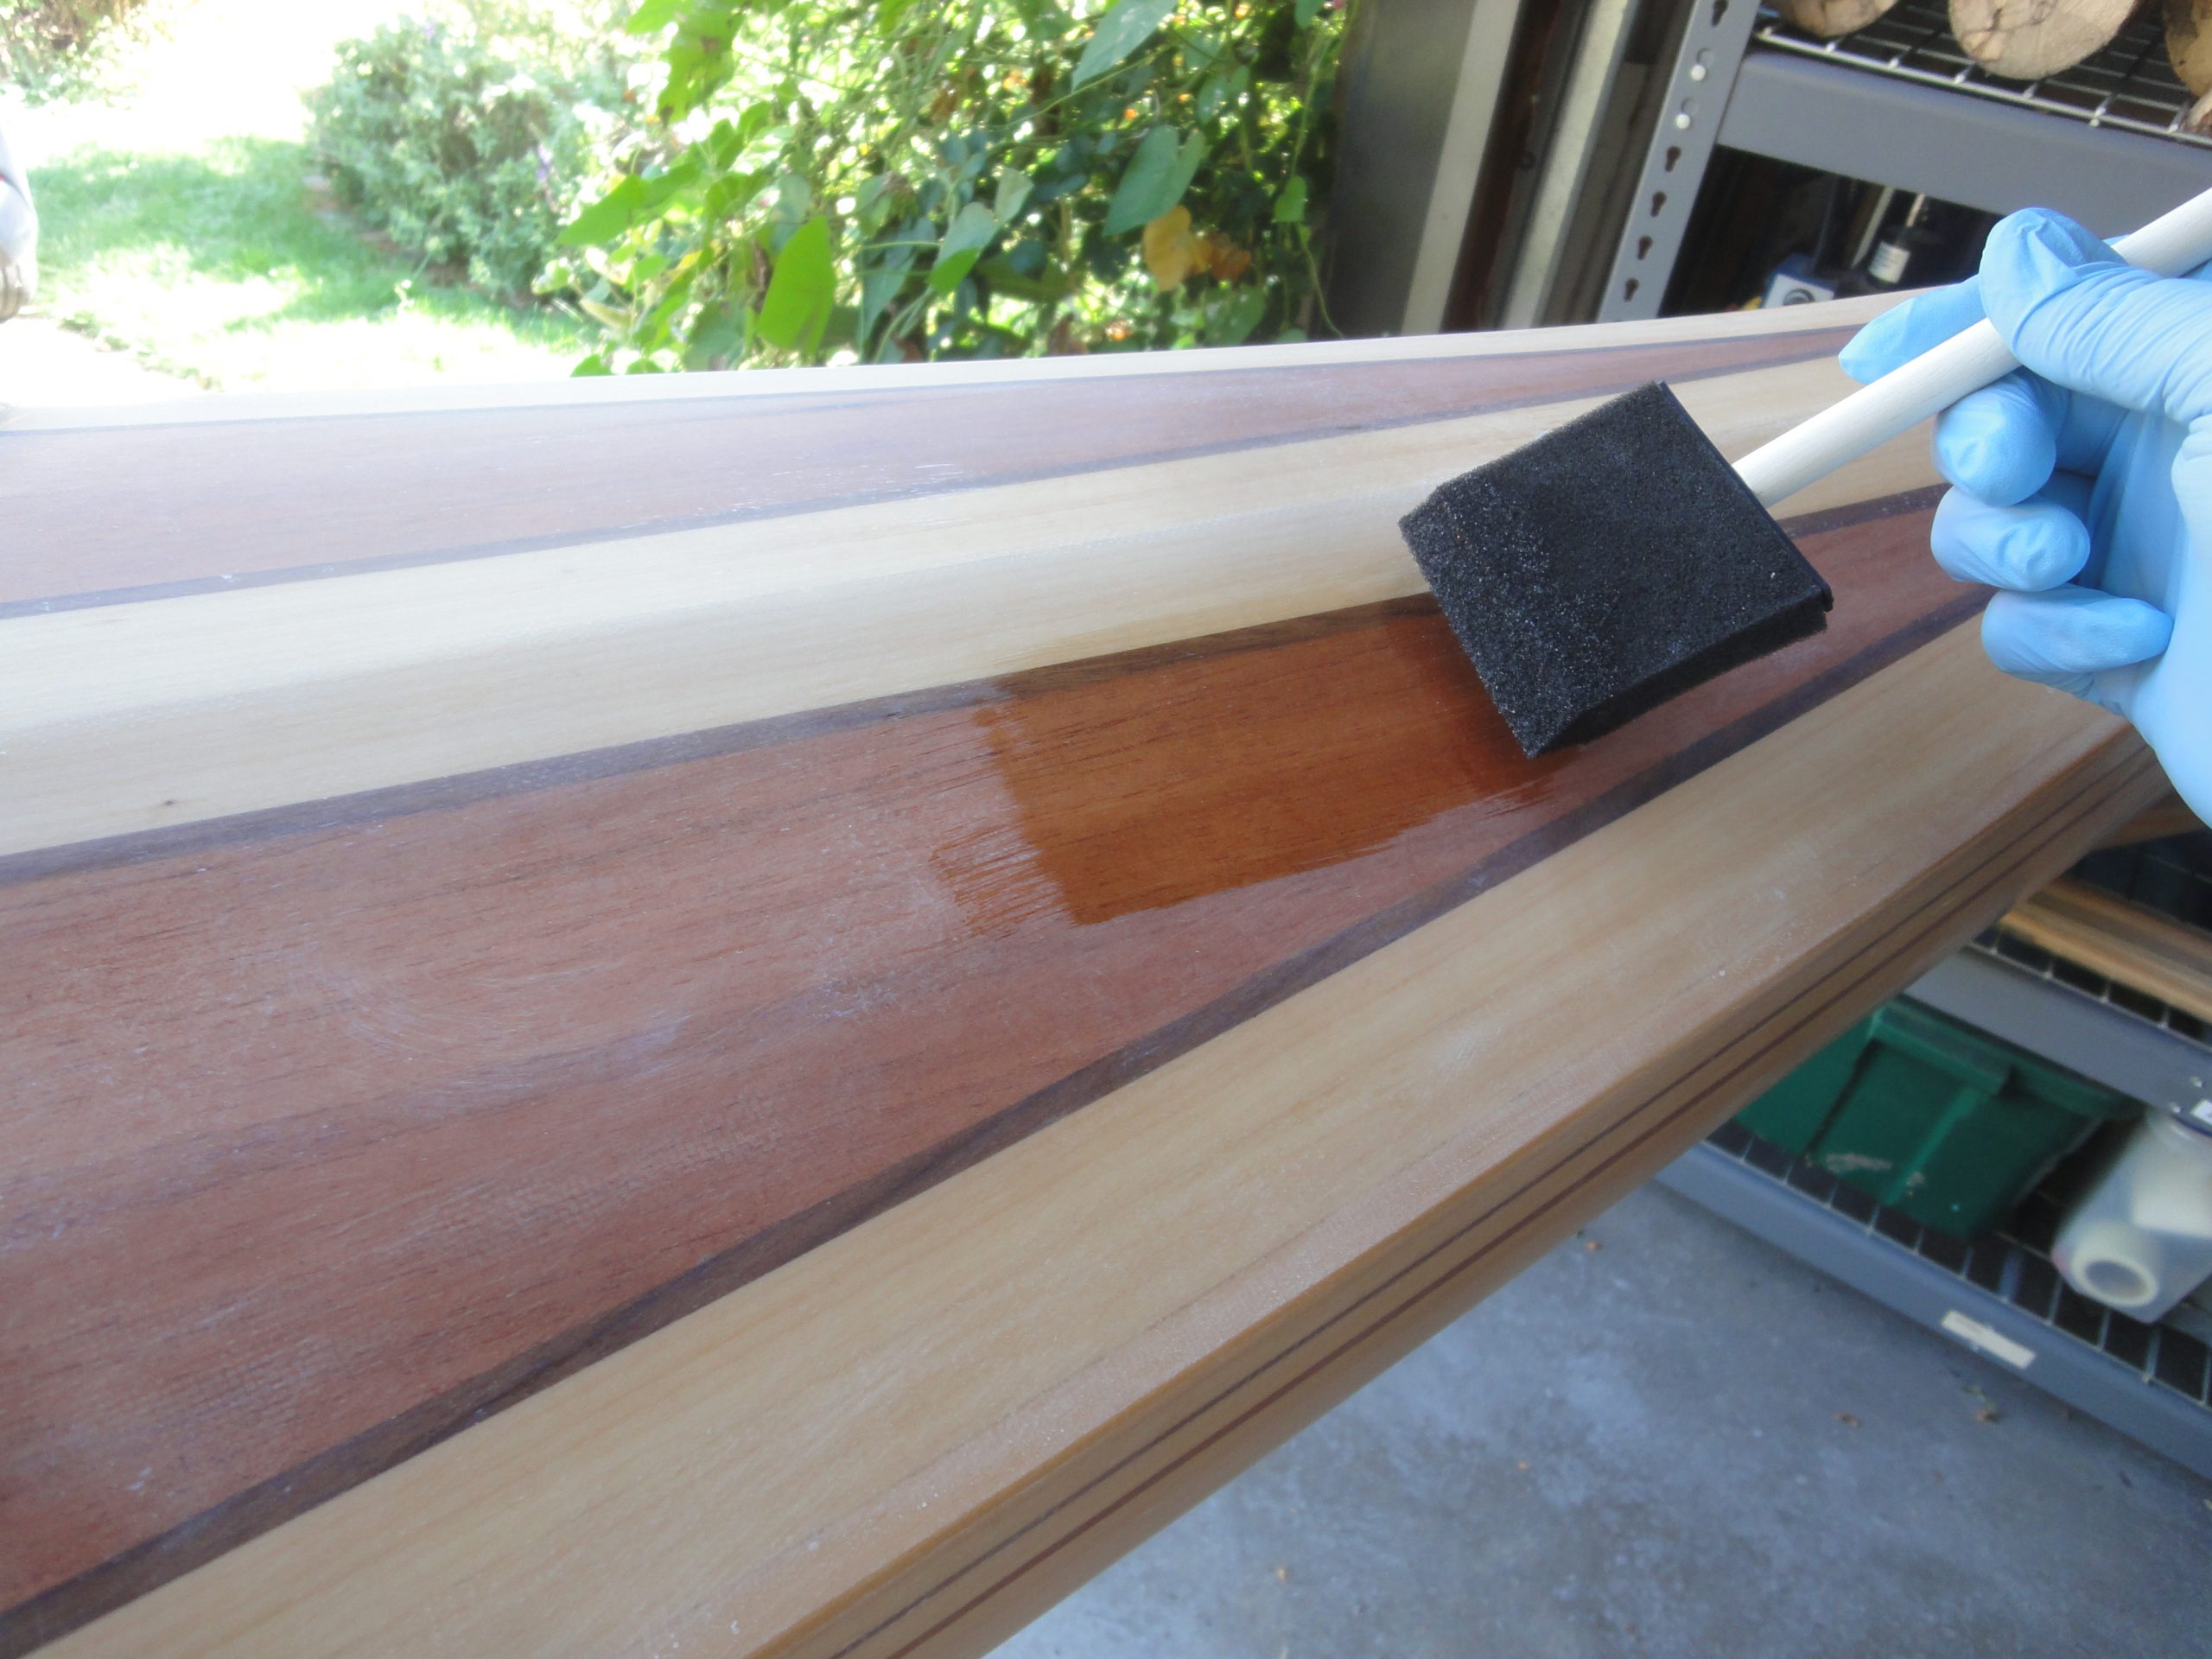
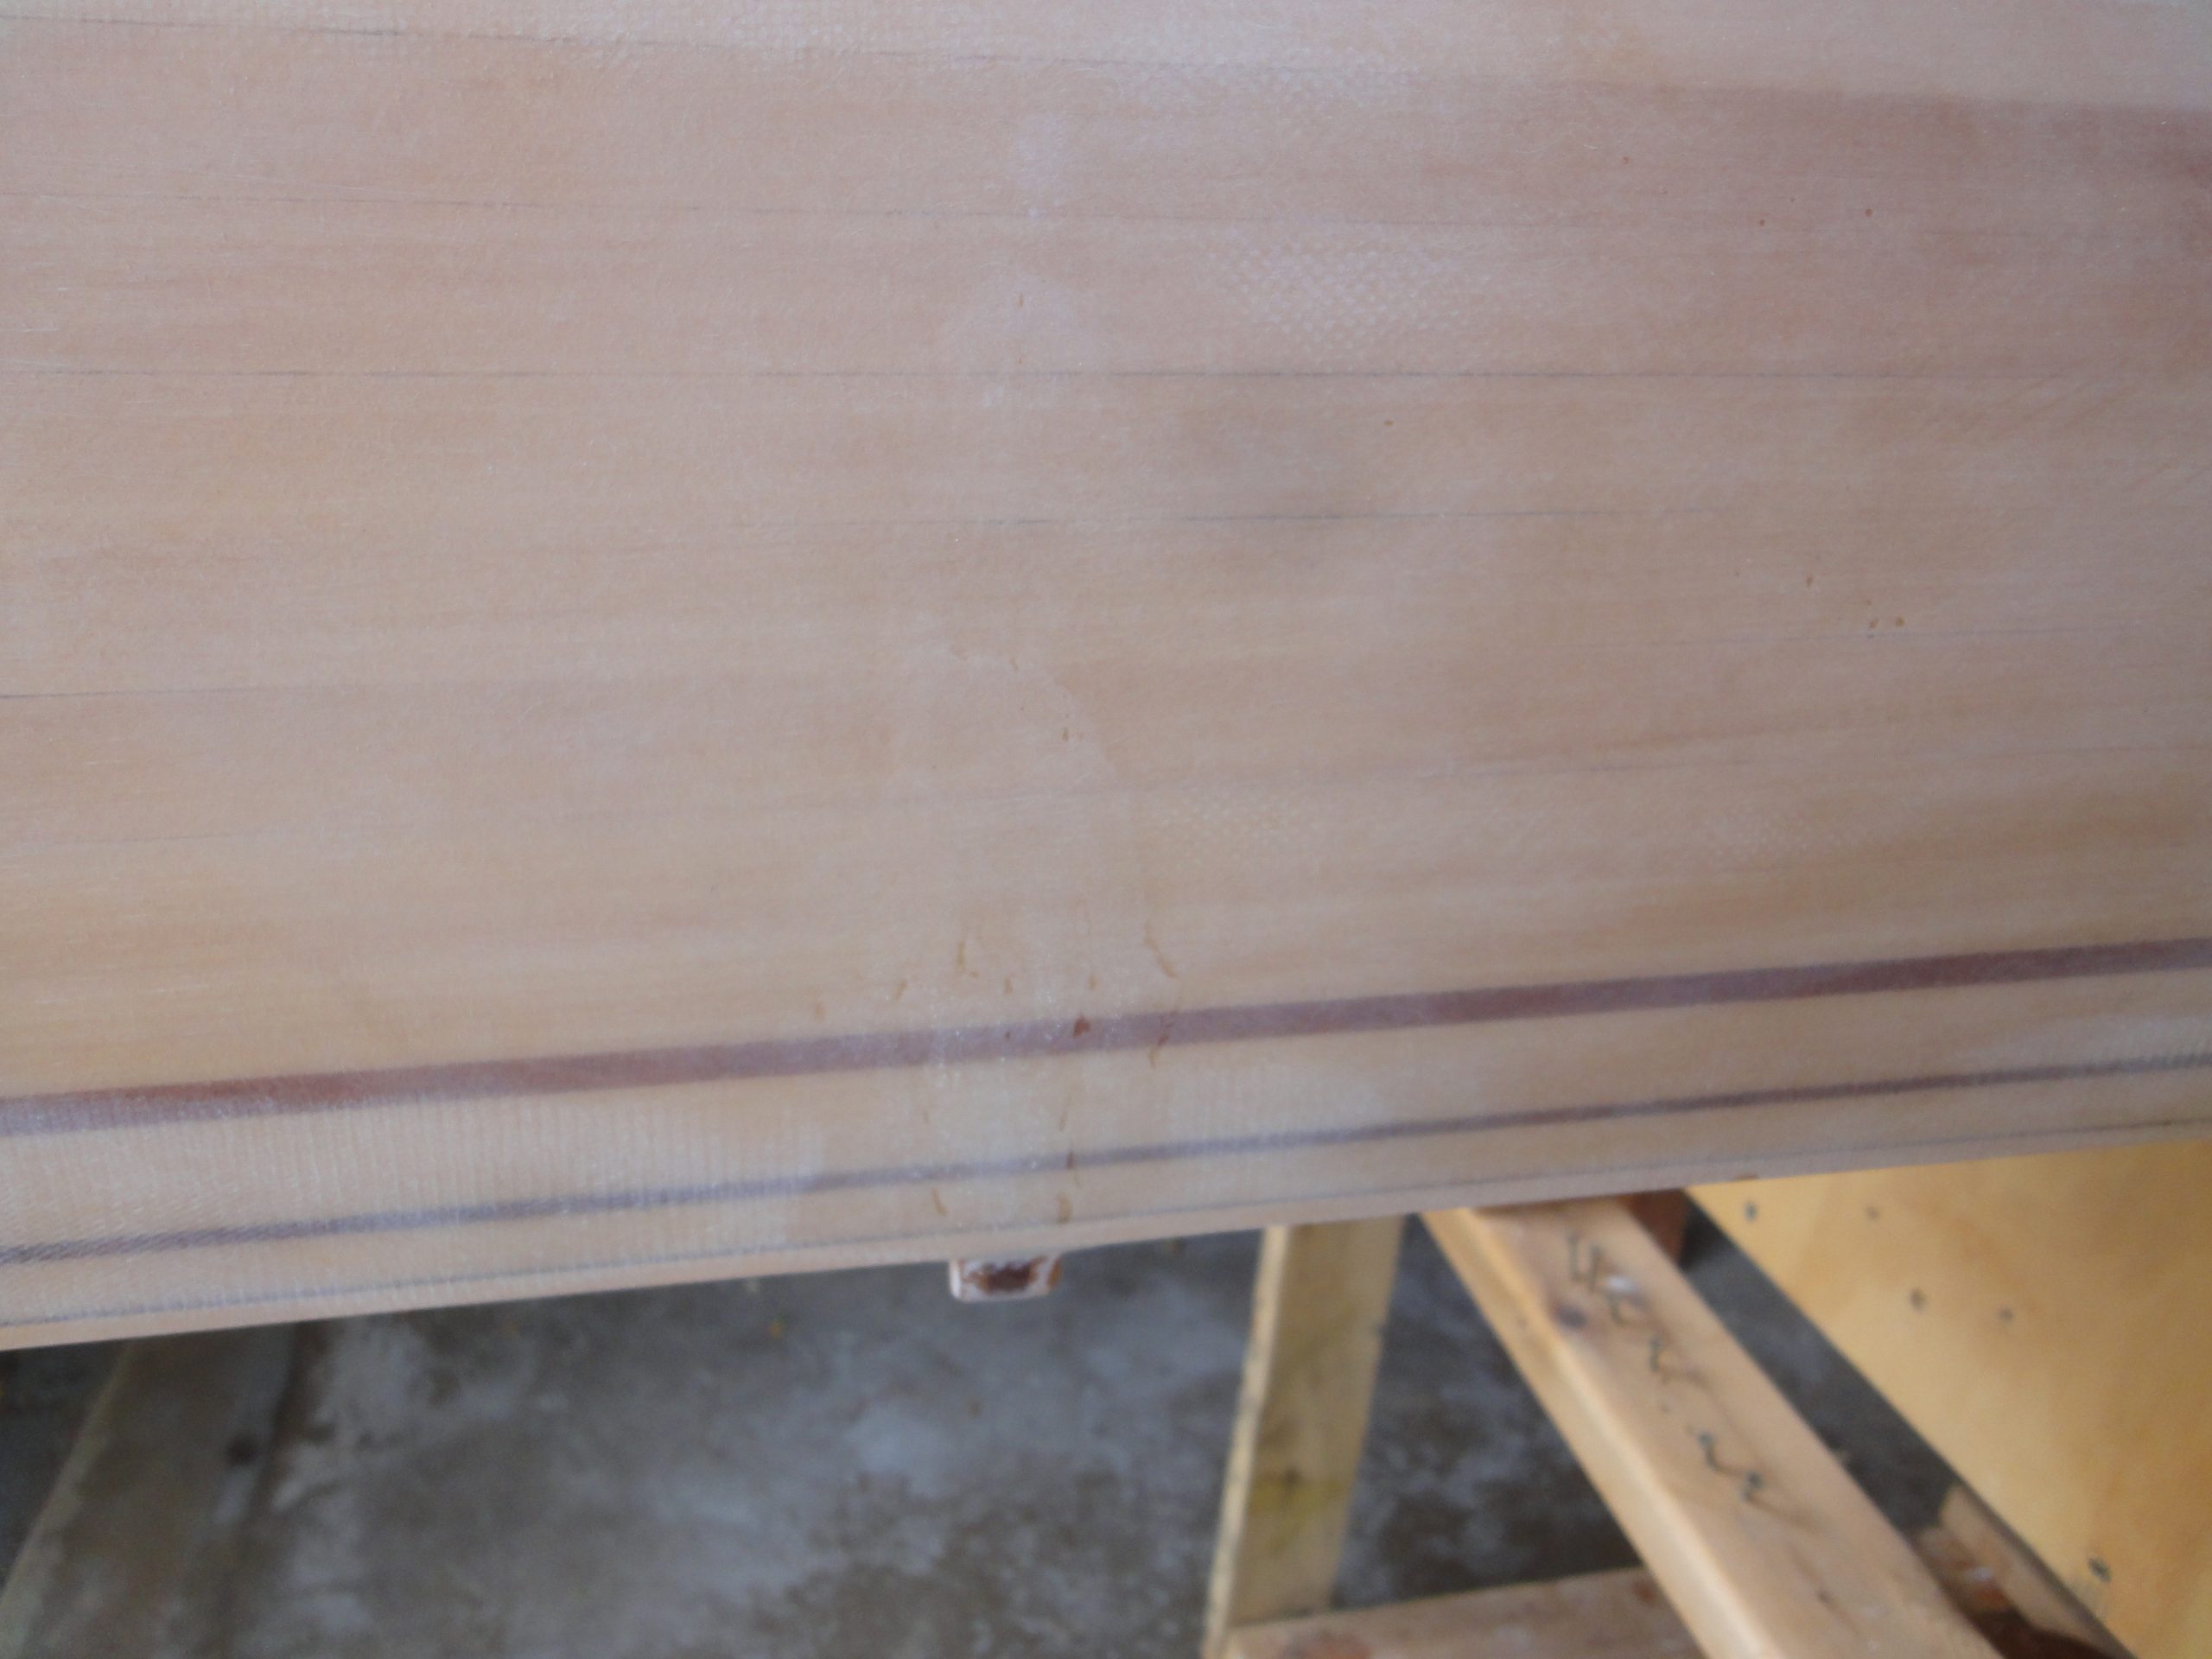
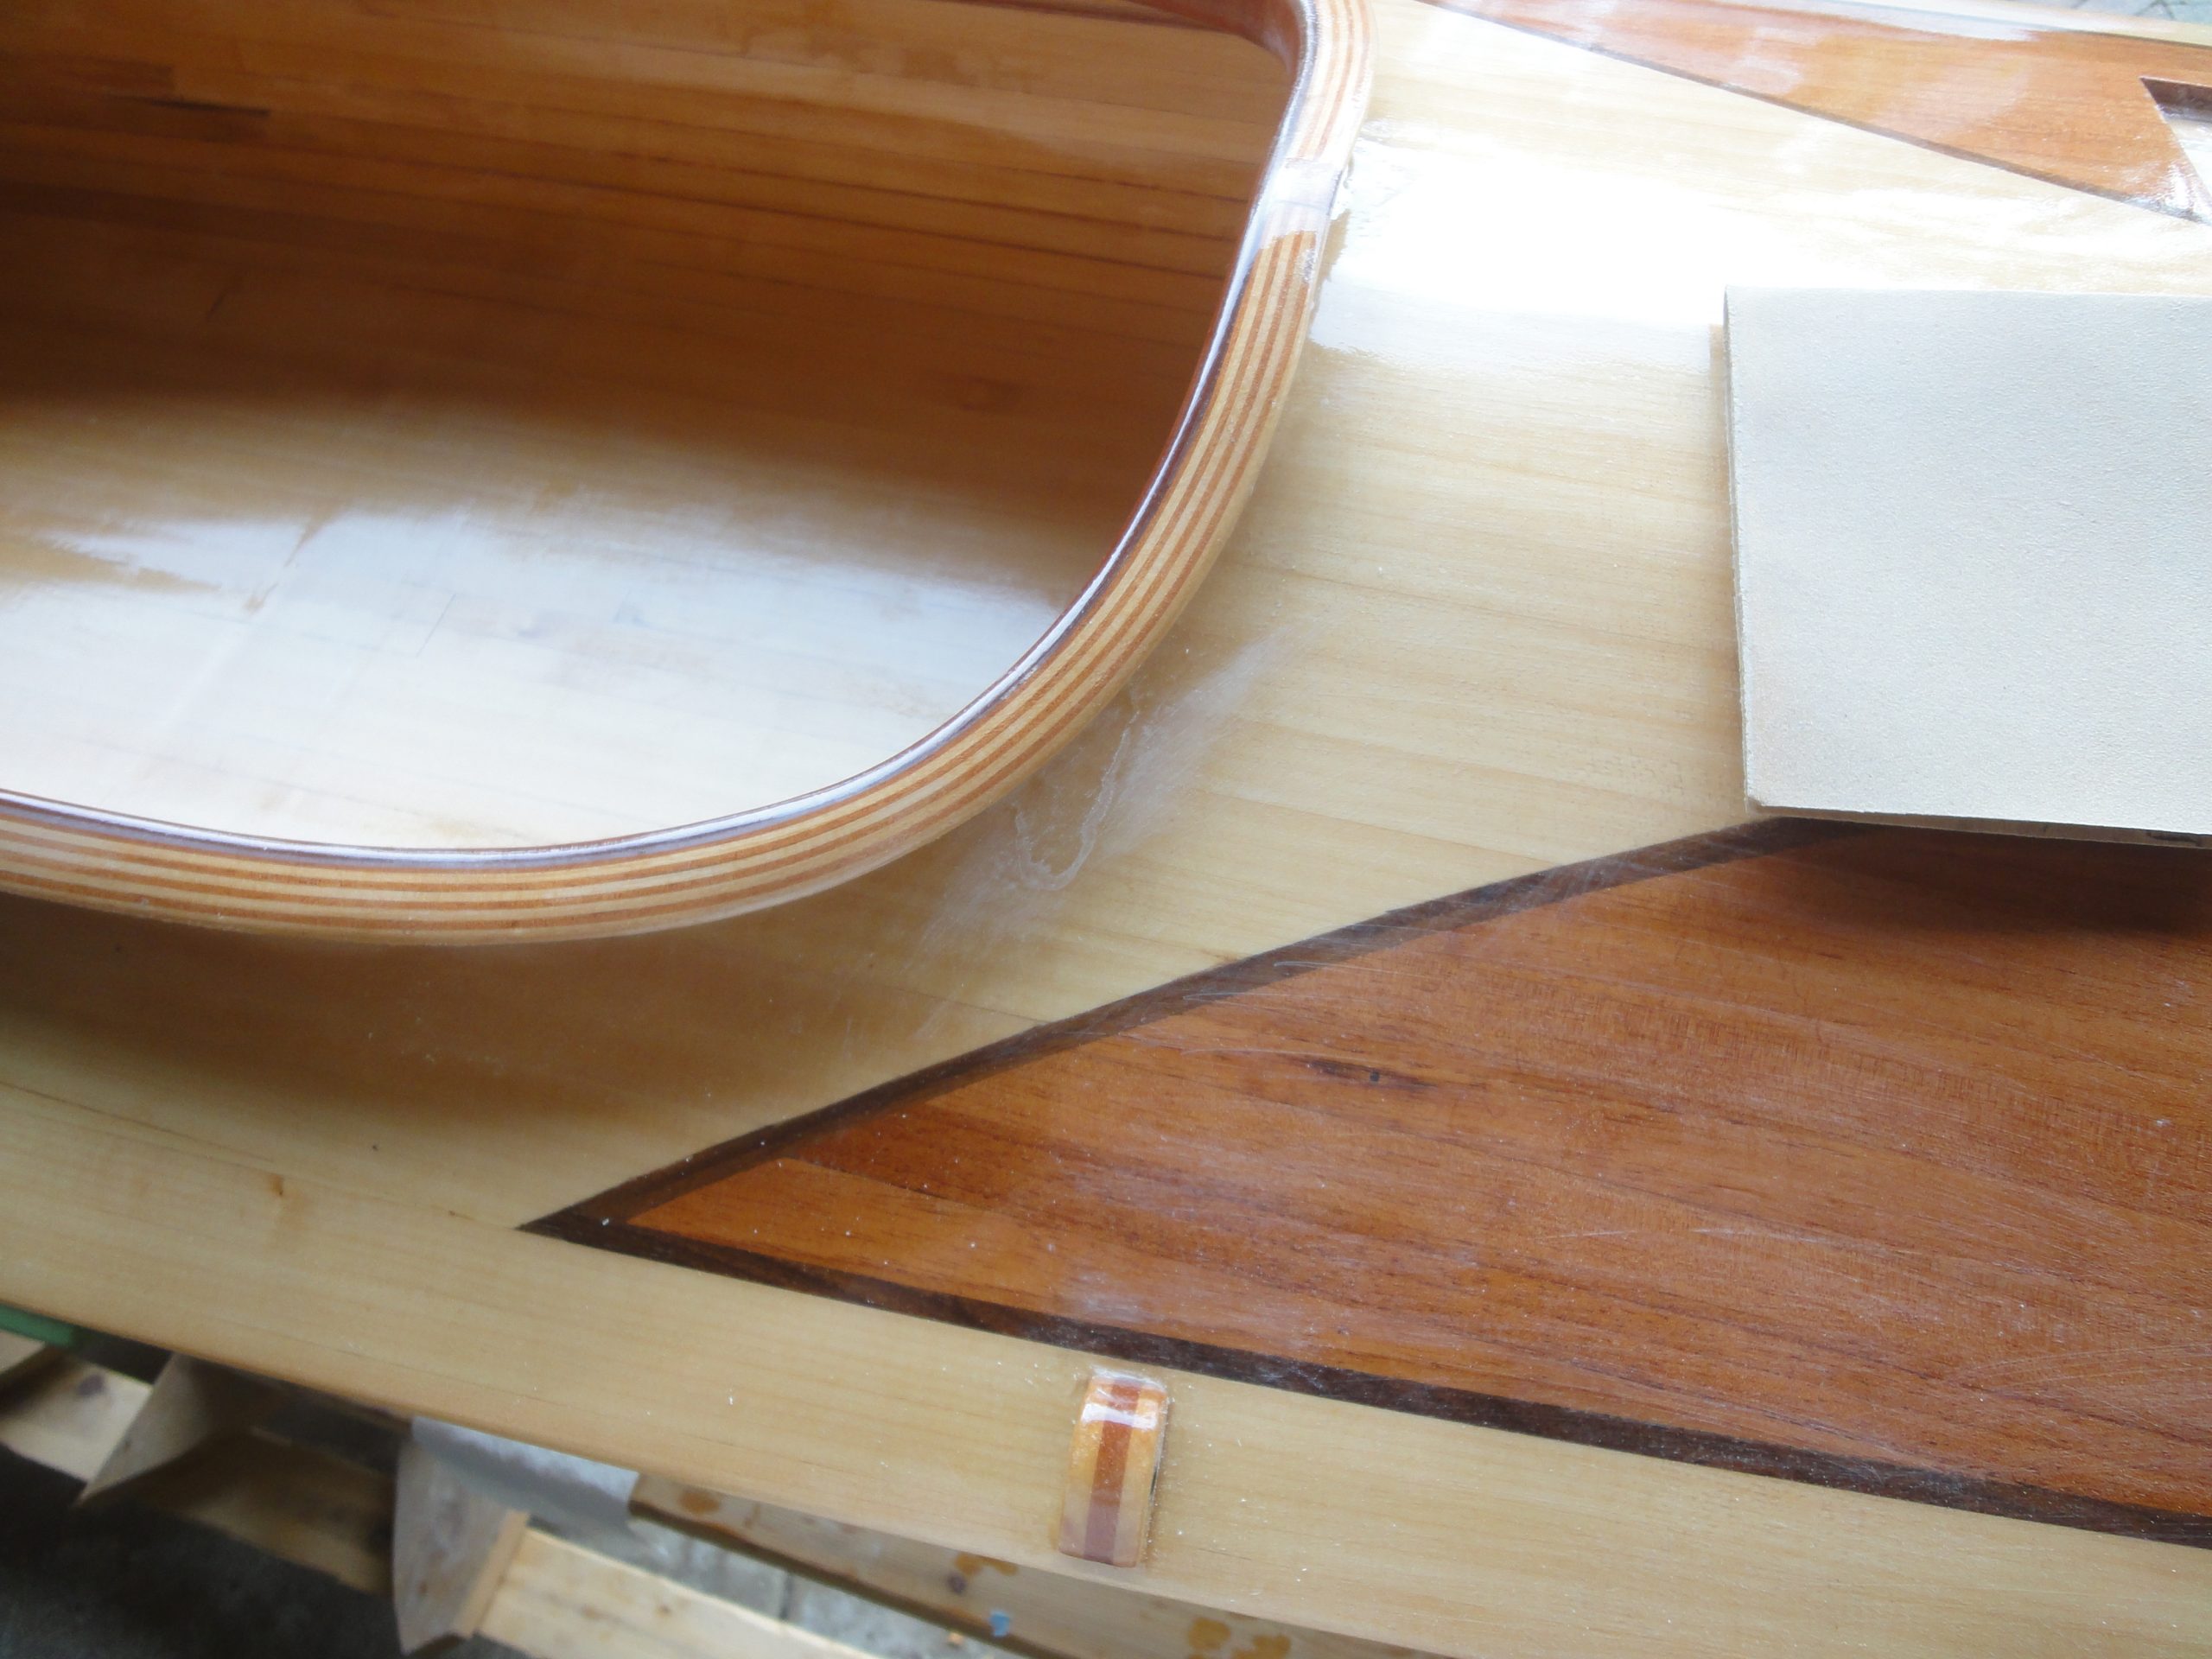
The varnish was left to dry overnight. Sunday I got back to work with an initial sanding. You can see some sags and other irregularities in the first coat. This is normal. Some 250 grit (yeah, that’s an odd number but I had an old pack laying around) sand paper scuffed the surface nicely and took care of any blemishes.

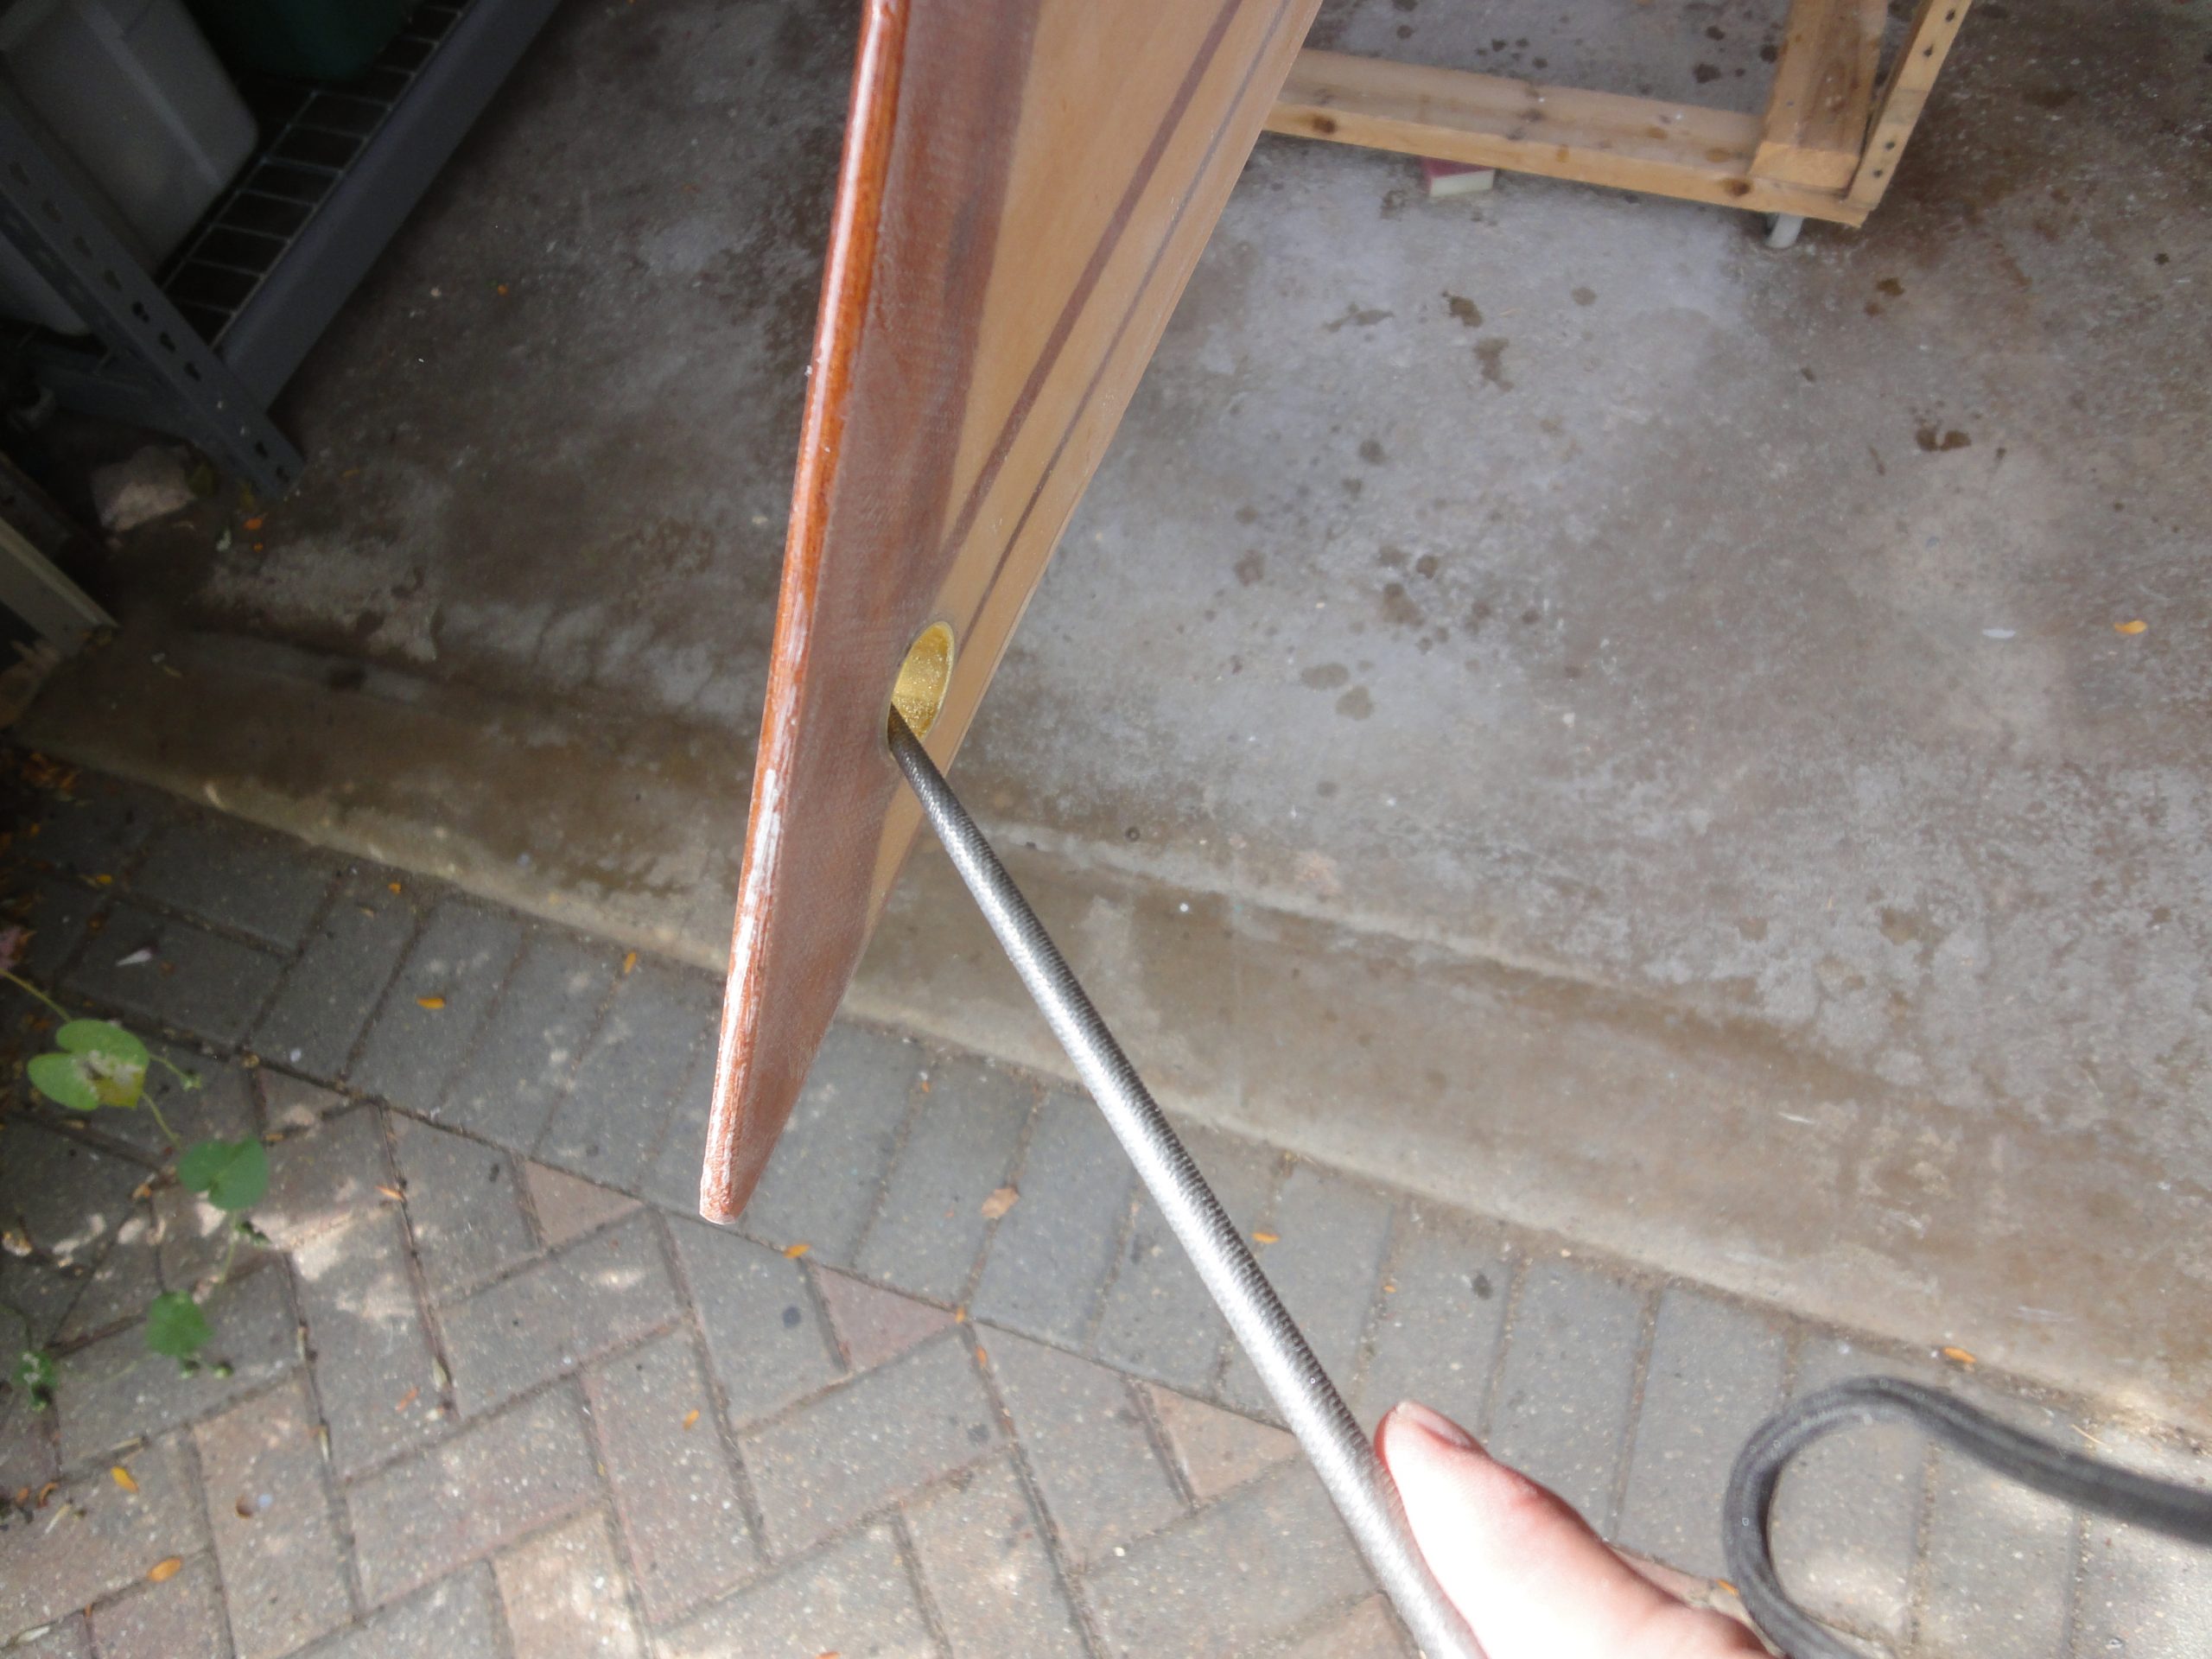
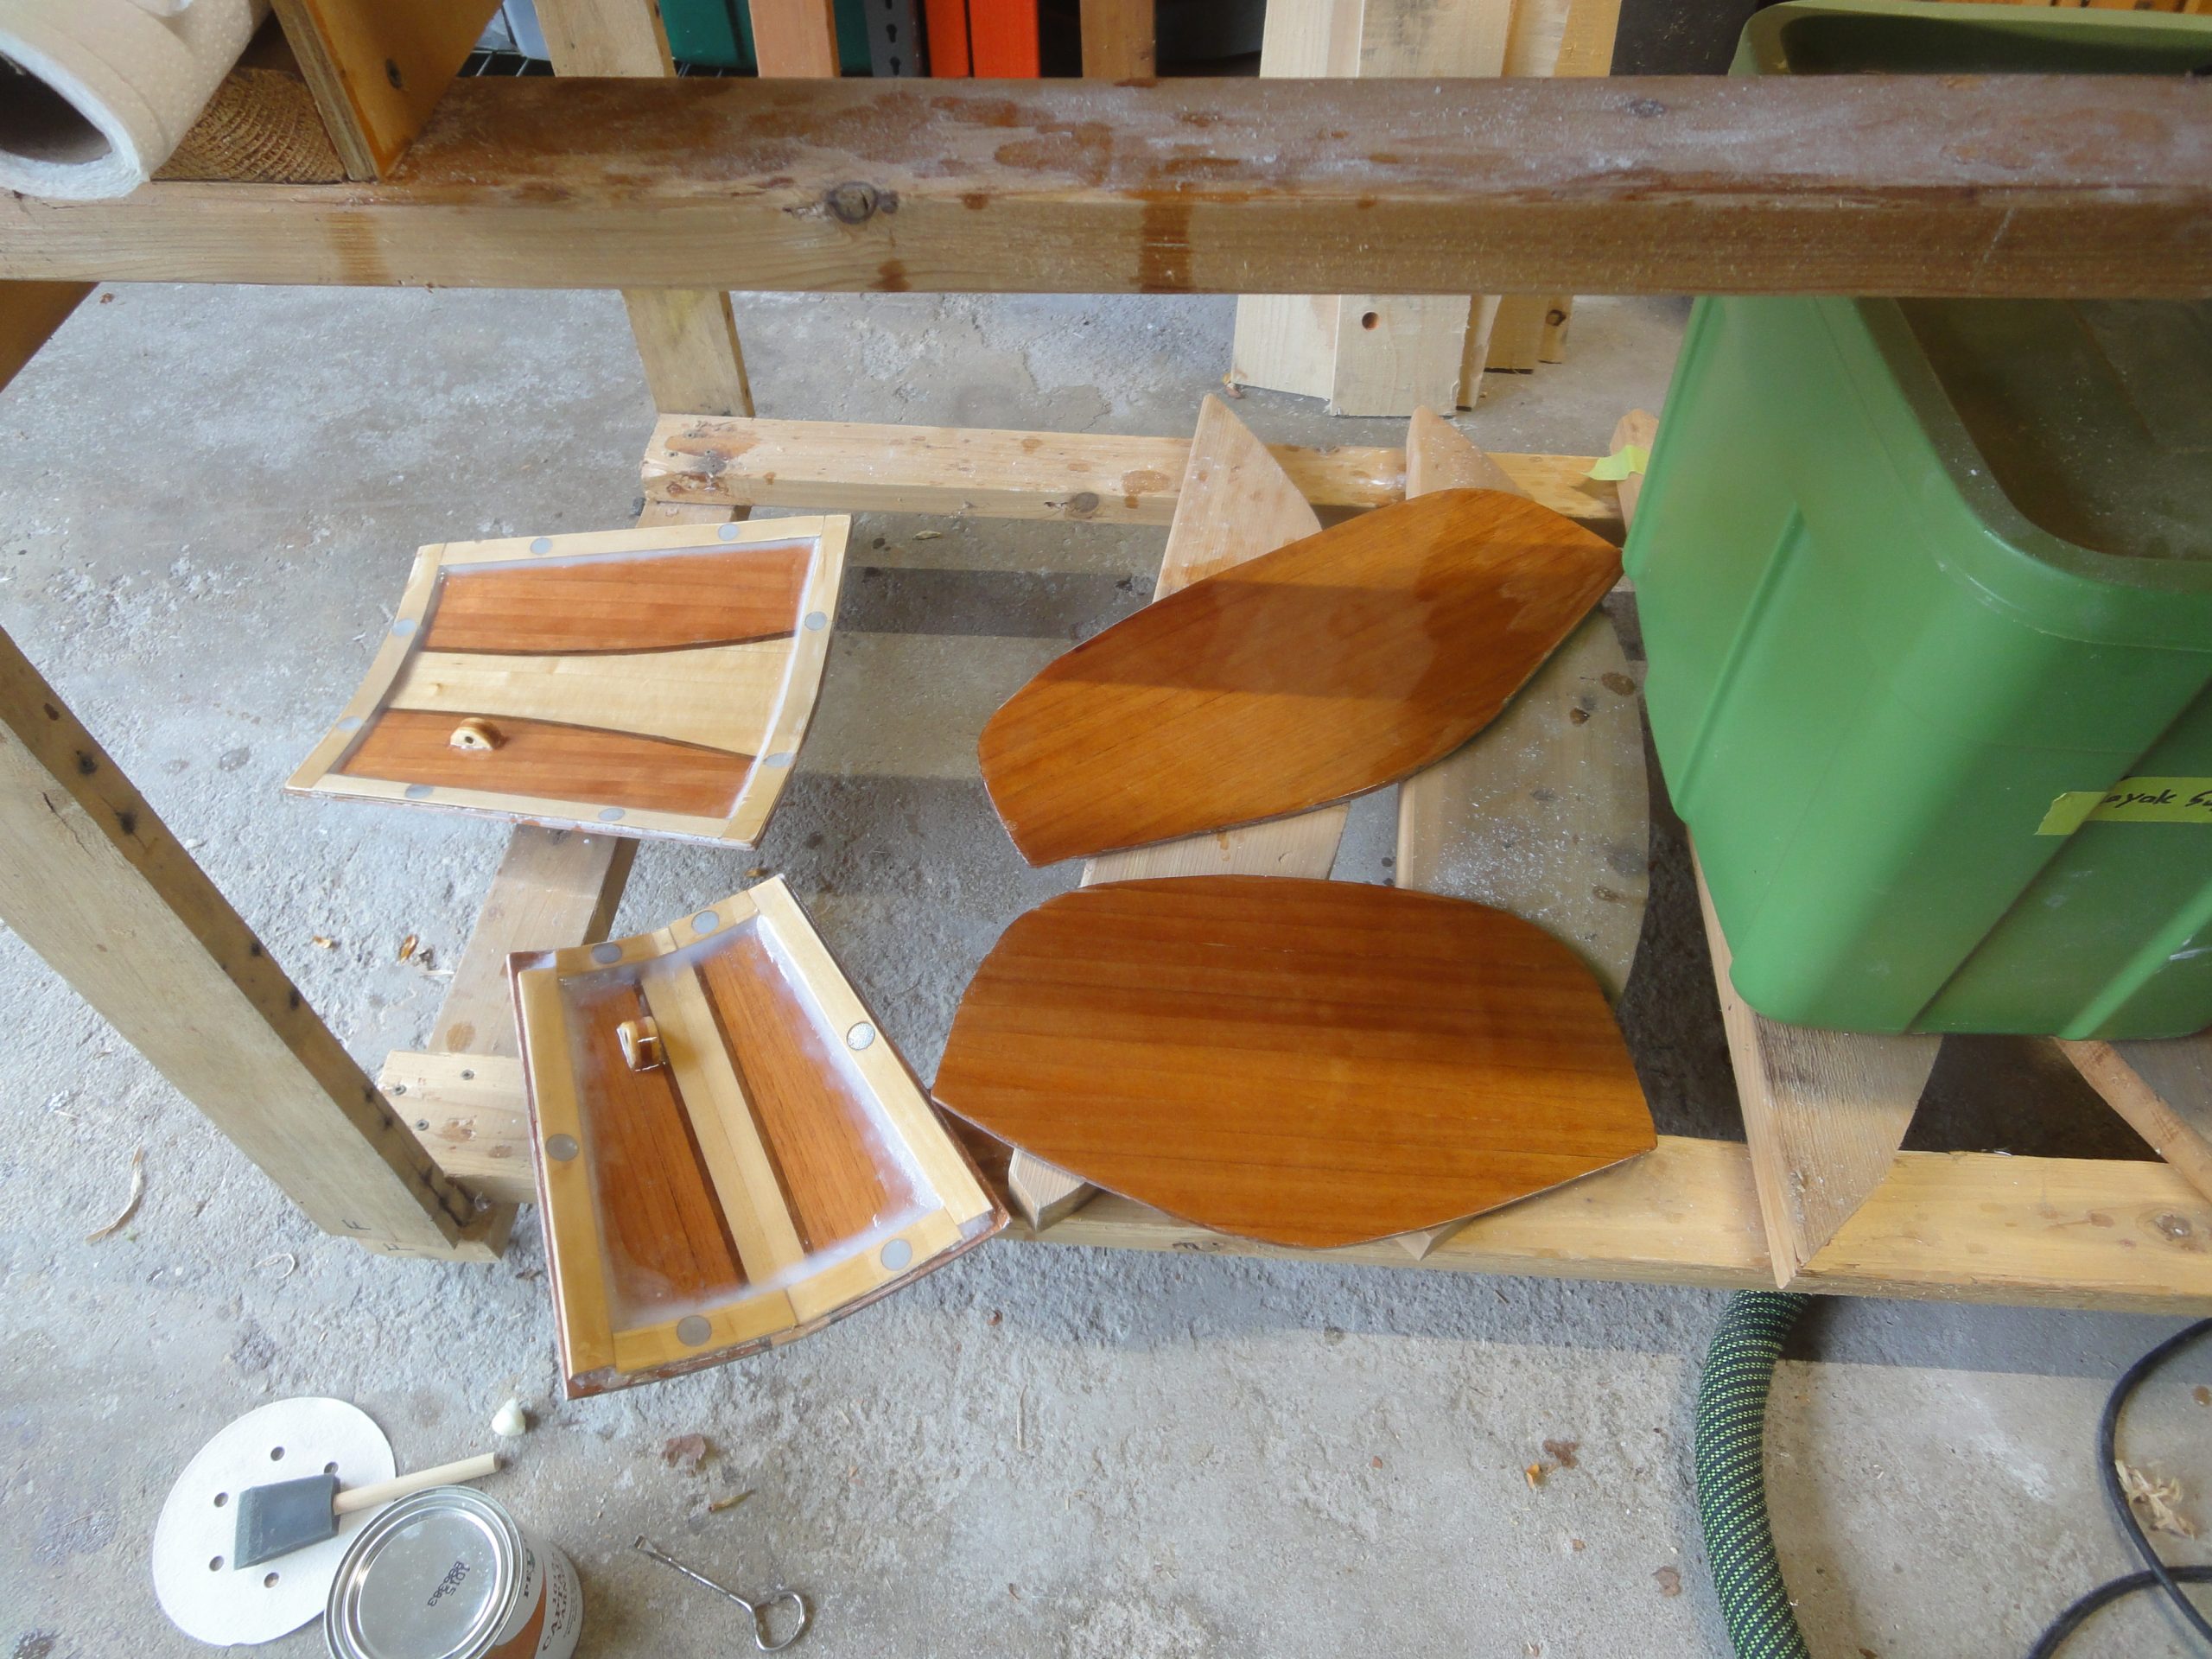
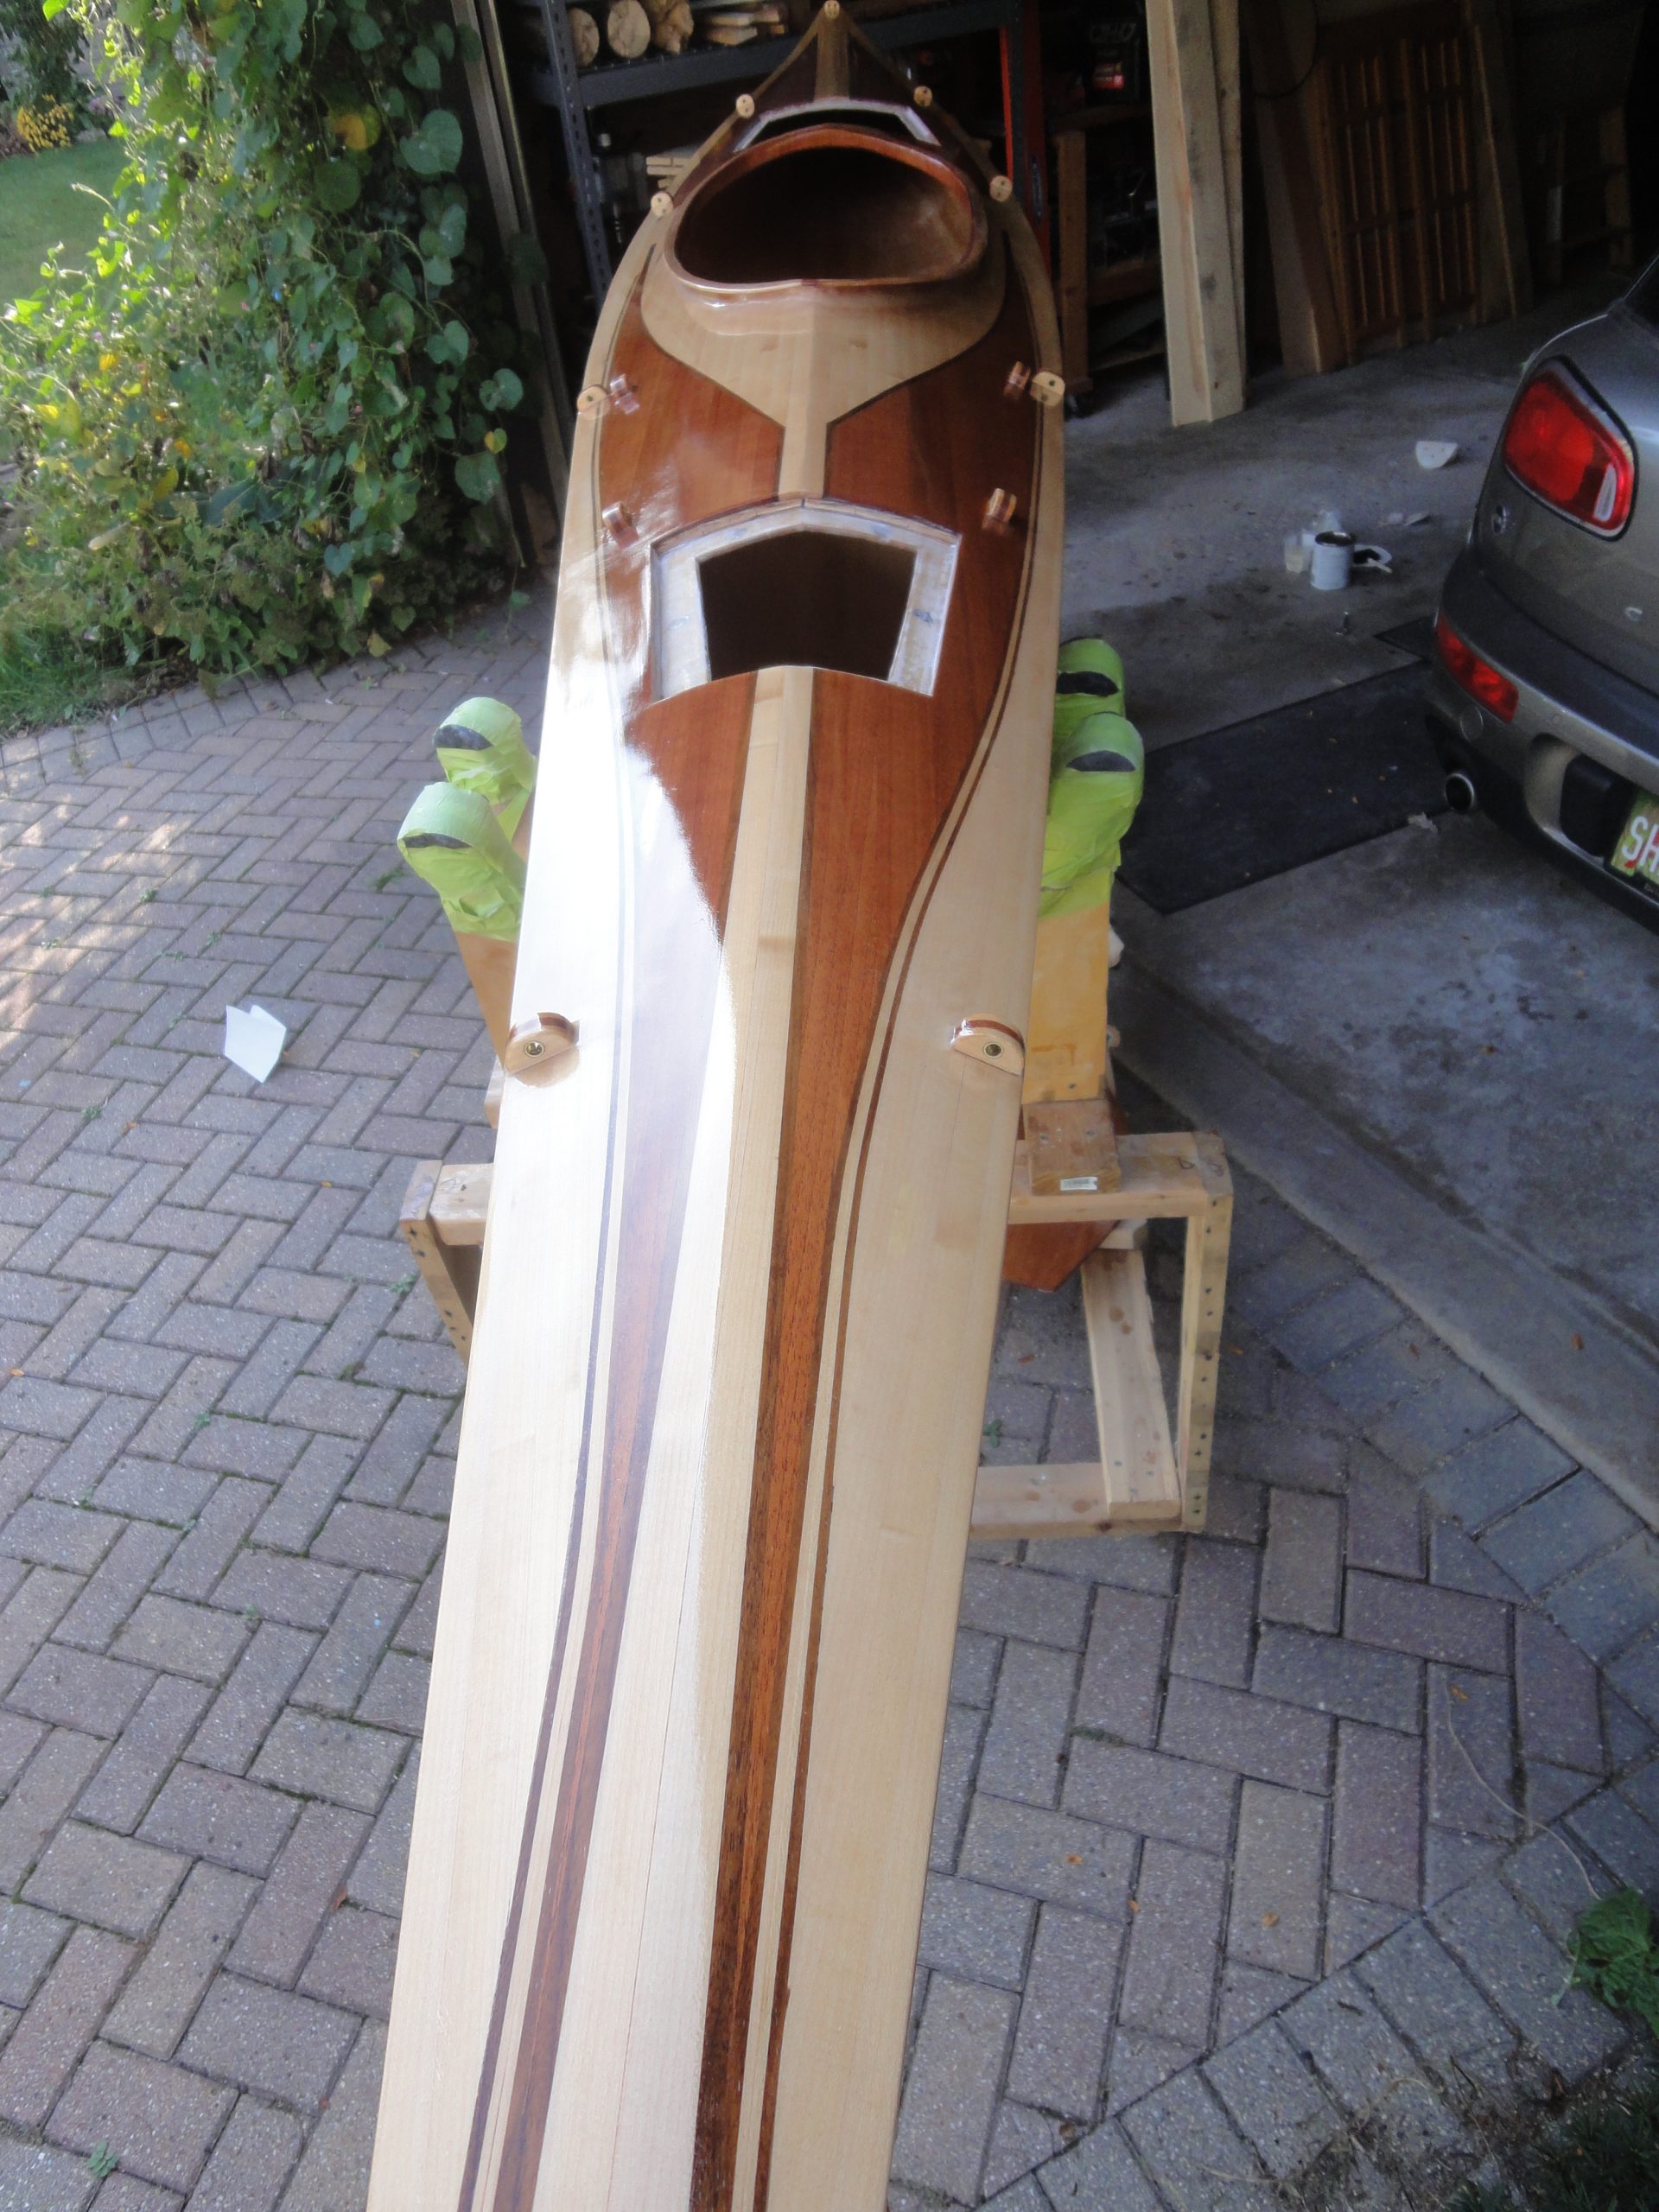
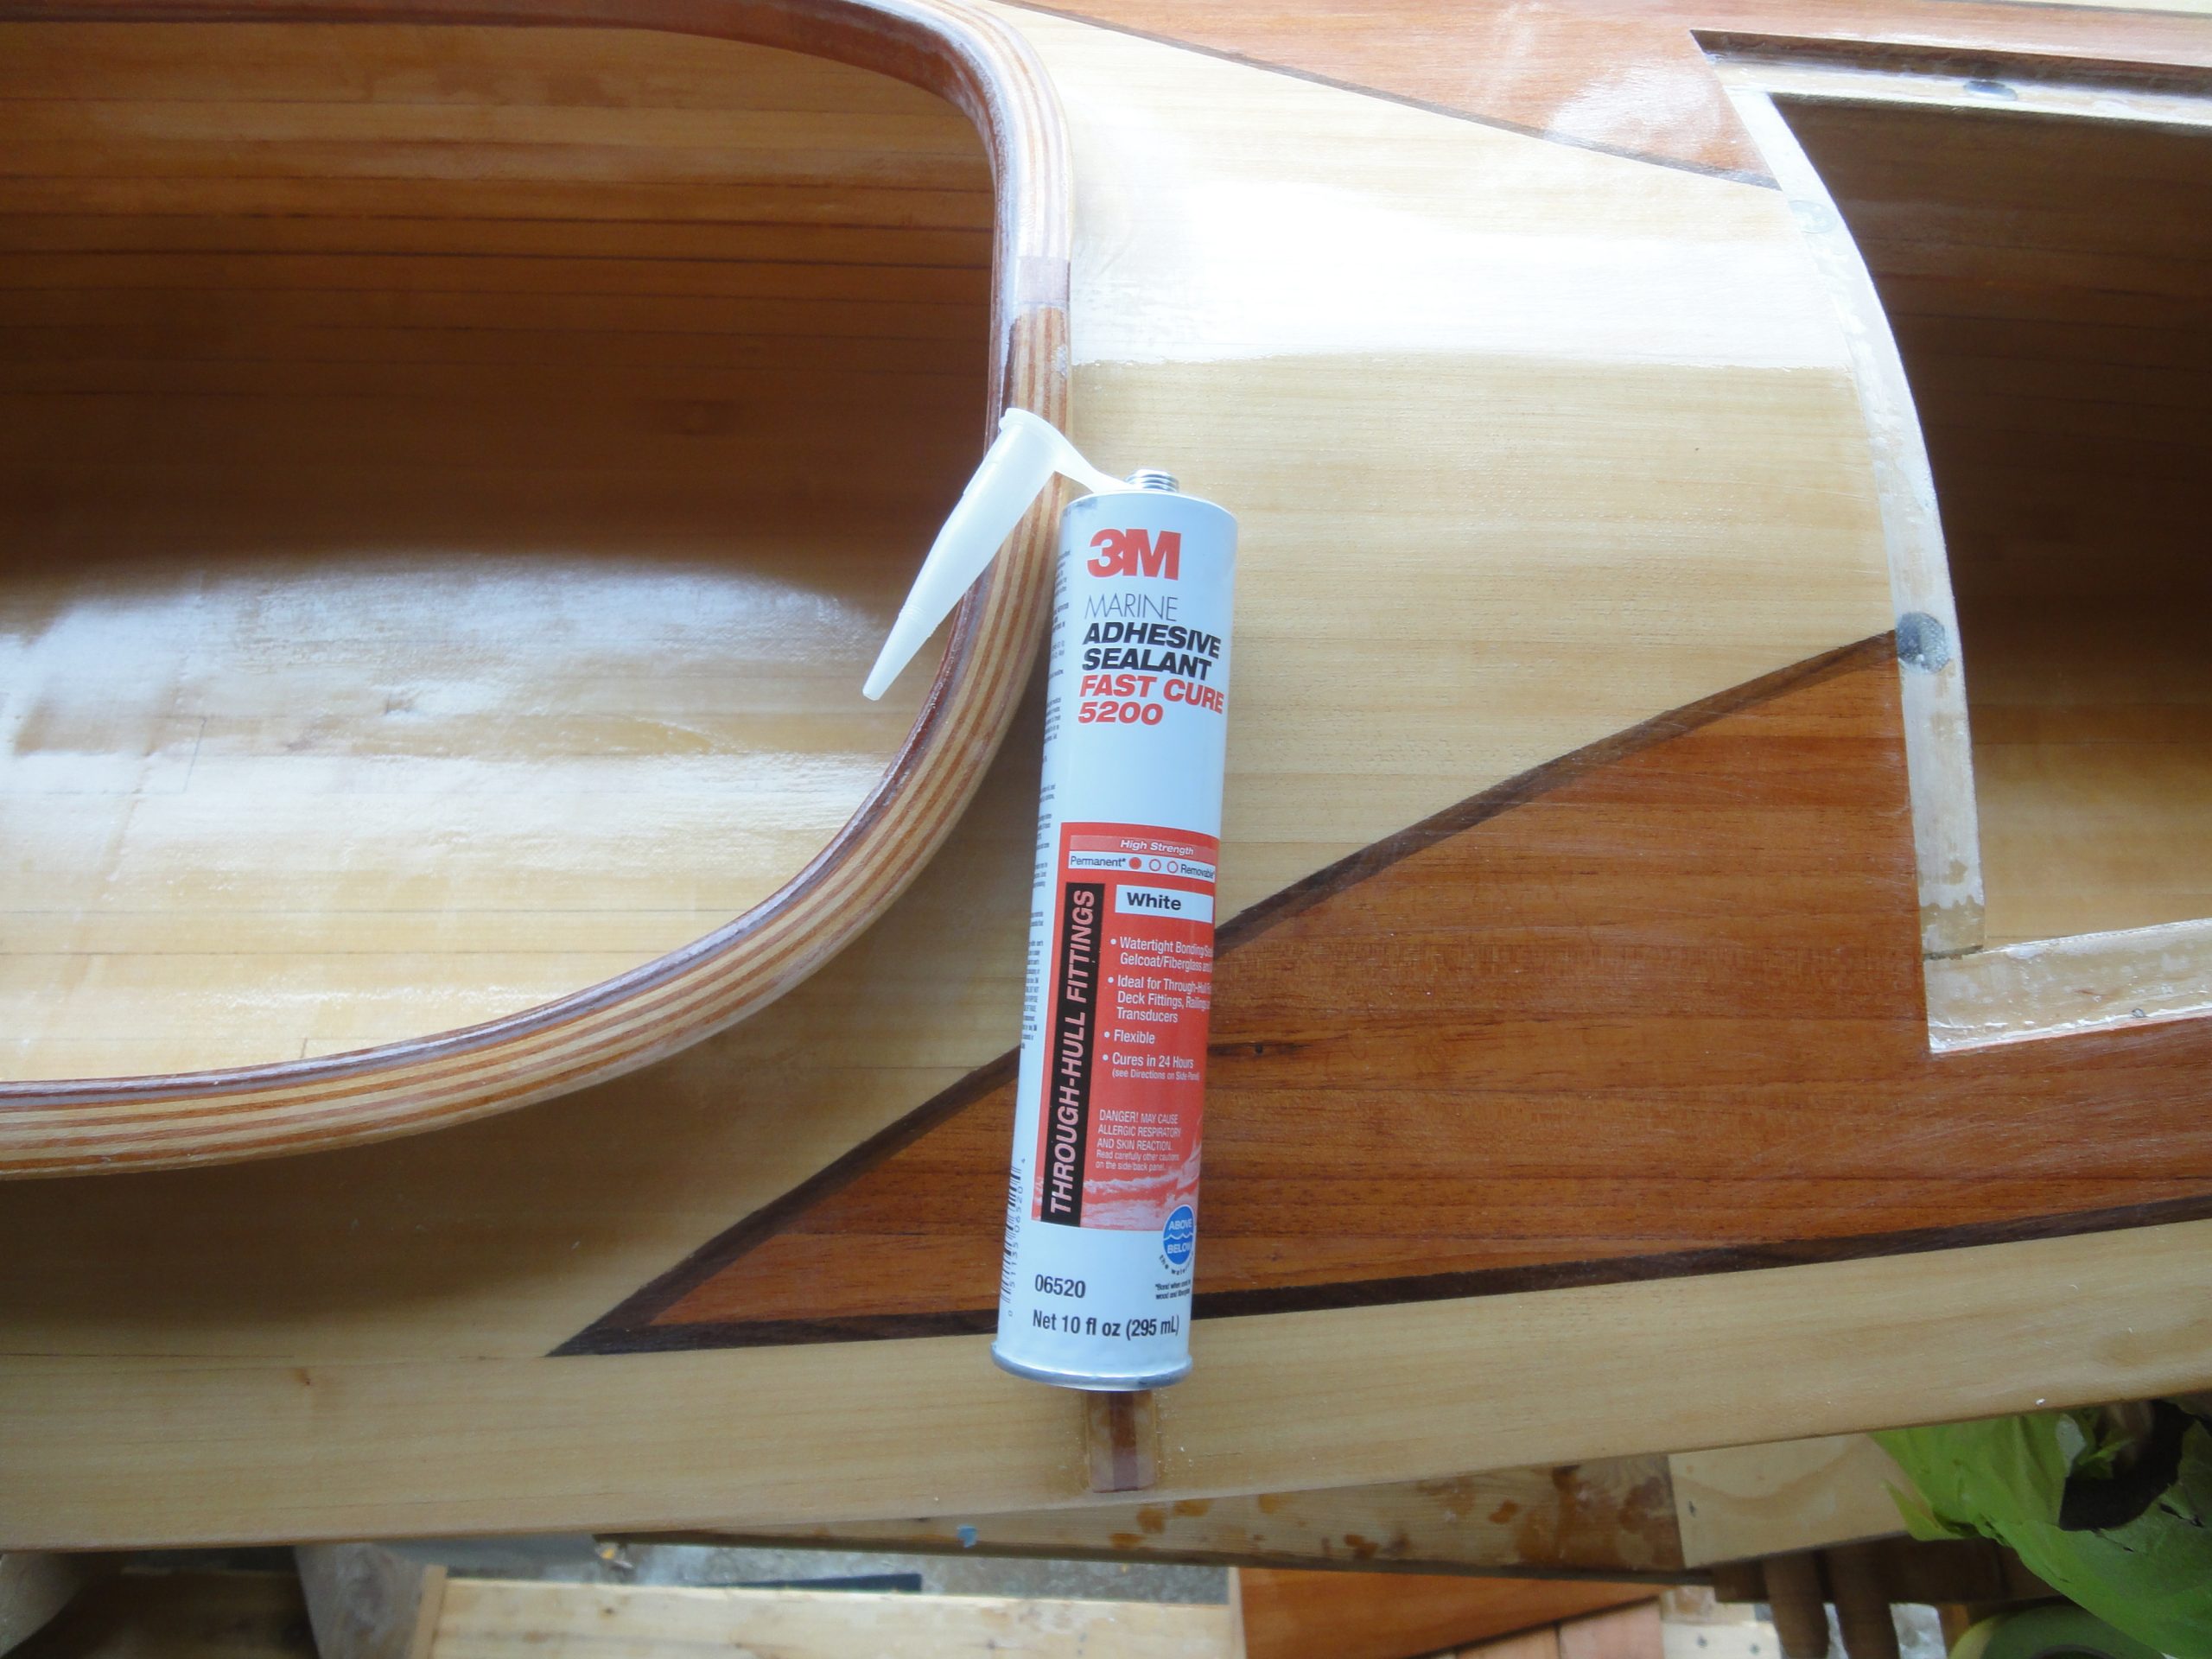
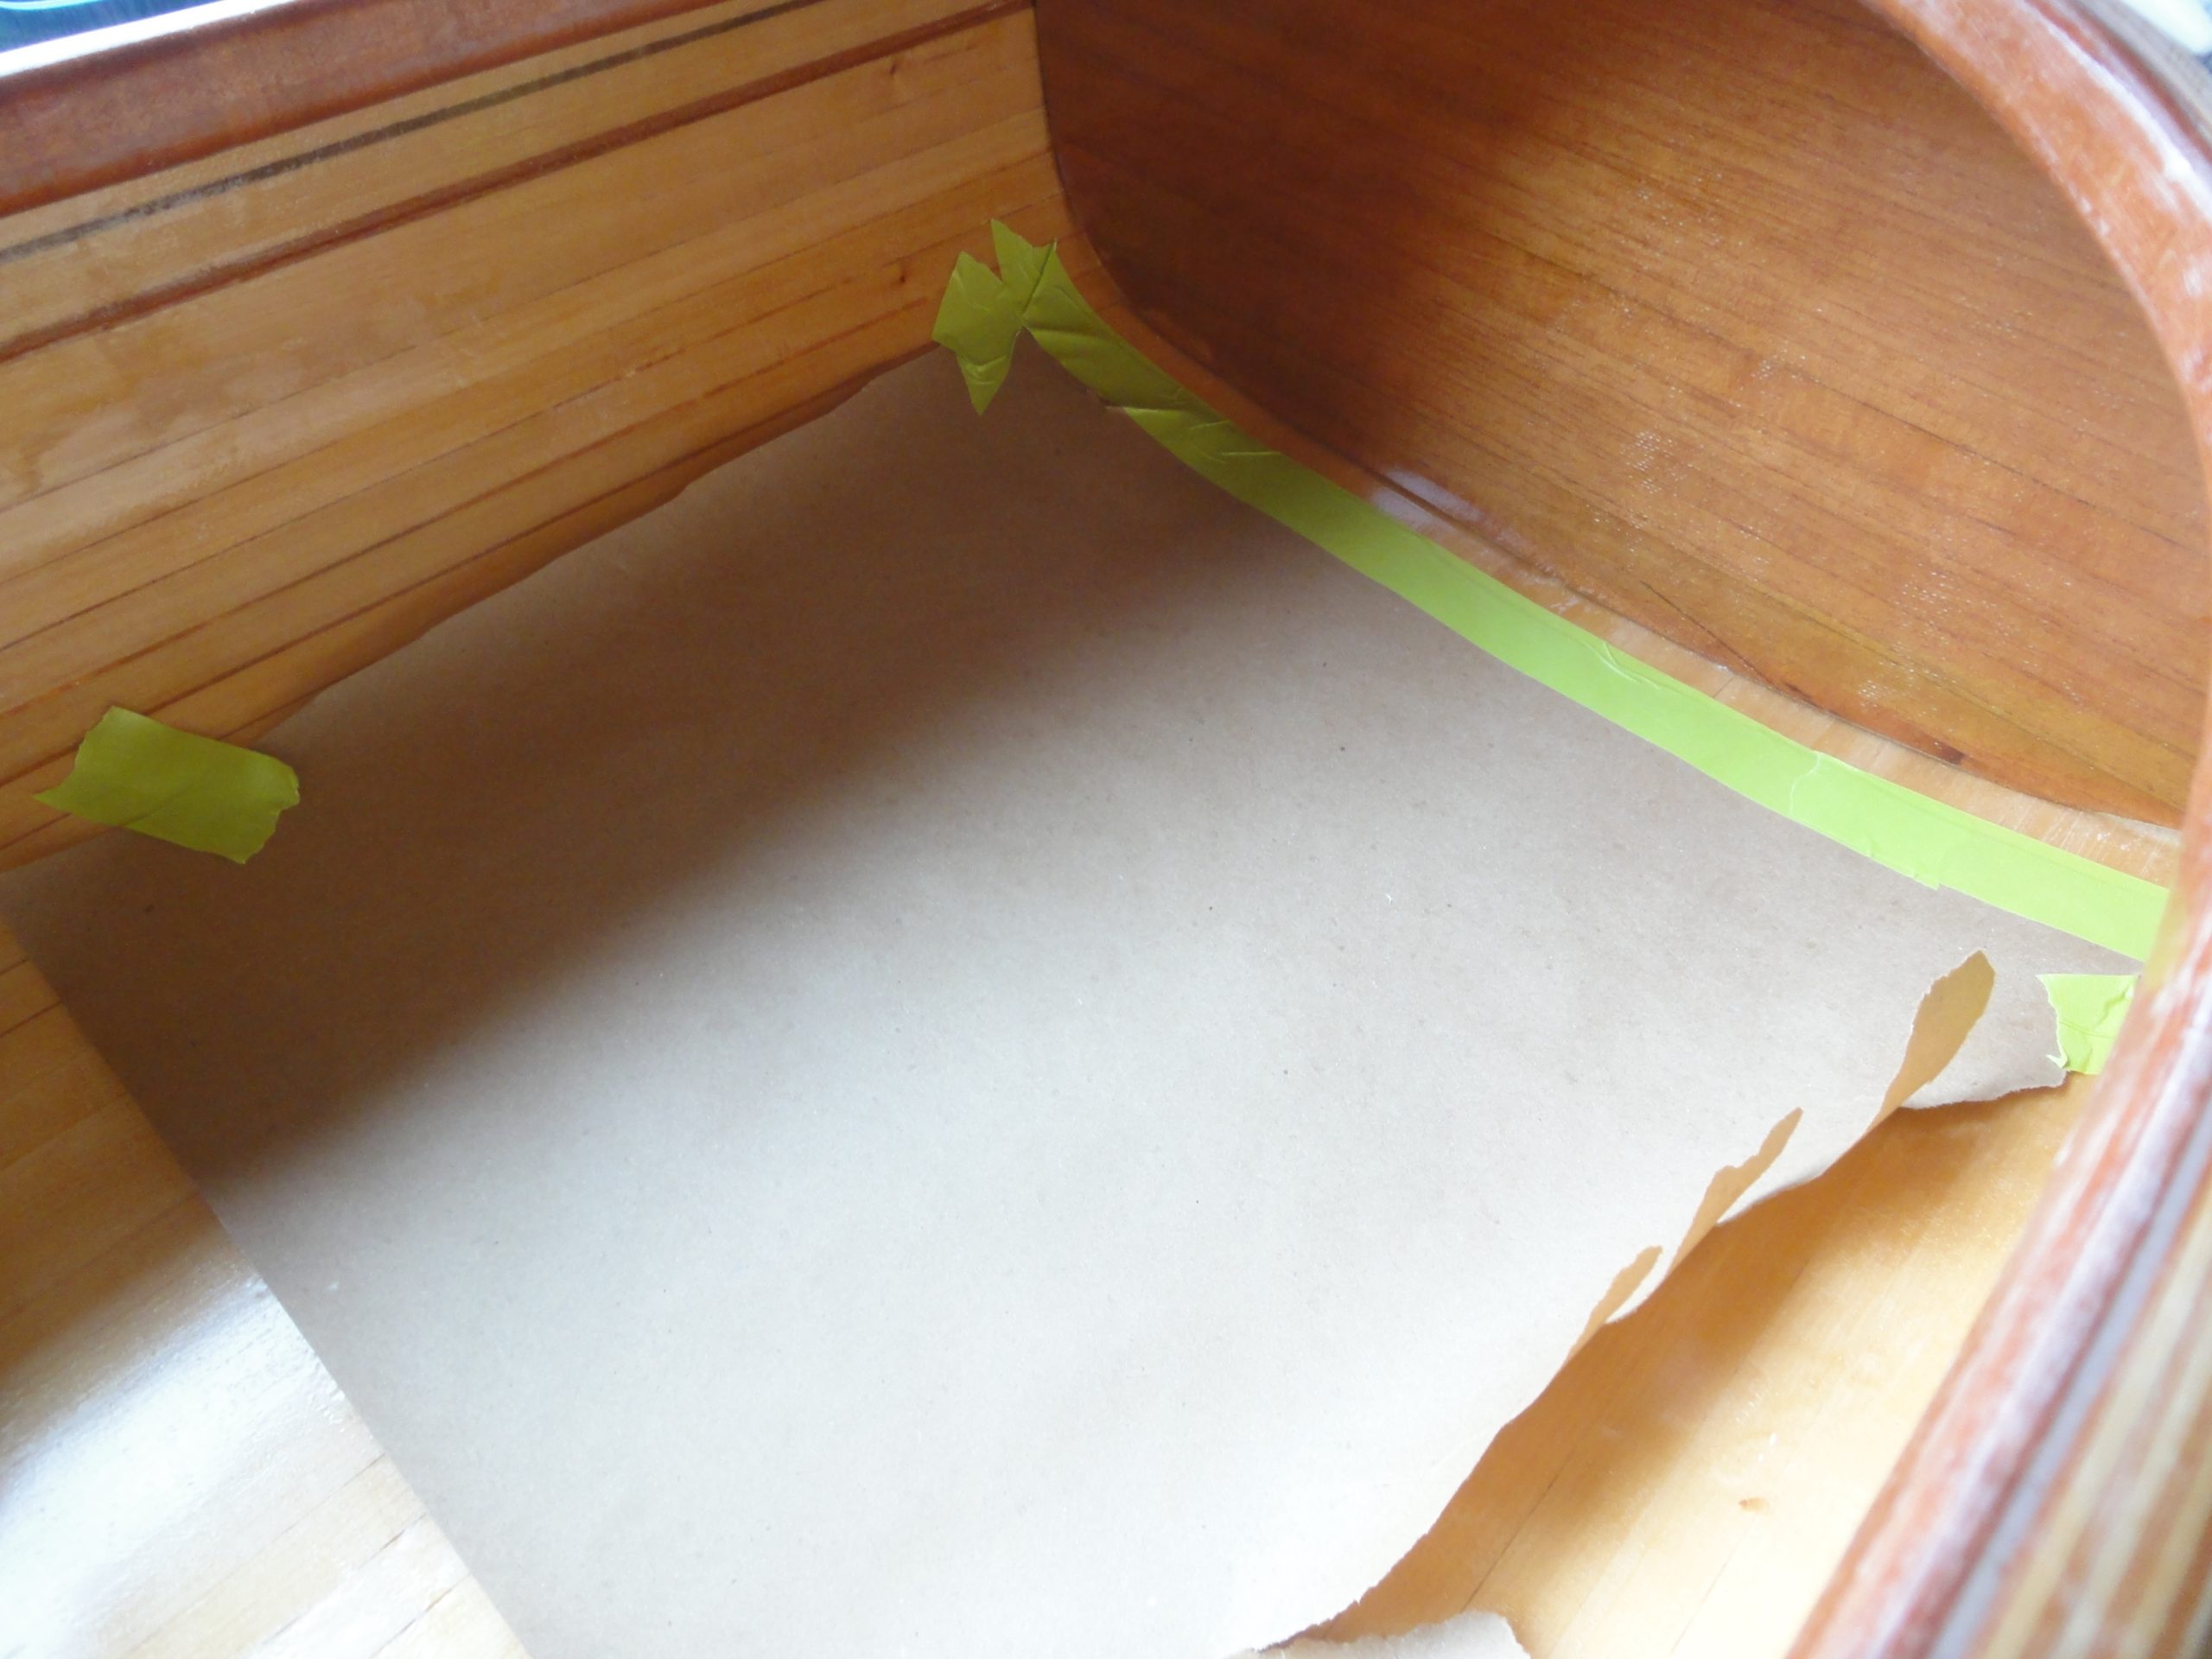
Before applying the second coat I took advantage of the deck being dry and shifted to work on the bulkheads. Both were placed and then I masked around them to avoid getting the sealant all over. I’m using a marine adhesive sealant from 3M. I applied it to both sides, used a gloved finger to smooth the bead out and then spent some time cleaning it up as best as I could.

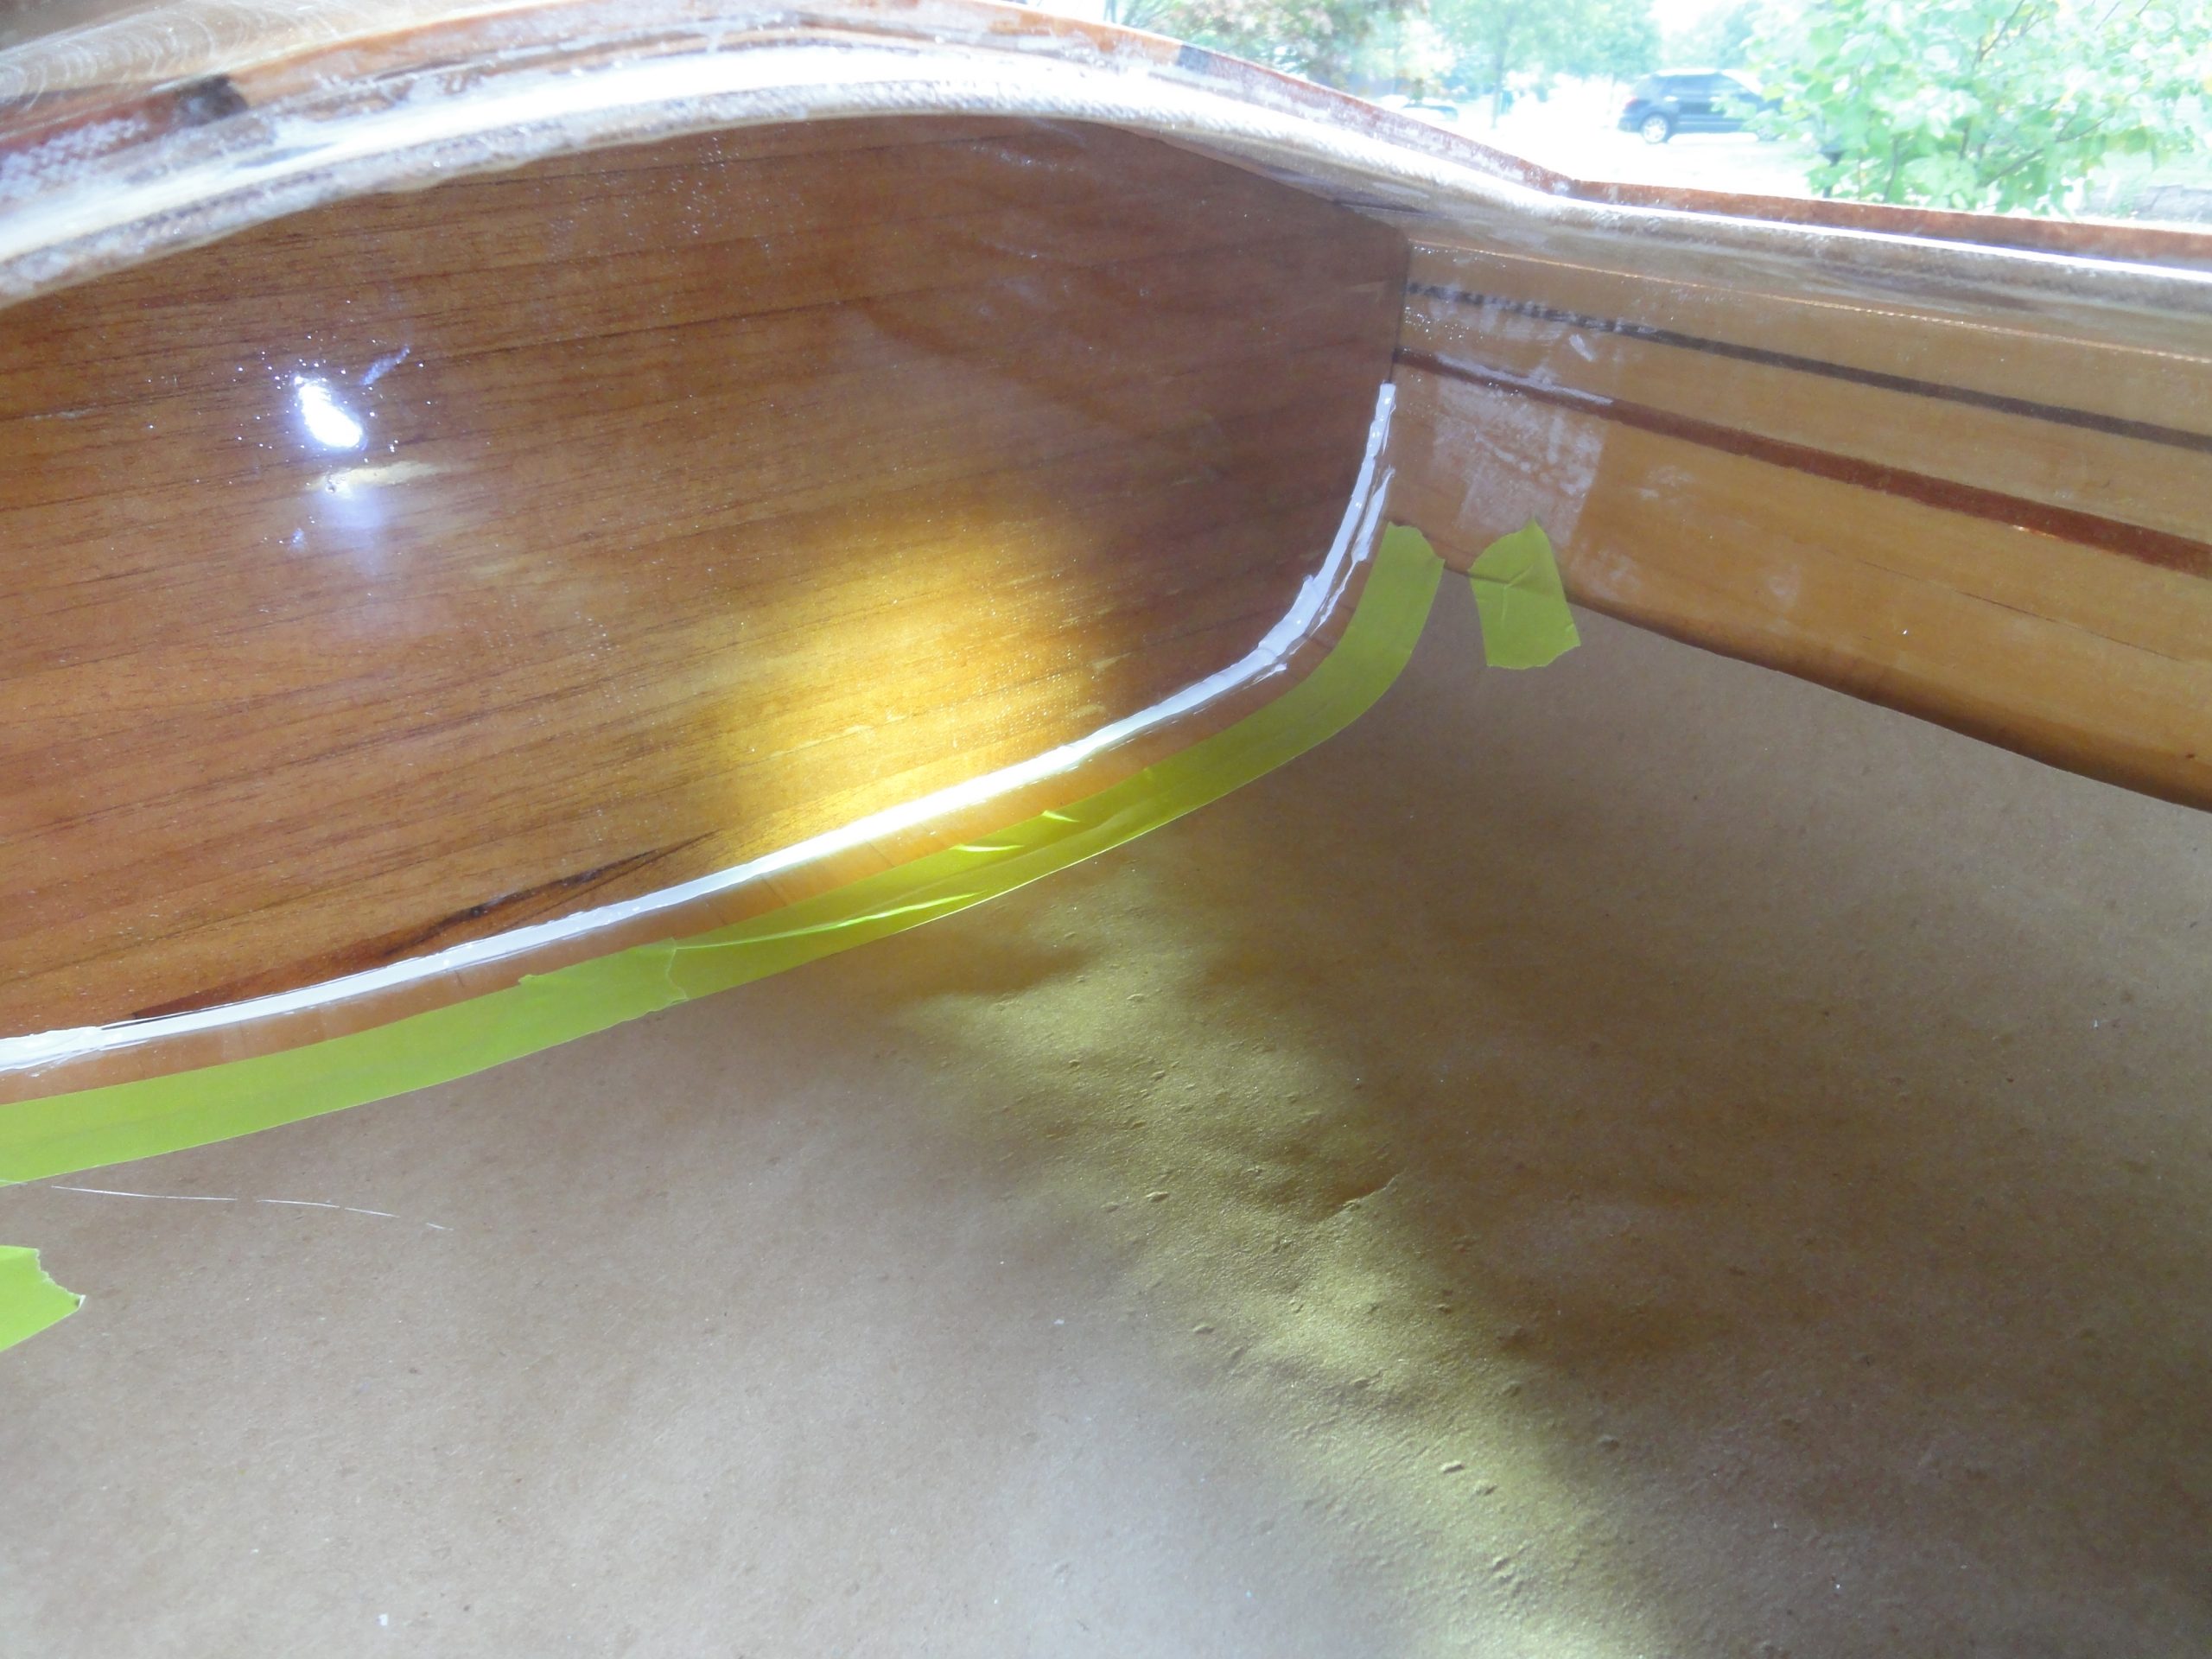
Contorting into the hatch openings with a caulk gun and my arm left little to no room to actually get my head in there to see what I was doing. A few parts were done pretty much by feel but most I could at least get some kind of sight line on. The final image is a good example of applying where I could see. The rest going up and around was done pretty much blindly. Of course reaching in to smooth and clean wasn’t the easiest either but since this is a one time operation I’m satisfied with the result.

I also took advantage of a dry deck (not sticky with drying varnish) to tweak the hatch rims. A few spots needed a bit of attention shaving down some epoxy high spots.

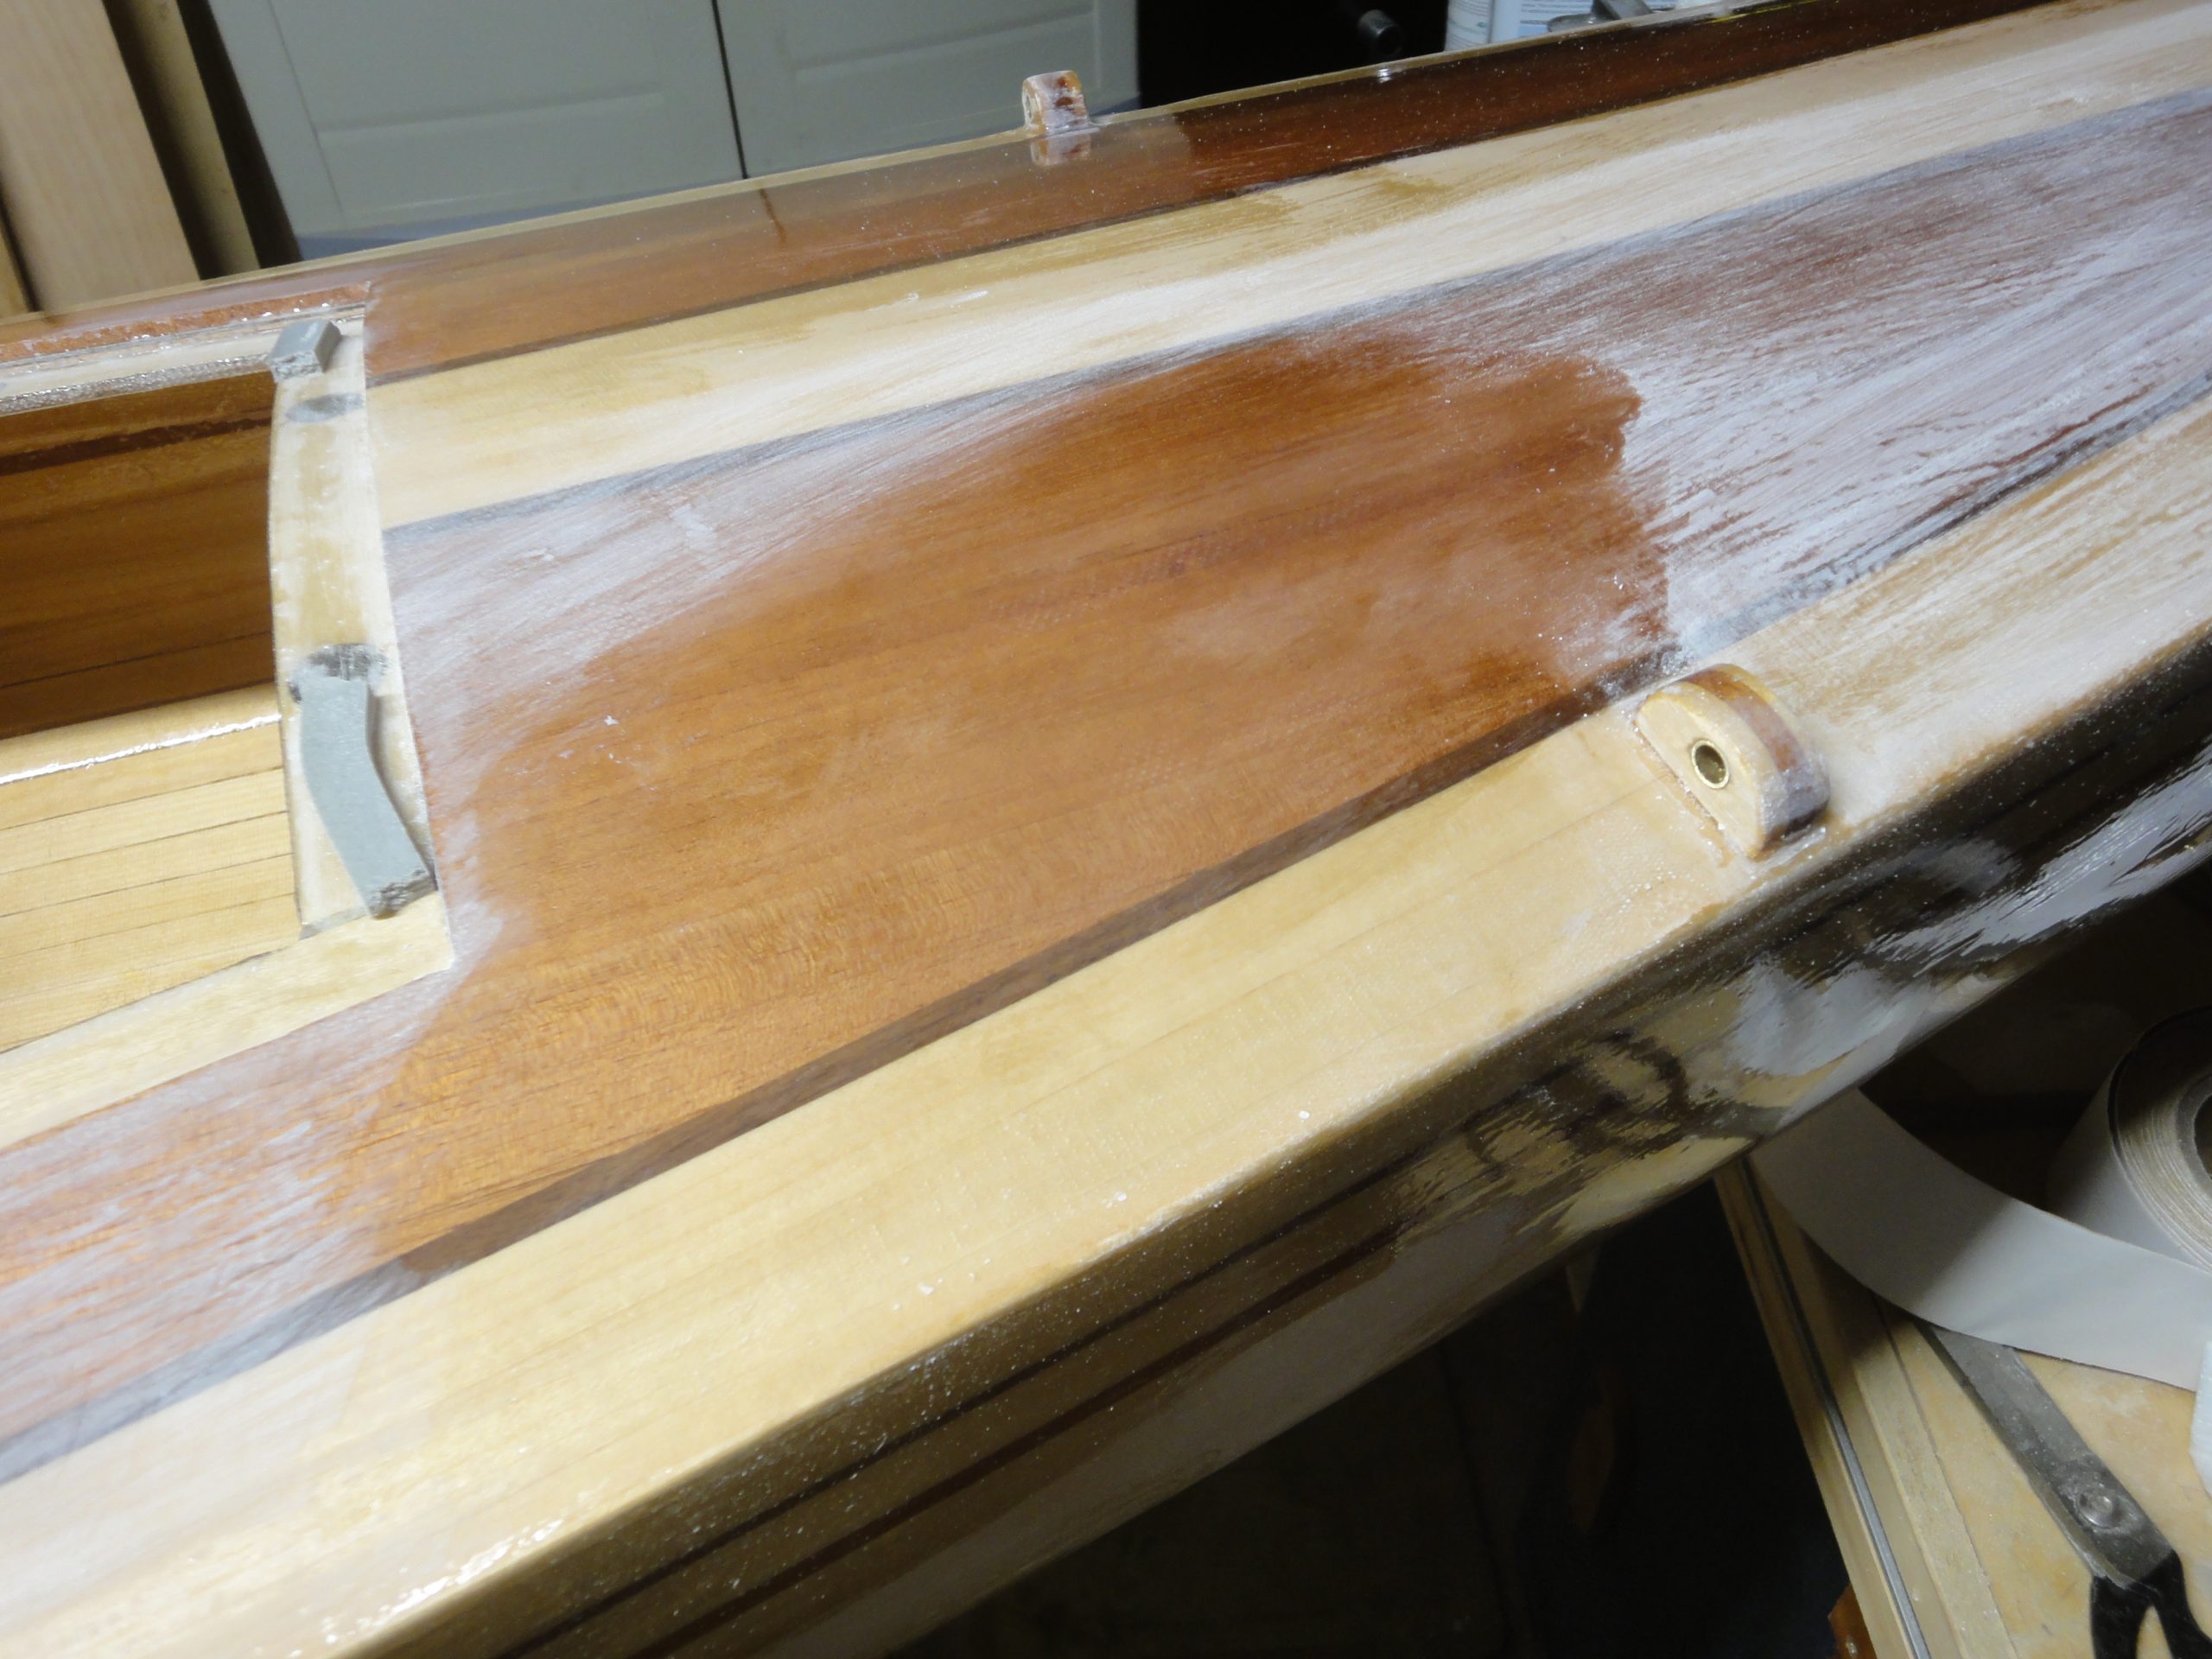
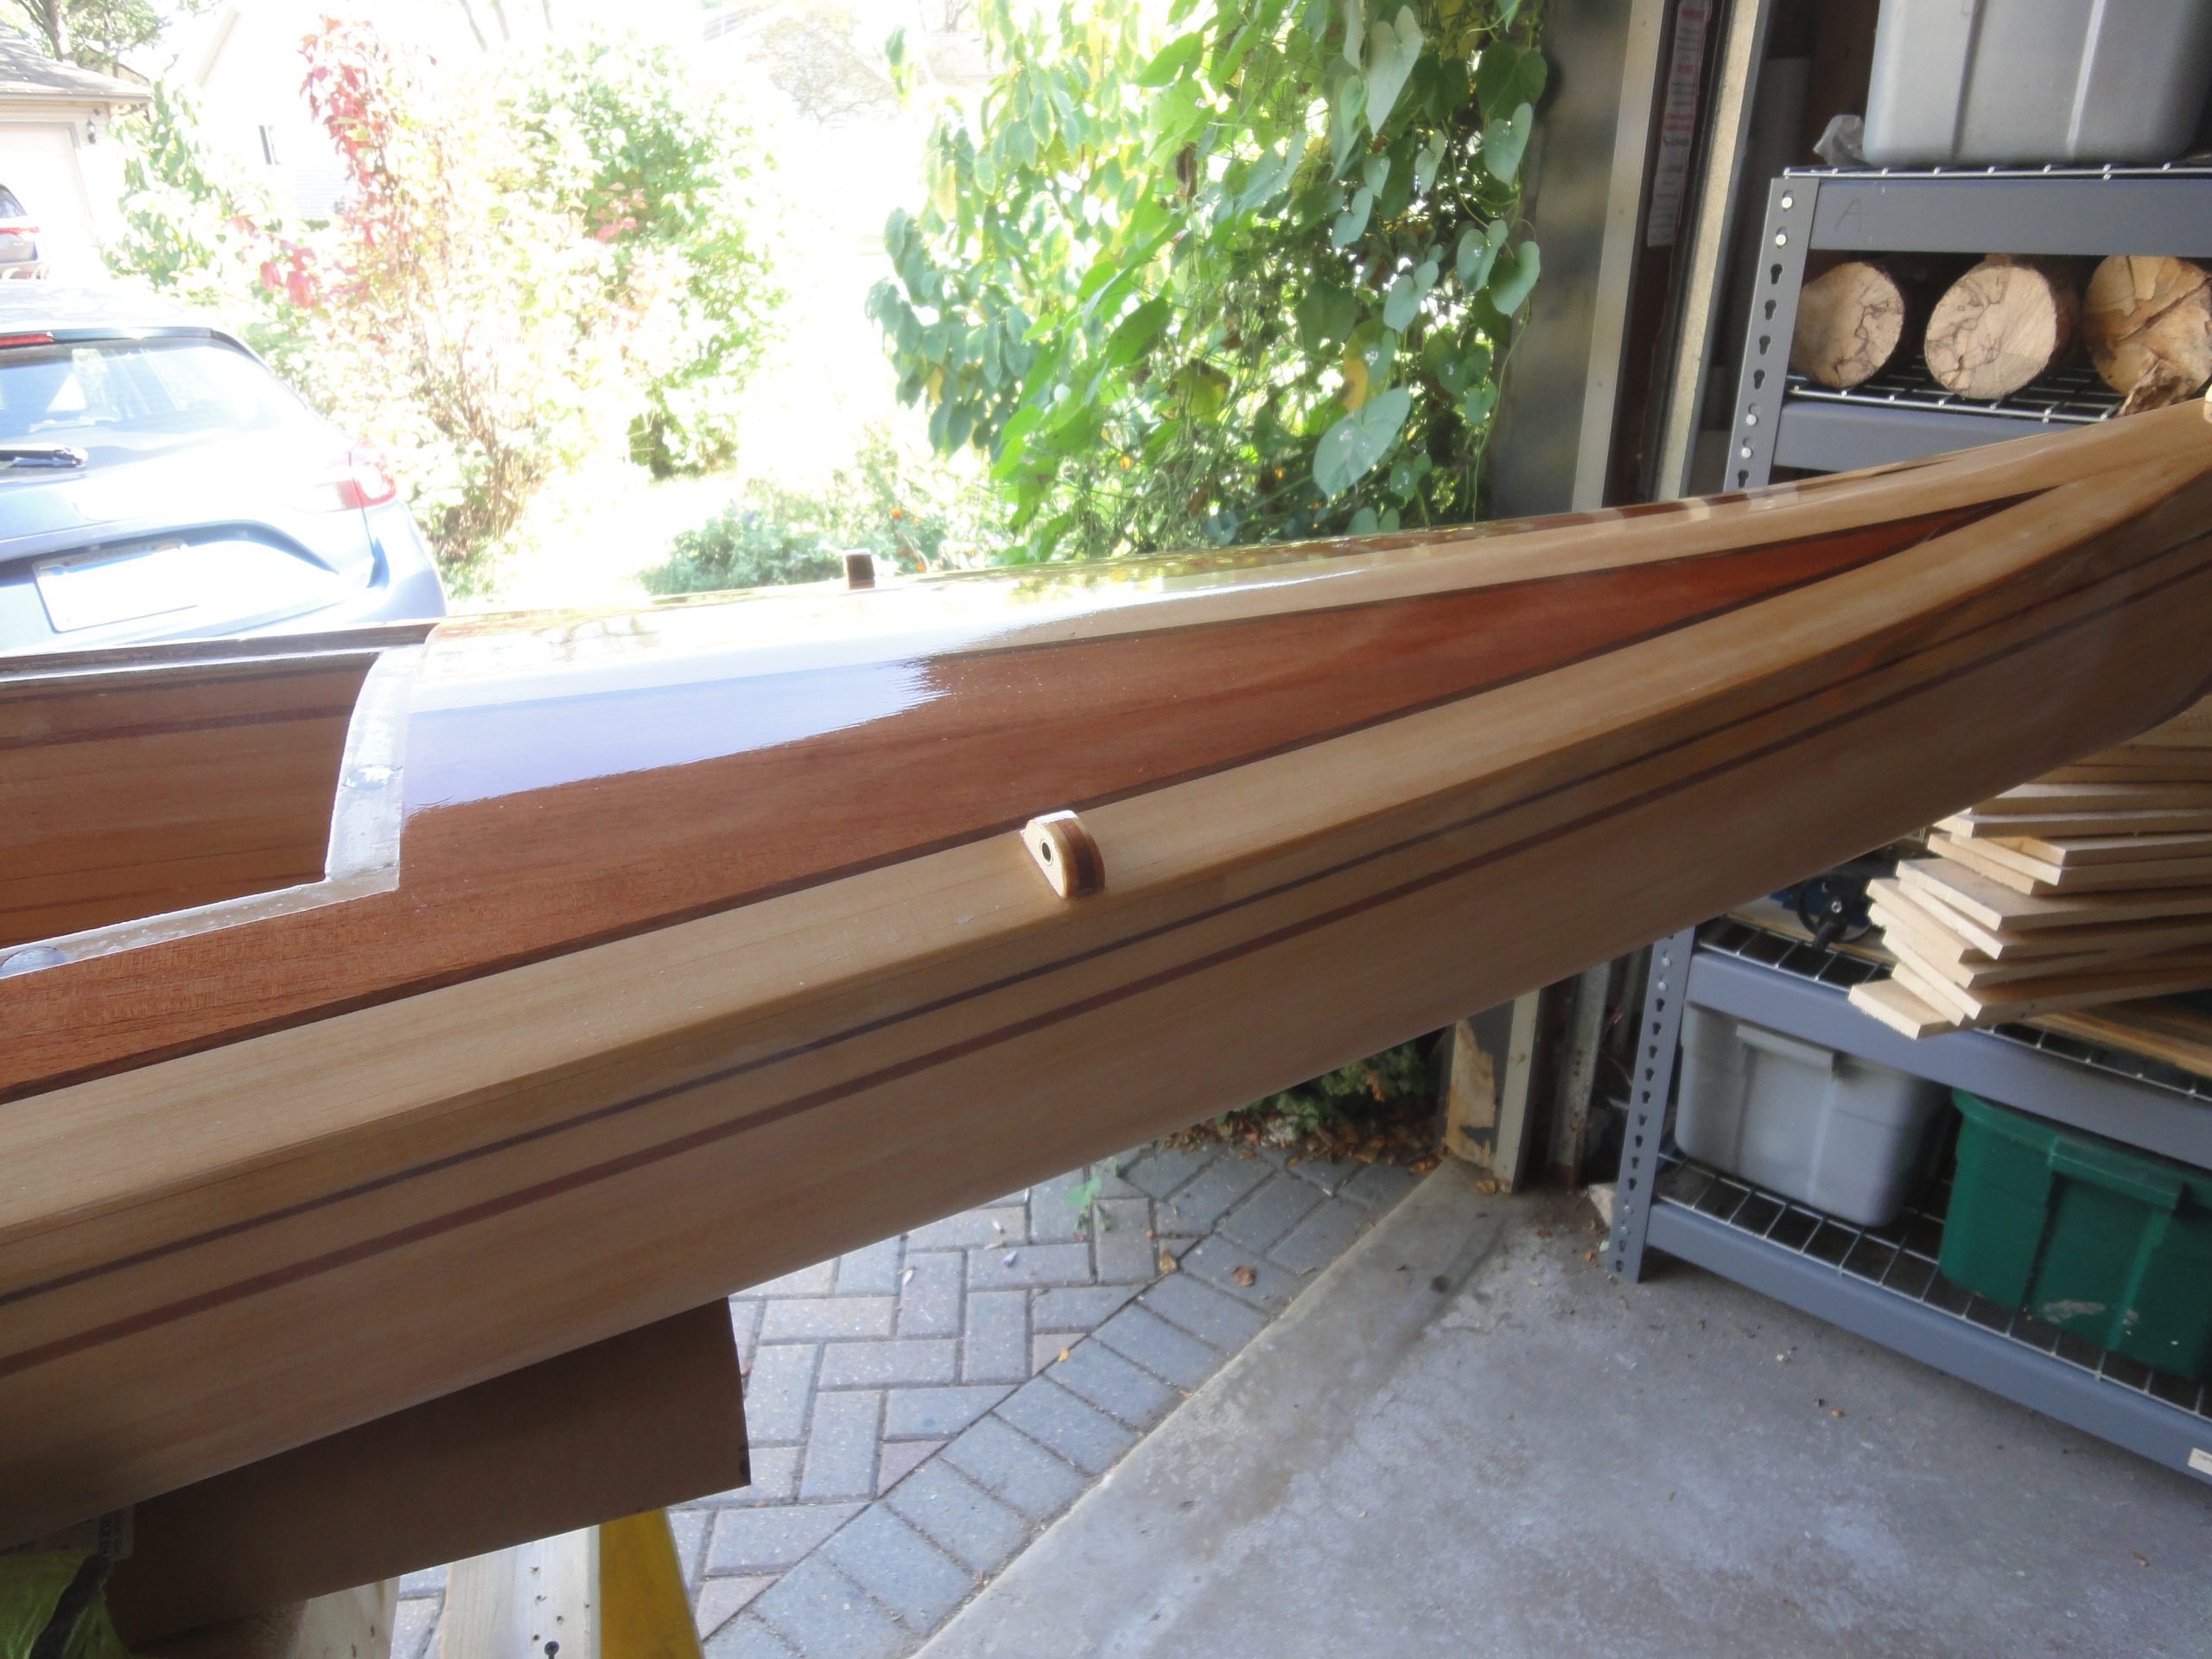
A second coat of varnish was then applied to the deck deepening the finish and the protection. I think the results speak for themselves. The will be at least two more coats with the only hold up now being the drying time. Then I can switch to the hull and apply the necessary coats there. I’m also applying the varnish to the hatch lips.

So the remaining list is really short now. The last three items will take less than an hour in total and I already did a bunch of hatch tweaking today so unless the foam seal creates an issue the hatch final fitting may be done already.

  • Hatch – final fitting/tweaking – partially completed
  • Varnish, varnish, varnish
  • Install deck lines
  • Install foam seal on hatches
  • Install seat

Moving Forward Again

Sad to say the skim coat of epoxy did nothing to remove the visible weave. It did reduce the visible aspect of it quite a bit but didn’t eliminate it at all so I’ll not be putting any epoxy on the other half. It would just be time wasted. Instead I have to accept that up close there will be some weave visible. From about 16 inches away you can see a bit of it in the dark walnut strip in the pic below. Not obvious though and from 3 or more feet away it pretty much disappears. It’s one of those things if you’re looking for it you’ll find it, otherwise it will probably never be noticed.

So I proceeded to work on sanding back the fill coat to return the surface to the nice 220 grit level smoothness I had before. With a bit of Bio-Solv to wipe it down you can see the weave is mostly not there. Even after the solvent evaporates off it’s still barely visible. Look closely just above the center of the last image and you can see a small patch.

So after completing the sanding I grabbed a round file and knocked off the edge of the tie downs. They didn’t really feel sharp but I didn’t want to take any chances.

I rolled the stand out into the sun to get good lighting and did a full Bio-Solv wipe down of the entire hull and deck. I then went over it inch by inch looking for any last defects or issues that need to be fixed. Found a bunch but all very minor. Most were just some sanding marks that will easily be removed. A couple of drips to still be removed. A few were slightly rough patches that I hit with another thin coat of epoxy and a few spots I found along the part line (where the hull and deck were joined) that look to have a 1/4″ paper thin gap that needs filling. I marked them all with a small piece of tape so I wouldn’t forget any. Unfortunately many of those shots were blurry so only a few are shown below.

With a few small patches of epoxy drying on the kayak I moved to the bulkheads and inside of the hatches. Gave the hatches a thorough sanding through the grits and then applied a coat of varnish. The bulkheads, at different stages in the process, received either a 120/220 or a 400 grit sanding and a coat of varnish. The 400 grit smaller bulkhead is now on the 4th coat and I think this will be the final.

Prior to varnishing I also did a sanding on the cockpit interior to take care of a few last drips and then gave that a coat of varnish too.

Lastly I installed the foot braces. Well, last in the list, actually I installed them before varnishing the cockpit as you can probably tell from the pictures. I simply matched each one up to the corresponding side (drain slots facing down keyed which one went where), slipped them over the bolts and installed the washer and nut. A nut driver was used to snug them up. The first went on easy, the second didn’t want to slip down enough to accommodate the nut so I had to sand off a bit of epoxy that got on the bottom of the bolt stud. Literally just a few seconds and then brace guide slipped all the way on.

So after the interior sanding and brace installation I then applied a coat of varnish on the inside. I won’t get much time this week to work on it but am hoping for a few minutes each evening to put another coat of varnish on the hatches and bulkheads as needed. This should have me ready for final touch up sanding of the recent patches next weekend and then I can start with final varnishing of the whole kayak. Somewhere in that mix, when the bulkheads are done, I’ll install them too. Thankfully the varnish is fine to brush on in cooler weather. Not sure if I get an early start if I can do two coats in one day or just one. I’ll have to check it as I go.

Remaining to do list:

  • Last minor defect sanding
  • Install bulkheads
  • Hatch – final fitting/tweaking
  • Varnish, varnish, varnish
  • Install deck lines
  • Install foam seal on hatches
  • Install seat