Just Finished Class #2

I took my second kayak class today from REI. It was called Kayak Rescues and Recoveries and basically involved working with a skirt that goes around the coaming (cockpit lip) and seals you in while sealing out water, waves, etc. It was a more serious class than the last one in that we intentionally overturned our kayaks in order to “simulate” an accident or problem.

Again one of our instructors was Uma from my last class and then a new one, Joe who as the humorous rumor goes, lives in the boat house at Saganashkee Slough. Actually he said he just lives near there, is involved with running the boat house and spends a lot of his time there. If lived that close I probably would too. Both did a great job!

We started with “T” assisted rescues and then moved to self rescues before making a hasty return to shore with the appearance of an approaching storm. We each intentionally dumped our kayak over, had to remove our skirt under water, slip out, return to the surface, then gather up your paddle, kayak, etc. and meet up with your partner who would then help raise and empty it before flipping over and bracing it so you could climb back in. The self rescue was similar but you had to do it on your own with the aid of paddle float.

First time in I got a nice nose full of water (yeah, that was pleasant, not) and even though I knew what to expect it was still a bit of a shock, especially as the water was murky enough as to not allow you to see what you were doing. Fumbling upside down while holding your breath is not the most fun experience. Regardless within 5 seconds I made it to the surface. The second attempt was better and the self rescue was even better in that I was up in under three. The down side was that I scraped my shins on the inside edge of the coaming as I was extricating myself the first two times. The third I had a better technique and didn’t scrape.

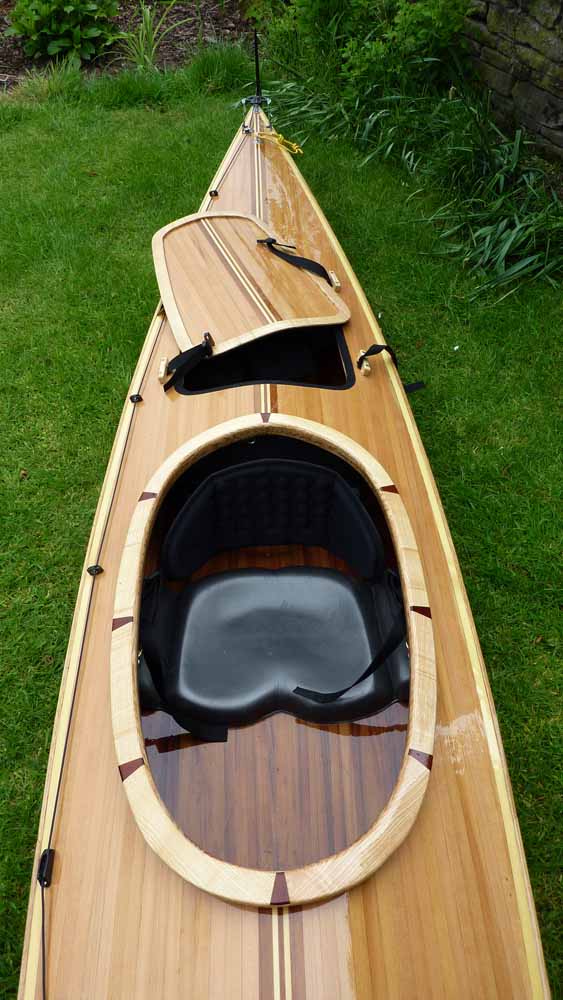
This injury tells me (along with the fact I had to more or less sit on the deck to get my knees in which is somewhat unstable) that the cockpit wasn’t large enough for my size or at least my comfort. For me I found this very good (other than the scraped shins) as it will help me in determining the size of the cockpit on my kayak.

We were in Wilderness Systems brand kayak again. This time I believe it was a Tsunami 145 (14′ 6″ in length) which has a 35.75″ cockpit length. With the seat back position, when seated this leaves about 30″ to work with and given my 6’2″ frame, there simply wasn’t enough room to bend my knees in the seated position to get in.

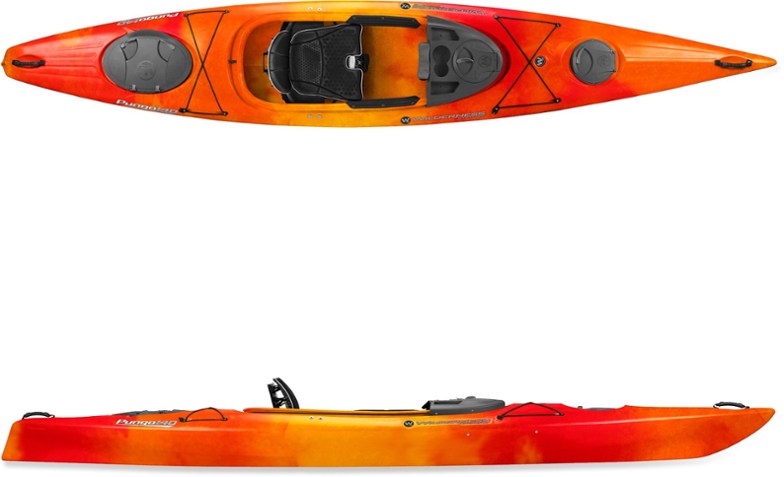
For reference, the Pungo 140 I had last time has a 57 1/2″ cockpit length. (according to my tape measure). It was basically open down to mid shin.

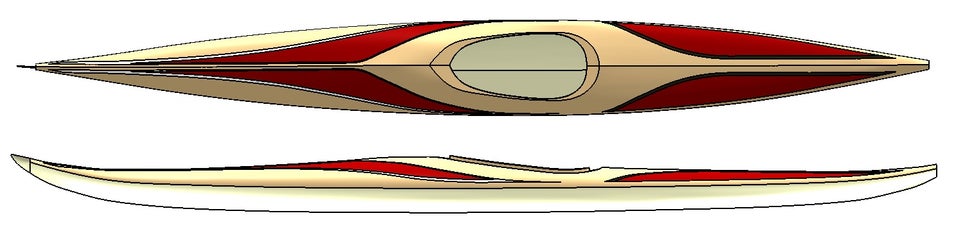
So I need to find a happy medium. I don’t want the really big 57 1/2″ but 36″ (30″) apparently isn’t enough. I’ll have to do a bit more investigating and measuring but I’m thinking something in the 42″-45″ size will probably fit me well. My final class is in a few weeks and I’m at least a few months from even needing to finalize the coaming size as I’m still picking out wood let alone actually starting the build. Of course I’ll need to find a skirt that fits or work with one of the companies that makes them custom if there isn’t a stock size I can use.

Final Design – I think

After looking at many designs and ideas and settling on at least three or four over the past few months, I’ve been rethinking my design given the wood choices. I did some internet searches based on using primarily basswood and found mostly favorable responses. The biggest negative is that it will weigh more than cedar but most comments were estimating 4-6 additional pounds. Compared to the weight of the plastic kayaks I will still be substantially lighter so I think basswood will be my primary wood.

During my searches I found this conversation with the following image, while this is not of the kayak I am building, the lines, in general, are close enough that the pattern should translate across.

I really like the pattern on this and it would work well with basswood as the primary and limited amounts of spanish cedar and walnut. My interpretation of this design would result in:

From part line (where the deck (top) meets the hull (bottom)) going down:

  • 1/8” strip of walnut
  • 3/4” strip of basswood
  • 1/4” strip of spanish cedar
  • continue on down with basswood

(optional, I may stain the bottom half in which case the entire hull would be stained basswood)

From the center line out on the deck (front decorative panels):

  • 3/4” strip of basswood
  • 1/4” strip of walnut
  • spanish cedar filling as necessary
  • 1/8” strip of walnut
  • 1/4” strip of basswood
  • 1/8” strip of walnut
  • continue to part line with basswood

From the center line out on the deck (rear decorative panels):

  • 3/4” strip of basswood
  • 3/4” strip of basswood
  • (maybe a 3rd strip, probably not)
  • 1/4” strip of walnut
  • spanish cedar filling as necessary
  • 1/8” strip of walnut
  • continue to part line with basswood

Coaming:

vertical – basswood, lip – walnut and possible spanish cedar accents

I’ll spend a day or two to think about this but if I do stick with this design then the wood purchase will be coming up soon. I like the idea of the basswood which is very light and almost no visible grain which will make splicing boards together easy and the seam should all but disappear in the final product. It also minimizes the use of the cedar, to the point that a single board would be enough and it wouldn’t have to be overly long either. Walnut, while heavy, contributes less than a board foot with the decorative strips and just a small amount more for the coaming, again a negligible amount of weight gain.

How Much Wood would a Wood Kayak…

If I haven’t mentioned it yet, I’m in the suburbs of Chicago. We have a few really good lumber sources here. Owl Lumber and Hardwood Connection are two of my go to places. Pretty much anything you’re looking for they have. Well, except for most softwoods including Cedar.

Cedar (Red, White, Yellow) from the “West”, Alaska, “East” and other such location references is the most commonly used wood. Now I can run to the big box store (Menards, Home Depot, etc.) and easily get Cedar in pretty much any length, however it is full of knots. Usually you use a clear wood, one without knots, for the strips. My go to wood shops don’t carry Cedar and the big box stores don’t carry the right kind. So, now what?

A lot of research and I found a place in Chicago called Harry’s Lumber Co. That advertises clear Cedar. I contacted them and confirmed that they do carry clear. In the next week or two I hope to get there and see just what they are offering.

However before I found Harry’s I was looking at alternatives. I’ve seen Basswood, Pine, Redwood and others mentioned. I stopped at Owl and after finding they don’t have Cedar I perused through the rest of their choices. What you want is a relatively “light weight” wood. Sure you could make a kayak out of Oak but it would be very heavy to carry around and getting it into/out of a body of water will be a challenge. Having basswood in the back of my mind I lifted a few pieces and they were pretty reasonable in weight, had longer lengths and I could find pretty much knot free wood. Nothing else there really jumped out until I came across Spanish Cedar. It had a very nice red coloring to it, any knots were very tiny (small enough to be considered knot free) and it was quite light. I bought a small board of Basswood and Spanish Cedar for experimenting with and a really nicely quilted/flame maple which I intend to use in very small areas as an accent piece.

As of right now I am still undecided as to the wood and probably will be until I check out Harry’s. I like the Spanish Cedar but the name is deceiving as it’s actually related closer to Mahogany rather than Cedar. Being as such it’s a rain forest tree and I’m a bit concerned about the source(s) of it. On the other hand clear Cedar mostly comes from old growth Cedar trees, again a source I’m not thrilled with either. So, I may end up going with Basswood and staining it to get the red color as it is a local and plentiful tree. Another possibility is changing my design idea from a darker red colored kayak to light colored with a few red accent lines. Or maybe a stained Basswood hull, non stained Basswood deck and a few Spanish Cedar accent strips in there.

I did some internet research and found many images, the three below are the closest to the ideas of what I’m thinking of. The one in Red is the color I was originally aiming for and the Spanish Cedar would easily produce this. The light deck is closer to what I’d have with Basswood and you can see the person who created this one has a nice accent strip feature down the center line. The last image reflects a combo of dark lower and light upper while still including the accent strips. At the moment something along these lines is where I am leaning but still undecided.

The images are from: ???, here and here. If the first image is your photo, please let me know so I can provide credit/a link.

Over the next week or so I’d like to settle on my wood choice(s), visual design and start making those purchases. In the mean time I’ve started to pickup some basics like glue and spring clamps.

The Kayak is a Go!

Well today was my first kayak class. I took it through REI and it was Learn to Kayak taught by Uma and Paul. Great instructors who covered everything I wanted to know at a beginner level. I’m pleased to say I did not overturn (nor did anyone in the class) and was able to maneuver around quite well. It also provided for a comparison in different kayak styles as they had a number of them there. I was in a Pungo 140 from Wilderness Systems which appears to be discontinued now.

Pungo 140

It didn’t have the black “dash board/cup holder” shown in the picture so the cockpit was very open. I kind of liked this extra leg room and may consider enlarging the cockpit to somewhere in between on the Resolute assuming I can find a skirt to fit it (or have one made).

Final verdict, I really enjoyed the experience and have a lot more confidence now that I will enjoy a kayak over a canoe. This means my kayak build is a go. The next few weeks will be starting to gather the supplies (tools, materials, etc.) to accomplish this.

So far the biggest hurdle seems to be finding a wood to use but I’ll leave that for the next posting.