Had a bit of time tonight so I prepped and added a couple of detail strips. I’m following Nick Schade’s methods for beveled strips and more or less his “clamping” method too. To start with I needed a few new tools. One of these is pretty much a dedicated kayak building tool, the other is designed to fit within the tool but could also be used on its own.
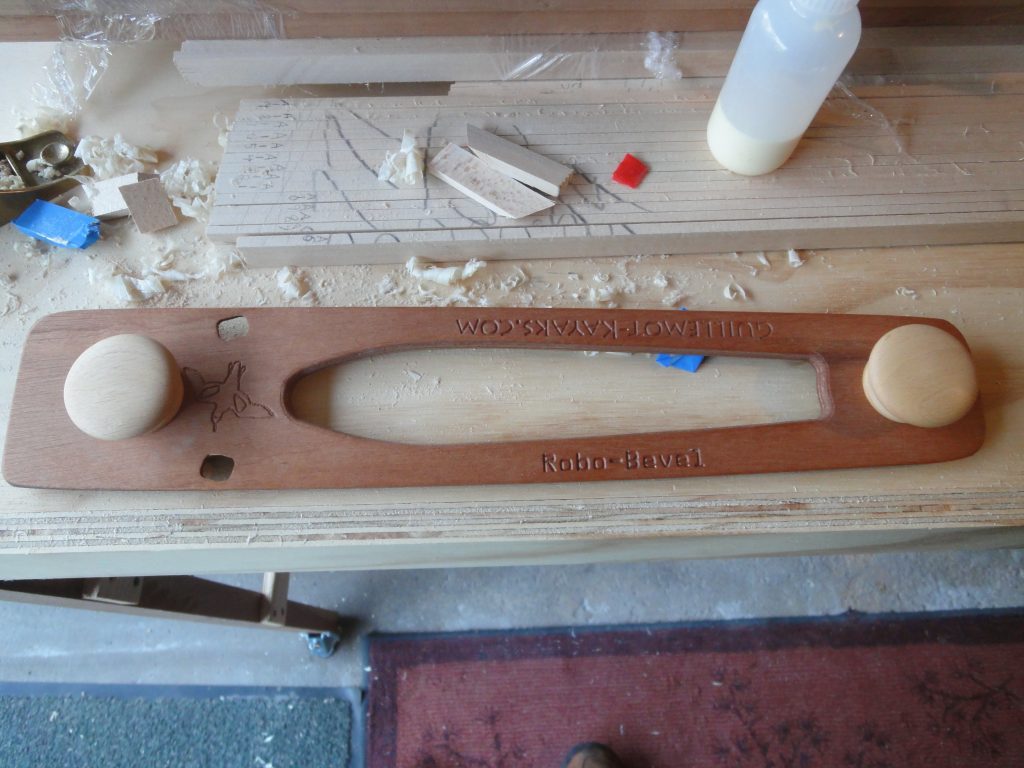
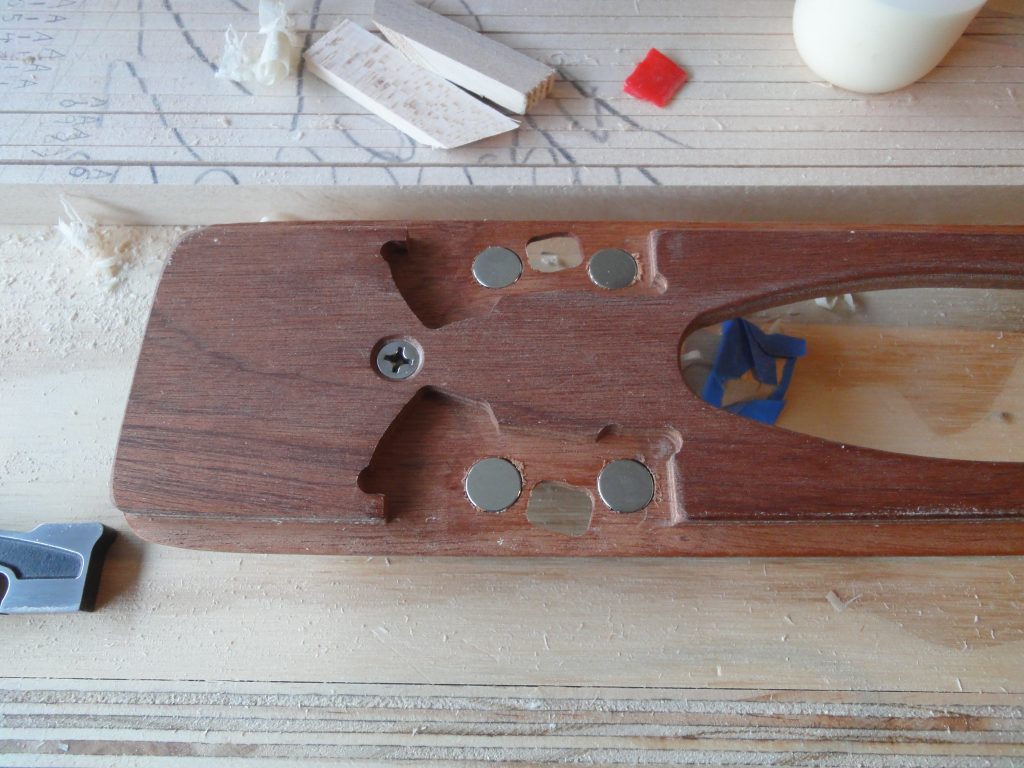
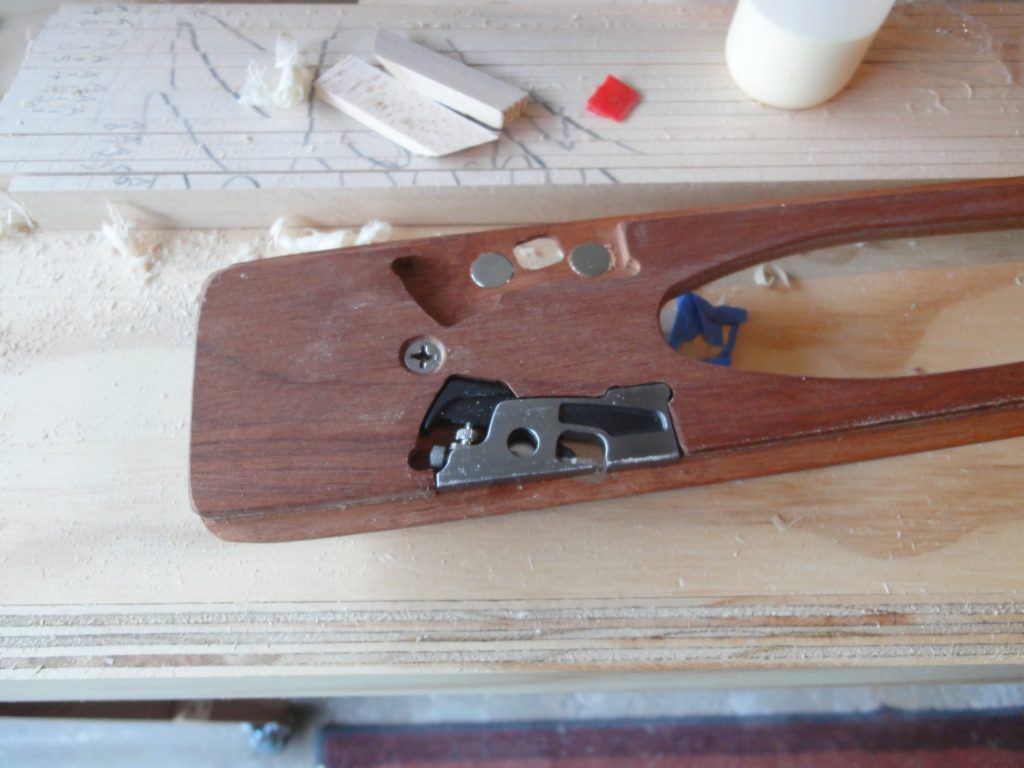
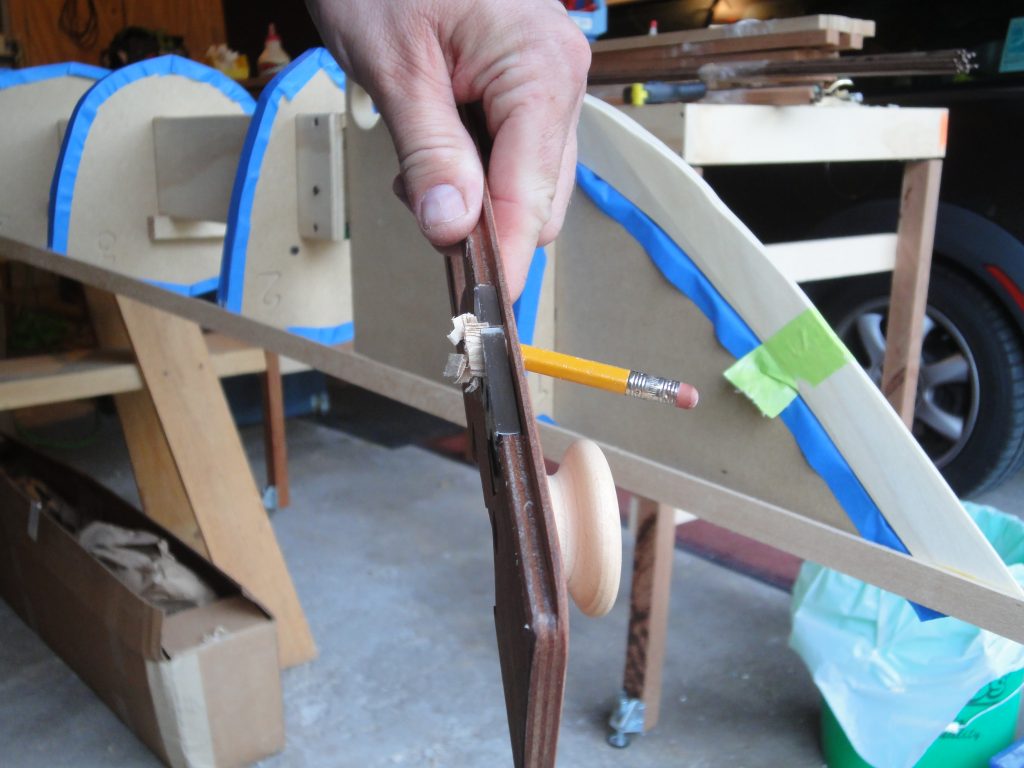
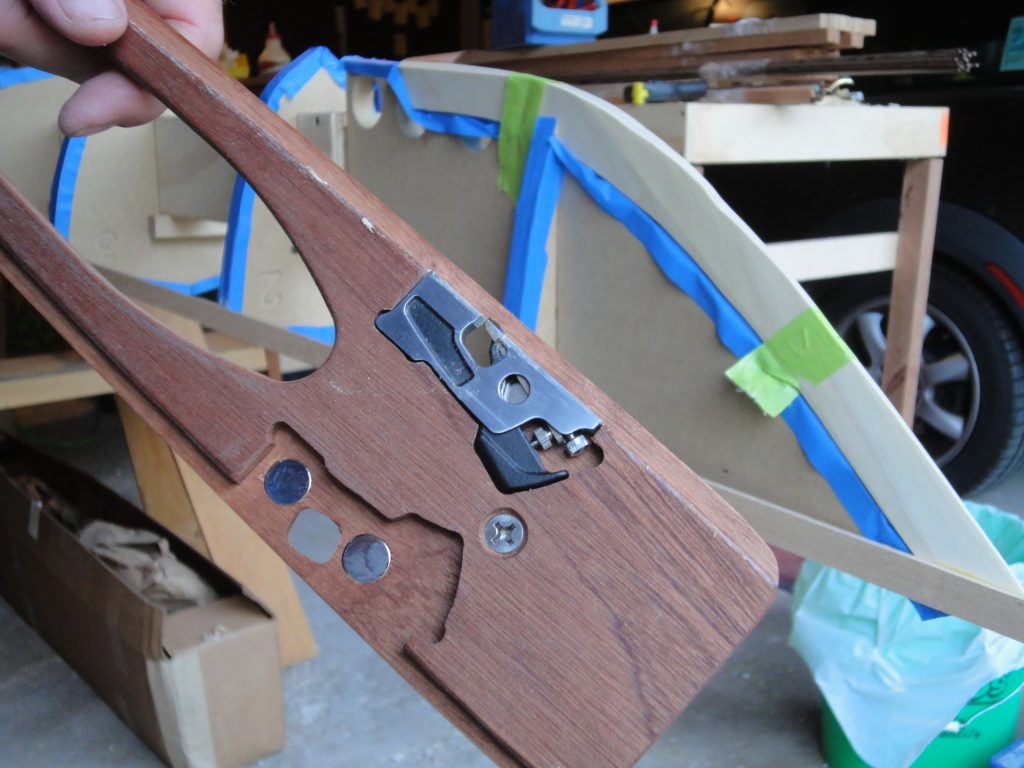
Robo-Bevel from Nick is a great way to bevel the strips that are already on the boat. I’ll briefly describe it, but his video and animation at the link above is probably the best way to see what it does. The Robo-Bevel is designed to use the Veritas Mini Shoulder Plane to achieve the beveling. It can fit in the Robo-Bevel two different ways allowing to to cut in either direction which is helpful to be sure you are planing with the grain.
The way the tool works is that you set the plane for a light cut, insert it into the tool, position the tool on the strip and lean it against the forms and then slide it down the boat being sure to keep it tight to the forms. As a result it cuts the strip at a right angle to the current form angle. This results in the next strip fitting tightly. Failure to get the bevel angle cut means a gap between strips or a gap between the strip and the form, neither of which is desirable.
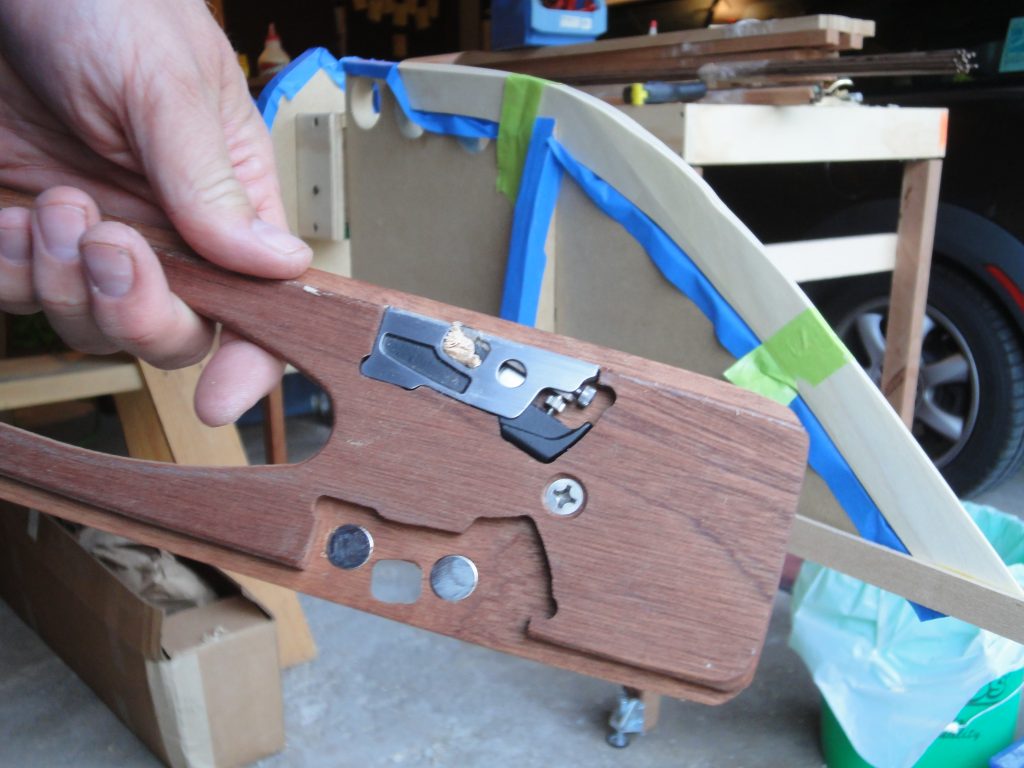
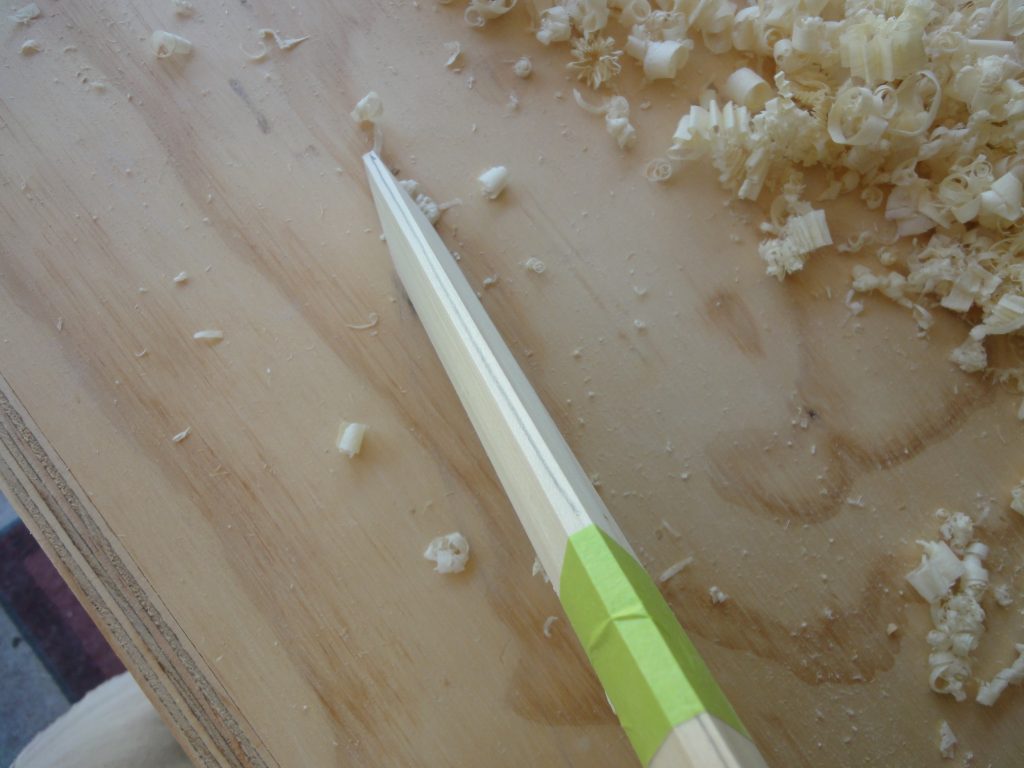
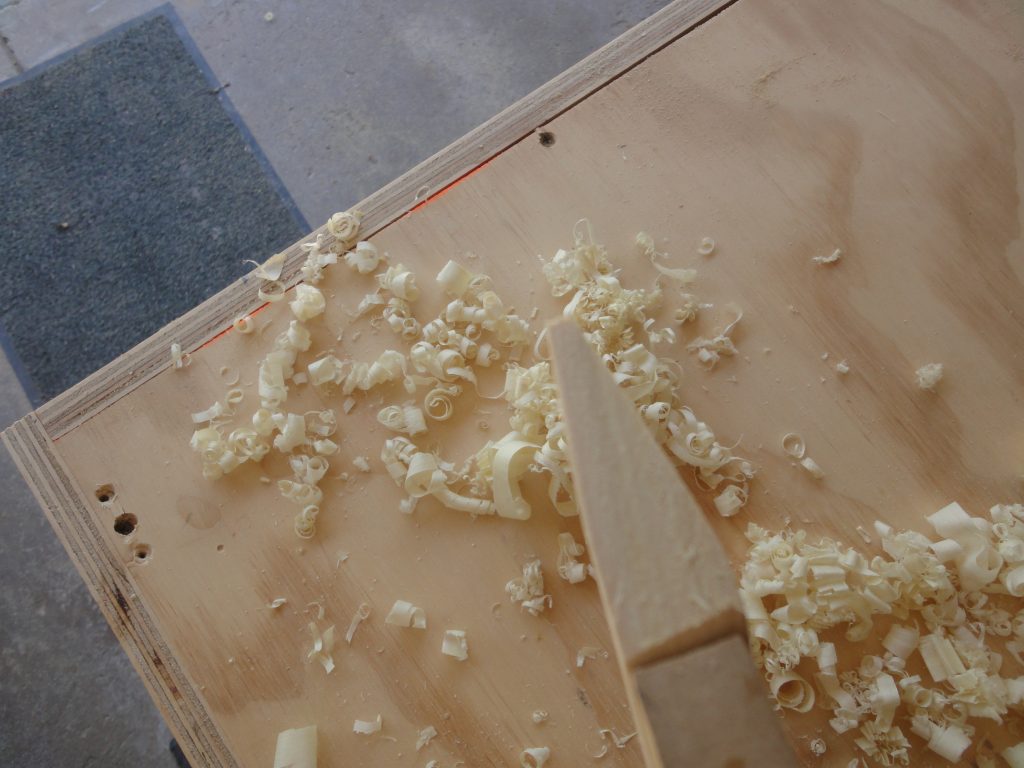
A minor frustration is that the area for shavings to accumulate is very small and quickly clogs. Use a pencil to clear it out.
In the following video you can see an example of it in use. Around the mid point I draw a couple of lines in pencil across the strip. If you aren’t sure that the cut is going across the entire strip, this is a good way to check. A full cut would eliminate the lines. Normally when beveling it starts with just a corner and as you make repeated passes more and more of the strip is being cut until finally you get a full width cut at which point the strip is beveled properly (assuming the tool was held against the forms) and ready for the next strip.
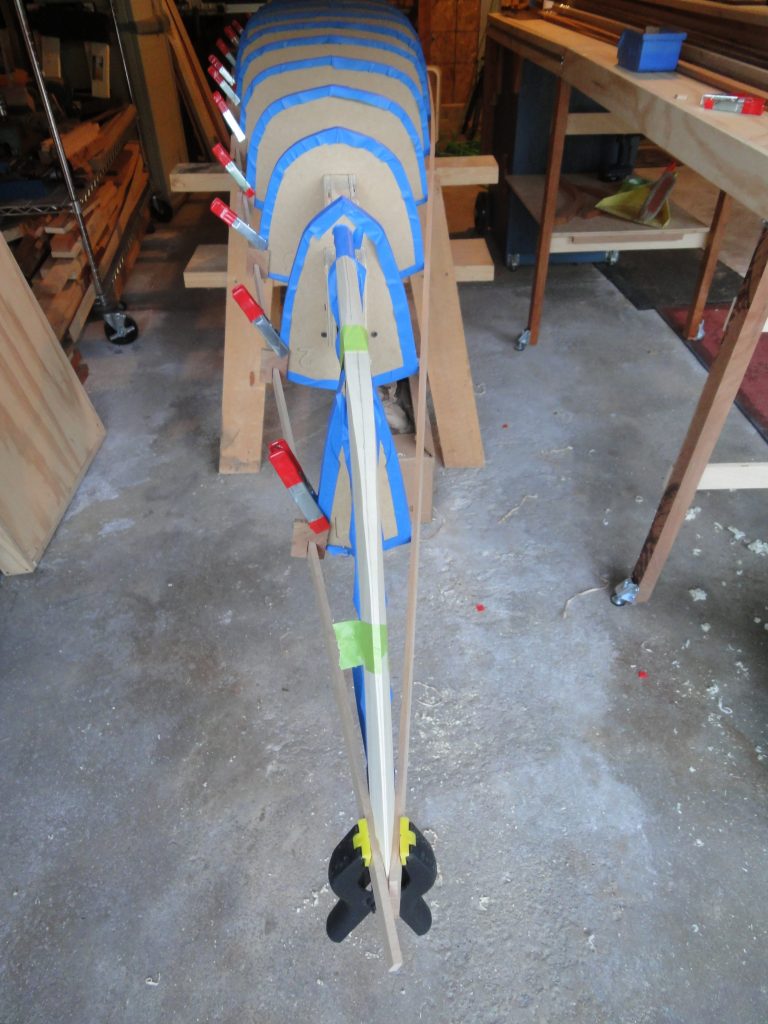
After beveling each strip, which at this point required pretty much just a single pass, I was ready to add the next strip. As more strips get added the forms start to curve (especially in the middle) more sharply then the tool will really start to come into its own. The next strip is a 1/8″ walnut strip meant to act as one of two accent lines. A thin bead of glue was added and the walnut was glued down. To hold the strips together and in alignment, Nick uses pieces of tape. I tried it and found this to work quite well. It acts as a clamp and also, if pulled tightly, an alignment tool that keeps faces in line.
At this point it’s going to be a lot of repetition as I continue to add strips.
Check strip fit against bow and stern, plane as necessary
Bevel previous strip to proper angle to accept this strip
Glue strip in place, scarfing joints as necessary
Tape/clamp in place
Hot glue to forms if needed – I’m aiming for every 5th or so strip but it’ll be done as necessary
Repeat.
So I will continue to do postings but the next handful may not cover much new information for awhile.
Exciting day. I was able to glue on the first strip on the other side so I officially have the first set of strips completed. Only about 60 more to go (for a guess).
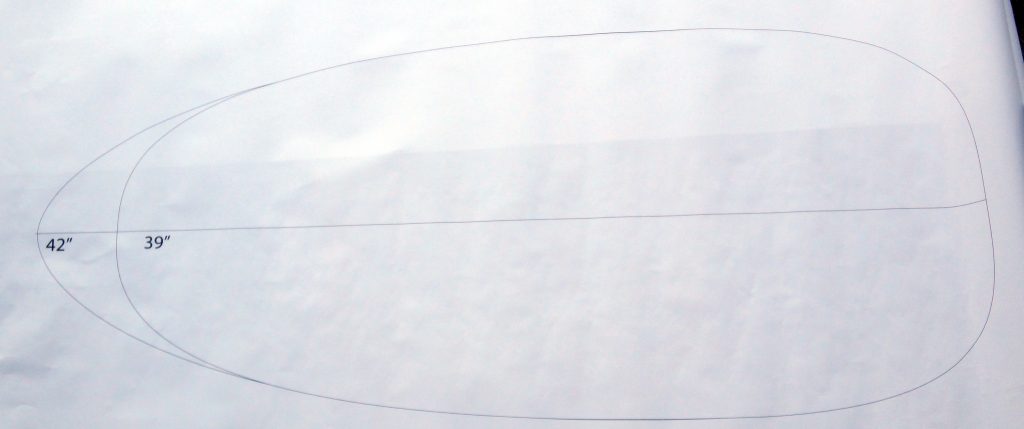
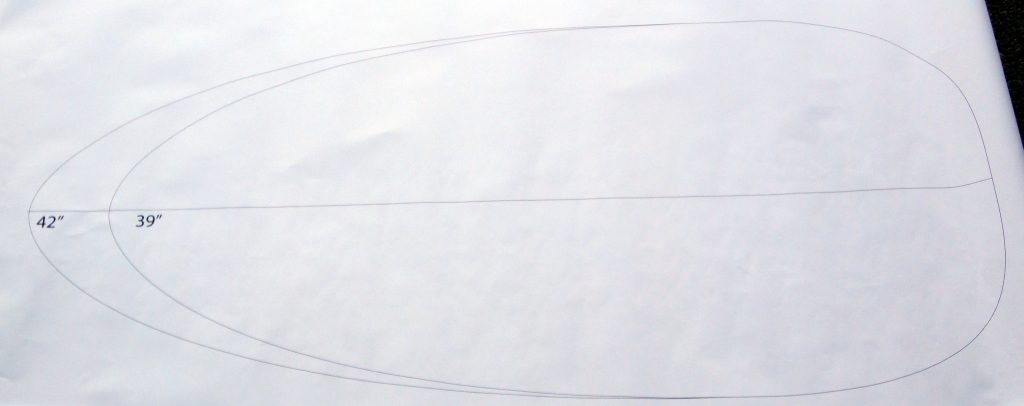
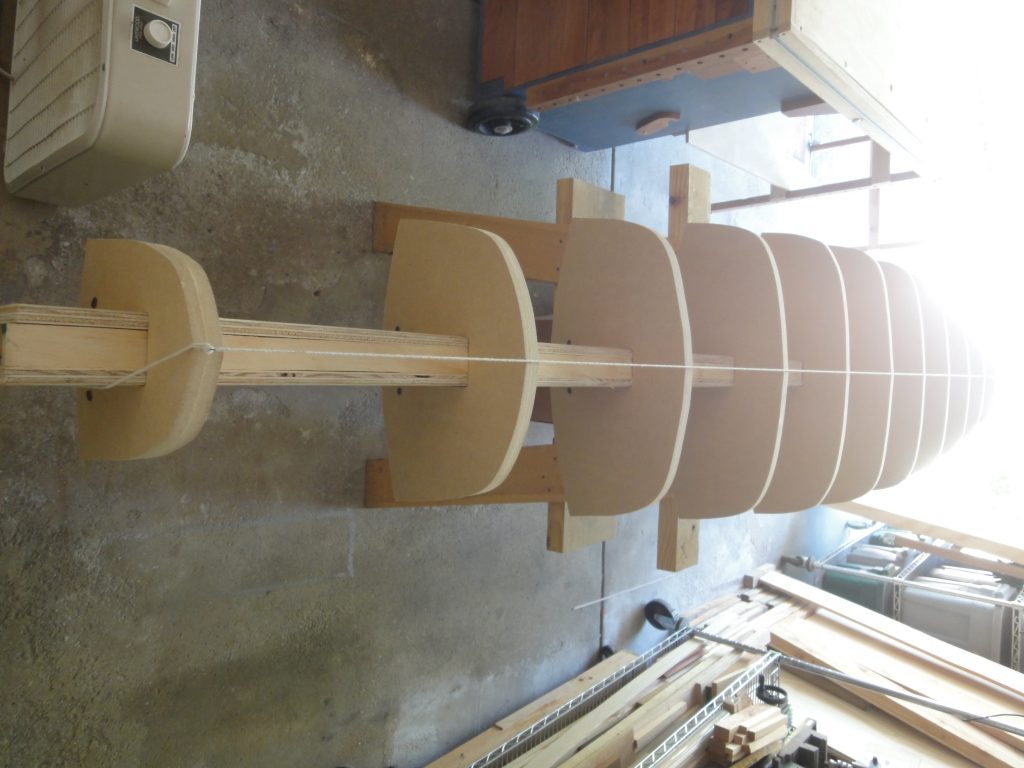
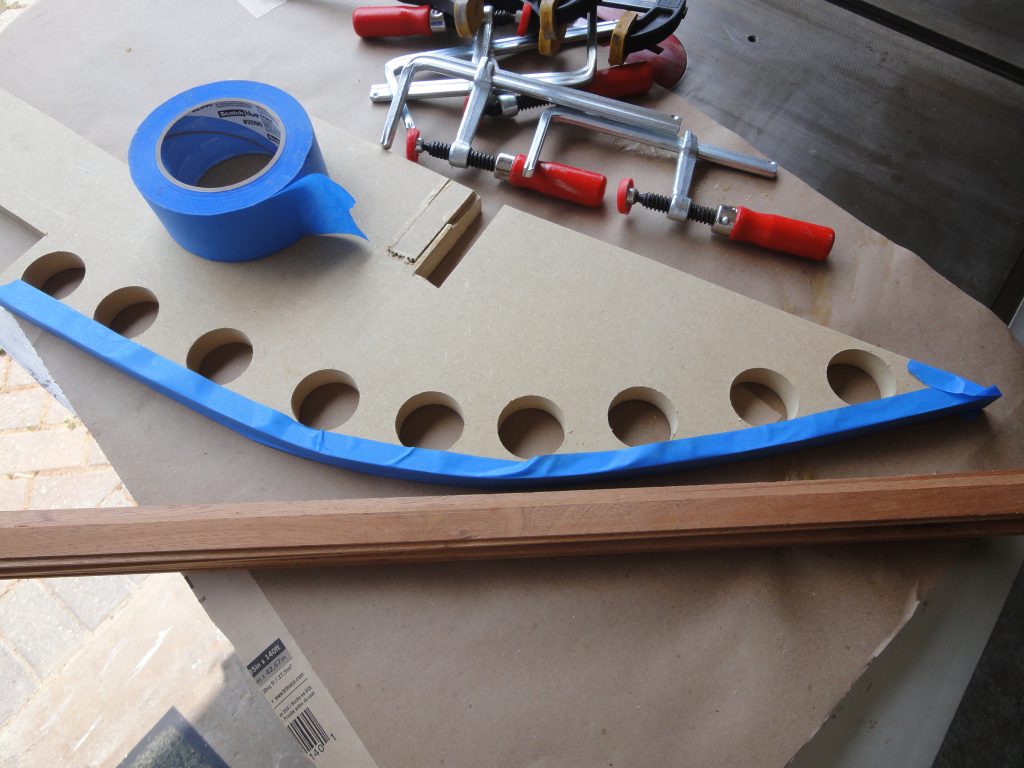
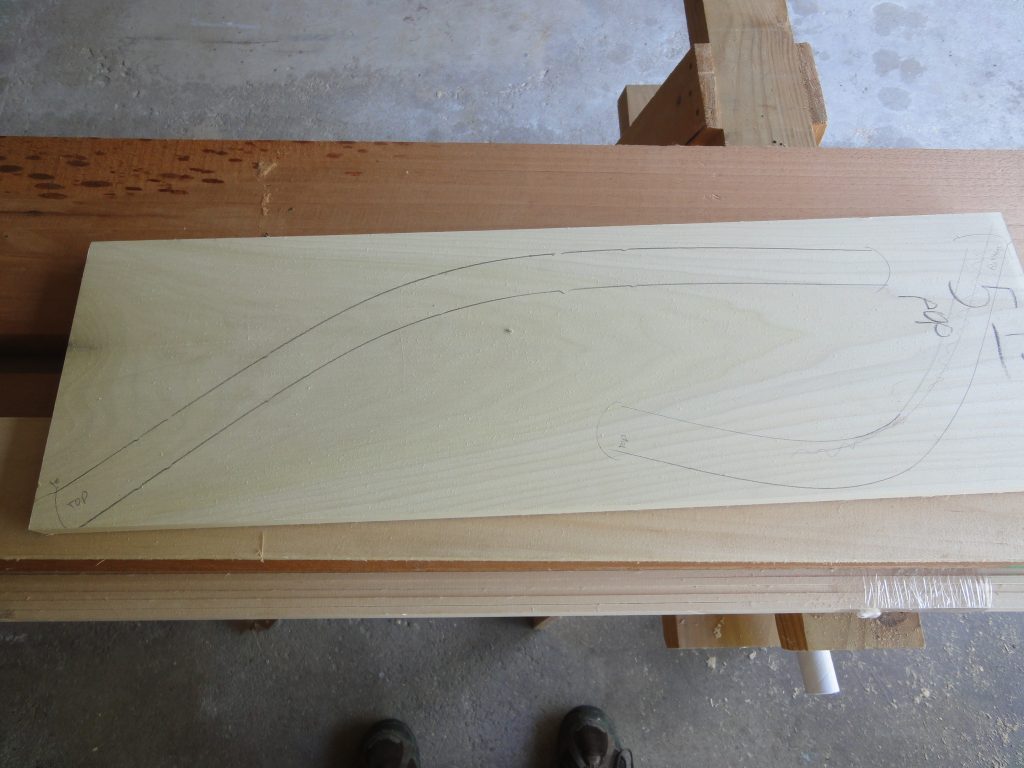
In other news I spent a bit of time and drew out actual size cockpit templates. The 42″ size is identical in both images, however the 39″ size varies at the front. I’m not sure yet which size or style. To test I’ll cut these out, place at about the height they’ll be in comparison to the bottom of the kayak and then see which I can comfortably get my legs into. If I can do the 39″ size then I could still cut the 42″ and do a bit of a recessed coaming at the front to bring it back to 39″. It would be pretty much just for aesthetics and certainly is not required but after seeing many kayaks built this way I’m considering it.
Progress. I got one strip on before deciding that was enough for today. Also because I only had one strip ready to go. Looks like I’m going to need to glue up a handful of strips if I want to do more than one per day.
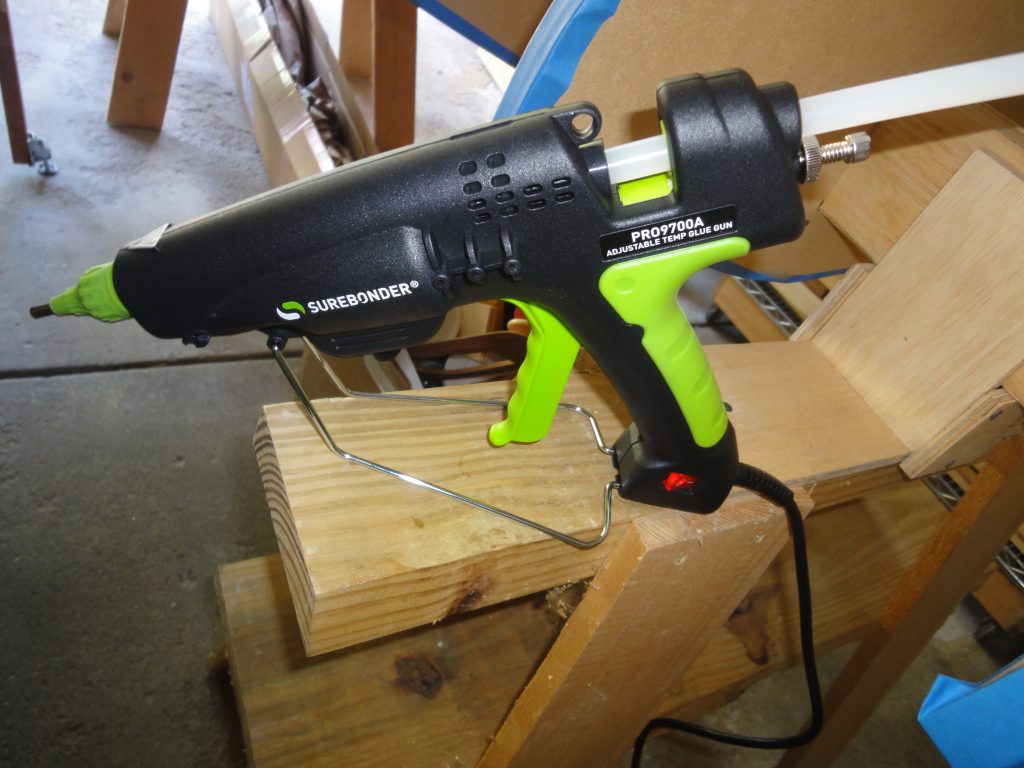
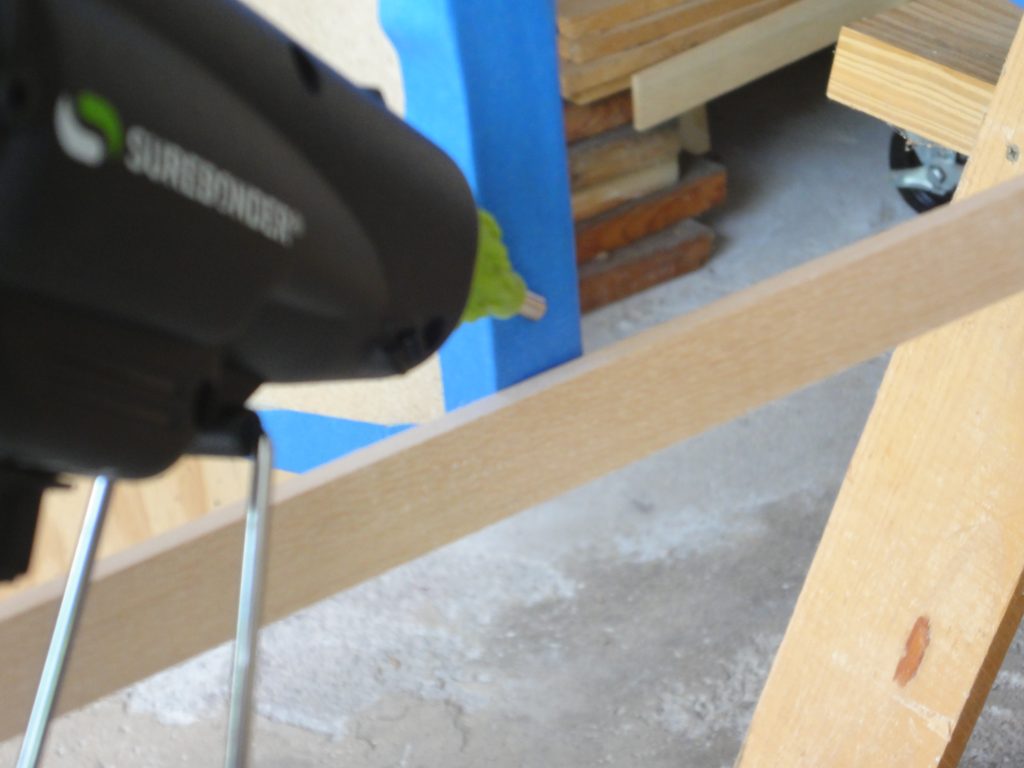
To start I wrapped each form in tape to avoid accidentally gluing the boat to the forms at some point. Also because I do want to glue the boat to the forms in a few selective areas but also have it release easily. For the first time I’m using the hot glue gun from Surebond and the corresponding glue sticks to help hold things in place.
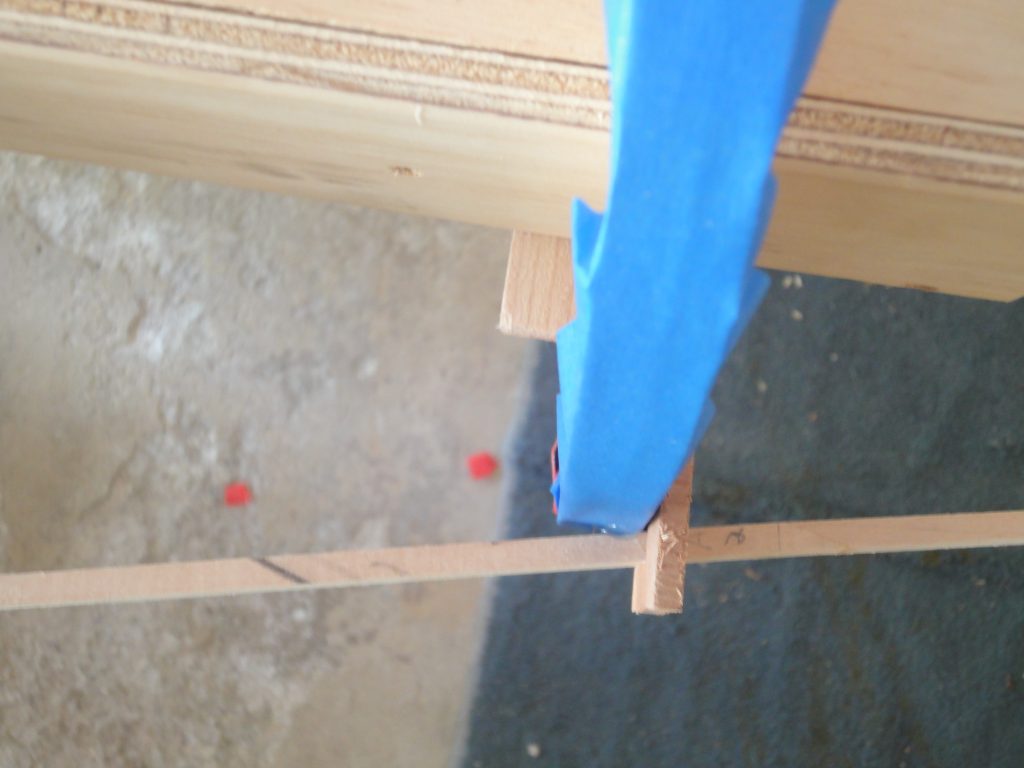
Most of the efforts today went to shaping the stems to support the first few strips and to get the rest of the stem at least close for the remaining strips. As I progress I’ll need to fine tune the bevel angles on them. Once they were shaped and taped back in place I put the mini holders in place to hold the strip and put the first one in place. It fit well so I glued it at the bow to the poplar stem and then glued it at each station to the forms using hot glue so I could “knock” it loose later. Notice how it isn’t flat against the form but rather touches at one edge. This is normal as the sides are not perpendicular to the forms. I could have beveled the forms too but it shouldn’t be necessary as long as the strip touches the edge. For the front half of the boat it should be the forward edge and the back half the rear edge. The middle few forms actually do almost completely touch the strip.
Since hot glue sets up in just a minute or two at most I was able to check and any spots where it didn’t stay attached to the form I re-glued. The mini holders, in some cases, were inverted and used to pull the strip tightly to the form and hold it in position while the hot glue set up. When necessary more than one clamp was used to keep everything aligned and tight. This is the second use of the holders, acting a clamp extension to exert pressure in towards the form, and/or up or down on the strip.
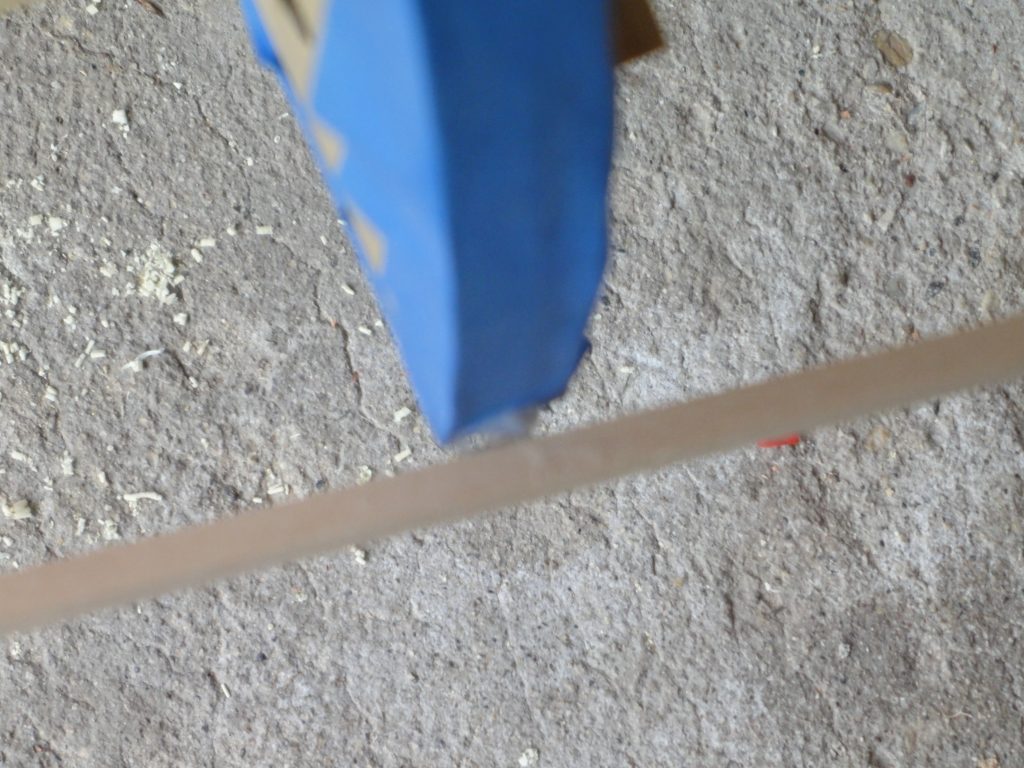
On the stern the strip simply was not going to make the bend from the previous form to the tip of the stern so I let it lay naturally. Later on I can fill in some short angled pieces to complete the curve.
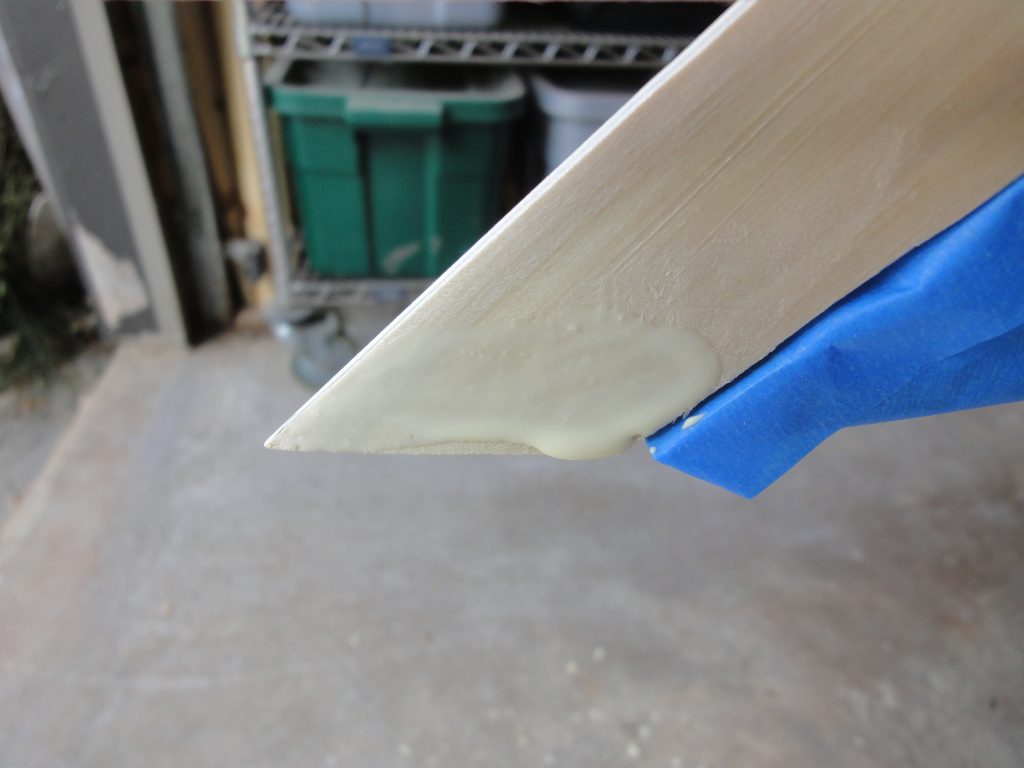
A couple of remaining clean up steps involved trimming the overhang at the bow and stern. It was not intended to be a perfect cut but rather just enough so the opposite side strip would be able to lay naturally and not hit this strip. Later this whole area will be cleaned up via cutting and/or planing after the stripping is mostly done so the outer stems can be attached. I also removed any hot glue squeeze out (in the photo below at the top of the strip against the blue tape) as this would interfere with the next strip.
Today was a day for completing some of the tasks that still needed doing and then moving on to the next phase in the process. I started with cutting up the Spanish cedar board. Due to the grain on it I sliced off two 3/4″ pieces, then turned them to cut out the strips. The remainder of the board was sliced into the 2″ x 1/4″ pieces and then those were further trimmed into two 1/4″ x 3/4″ pieces. Basically the same process as yesterday. Being as the cedar is a different color, once again I saved some of the saw dust (aka wood flour) for filler later on in the process.
I was about to start cutting up the last basswood board but thought it might be good to see if I need to or not. By my off the cuff calculations I would need around 900-1000 linear feet of wood to construct the kayak. However when I searched to see if this was consistent with what others used, I found a formula at CLC to calculate the necessary amount of strips. Essentially the formula is ((length in inches X widest point in inches)/144)*18 to get the total number of feet. In my case, 16’6″ = 192″ + 6″. I rounded to 200″. The widest point is just over 25″ so I used 26″. This yields 200 * 26 = 5200. Then 5200/144=36.1111. Finally 36.1111 * 18 = 650 linear feet of wood. Substantially less than what I had calculated.
Counting up what I cut so far I get the following:
Walnut 1/4″ x 1/8″ – 140′ +
Walnut 1/4″ x 1/4″ – 70′ +
Spanish Cedar 1/4″ x 1/4″ – 35’+
Spanish Cedar 1/4″ x 3/4″ – 320’+
Basswood 1/4″ x 3/4″ – 670’+
So for the main 3/4″ wood strips I have in excess of 990 linear feet. If the estimate formula is correct I have more than enough. If my calculations were more accurate then I’m going to be short and will need to cut that remaining piece of basswood at some future point. Since it’s a nice chunk I feel the best course of action is to wait and see. Cutting it is relatively easy if it does end up being needed.
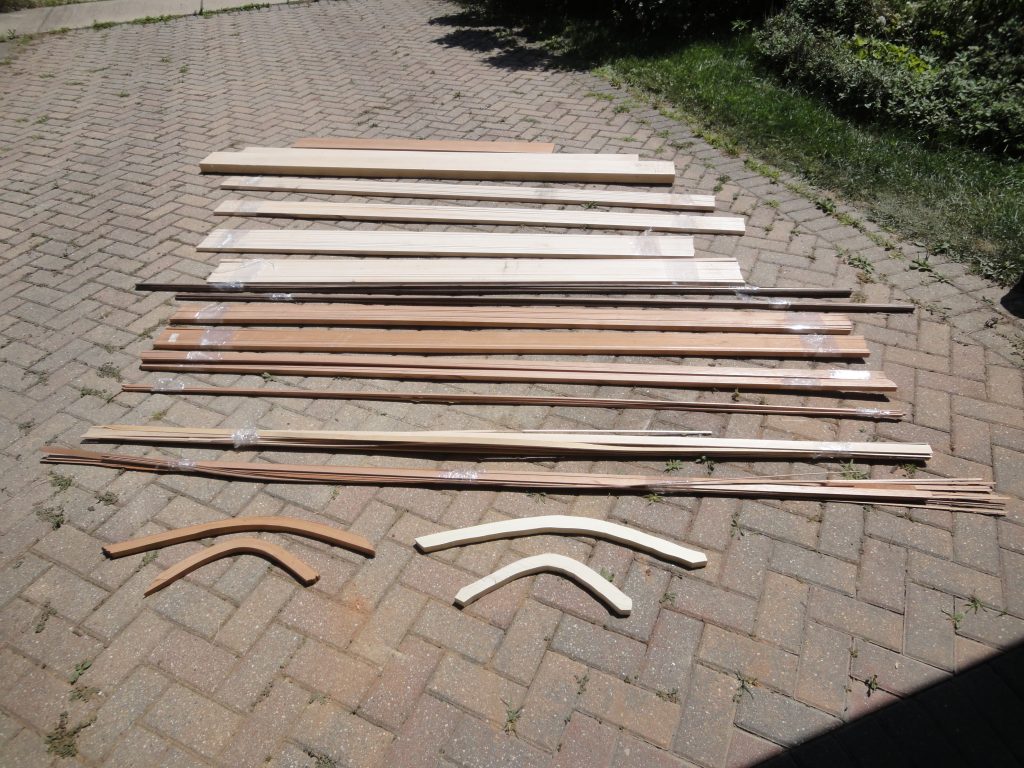
Reviewing what I have prepped (from the bottom up in the following picture):
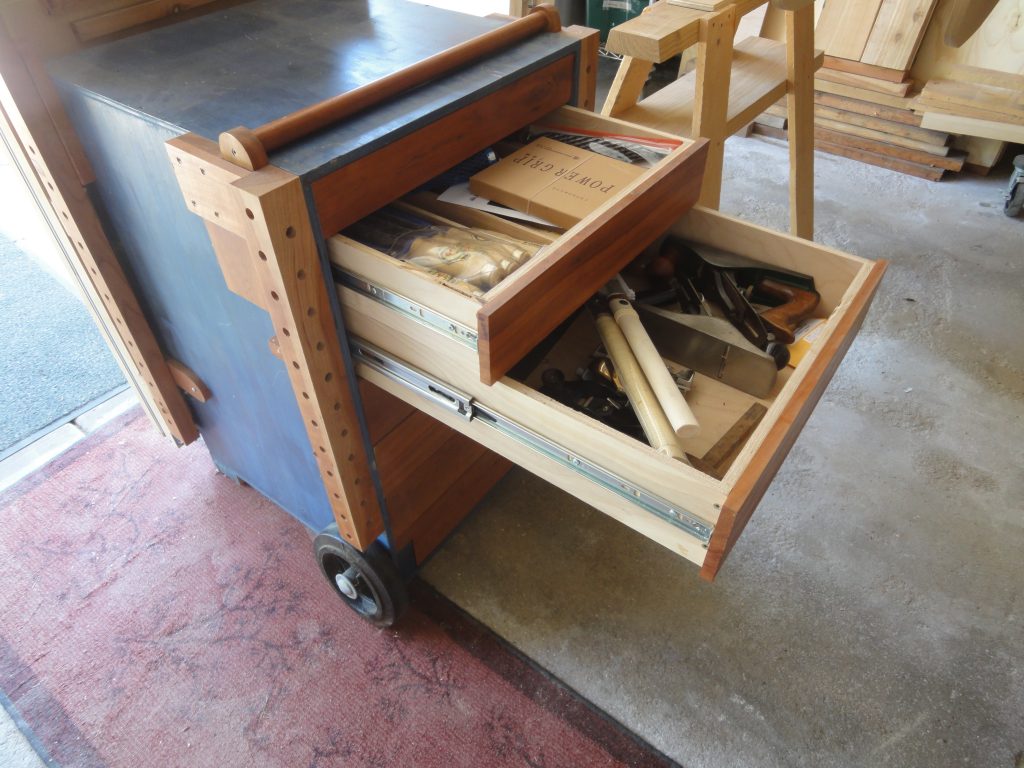
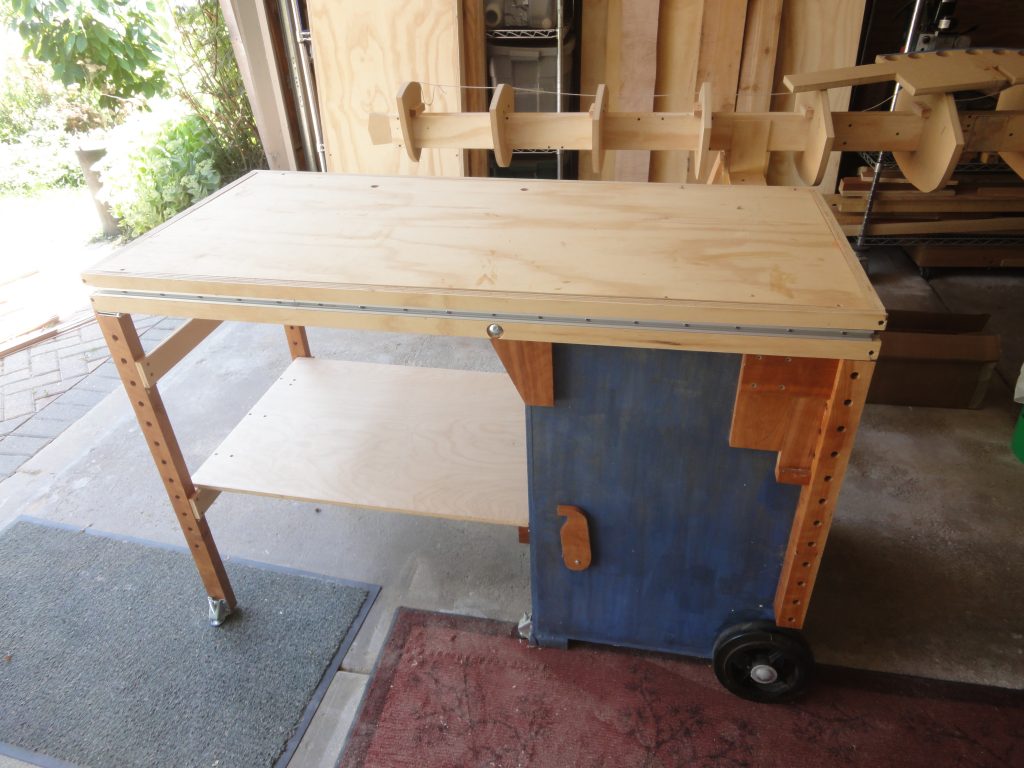
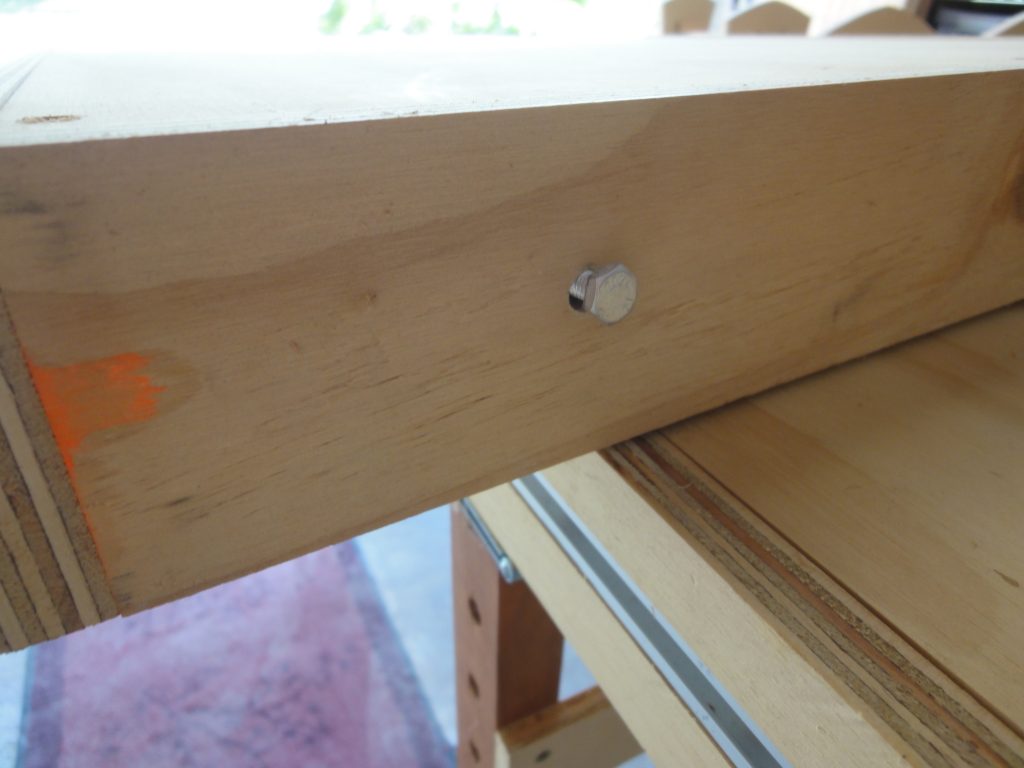
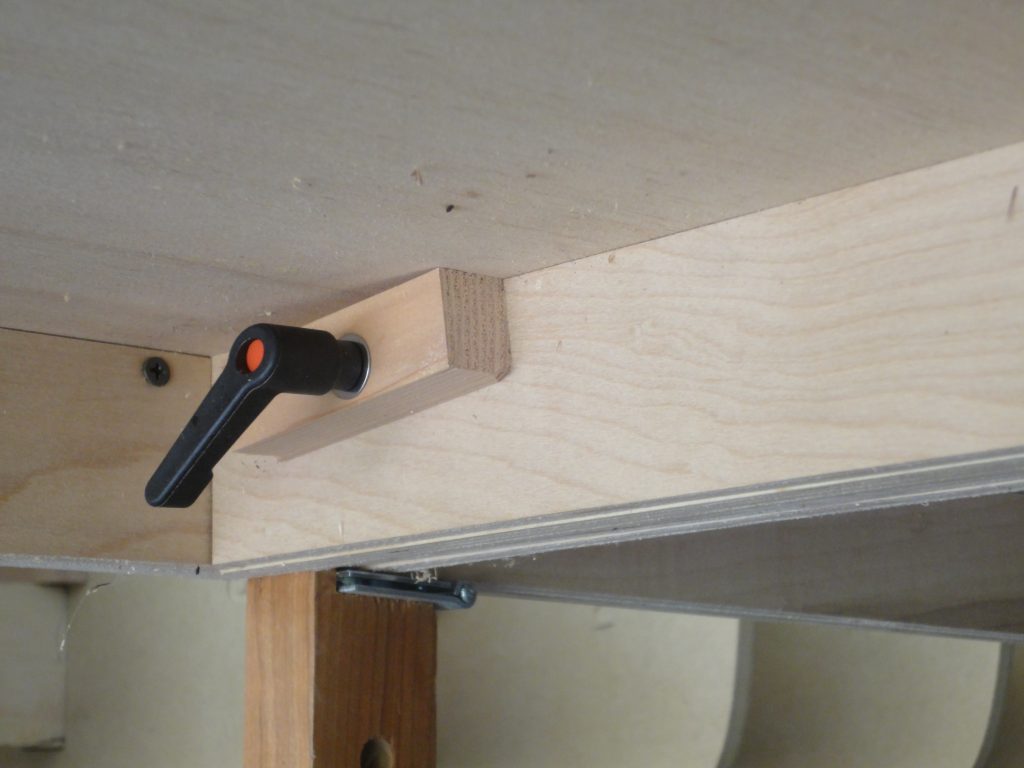
I brought the kayak down and placed it back in the cradles on the saw horses and then setup my portable work bench that I made a few years ago. If you like it, I made it (with some modifications) based on this cart plan I found online. The woods are painted plywood and cherry. The drawers have a positive locking when closed. You need to push to release and open them. It moves around like a “2 wheeler” utility cart. When ready to work the top folds down and a lower shelf is placed to lock it all in position. The T-track trim allows for additional “top” pieces to be slid into place using matching fitting bolt heads and twist lock handle. With the two extra tops I built I can do a 13’+ long bench or a T or L shape. For now I’m just using one piece to give an almost 9′ long workbench.
I checked the alignment and it’s still good. The kayak strong back was flipped over so I could start working on the hull first.
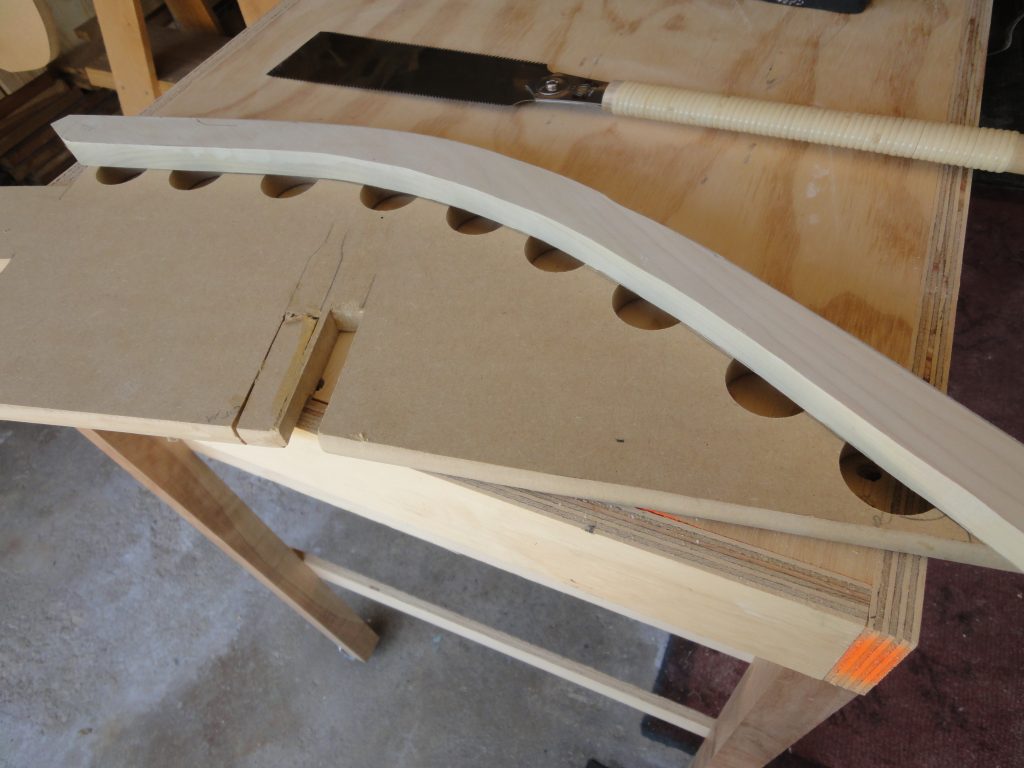
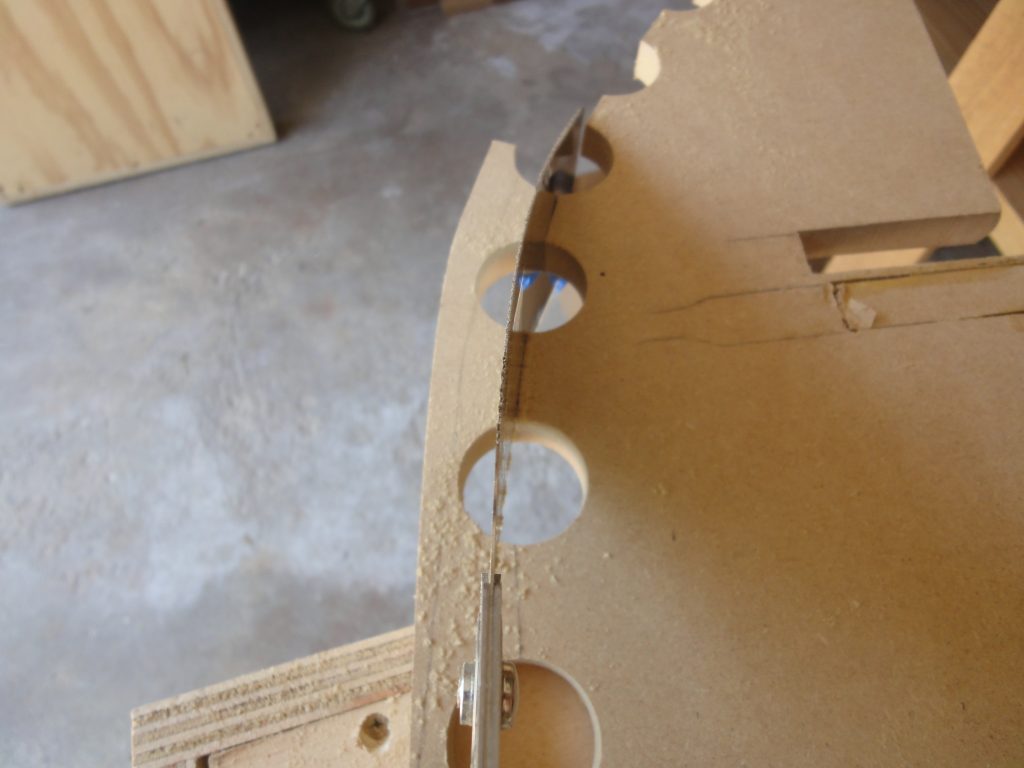
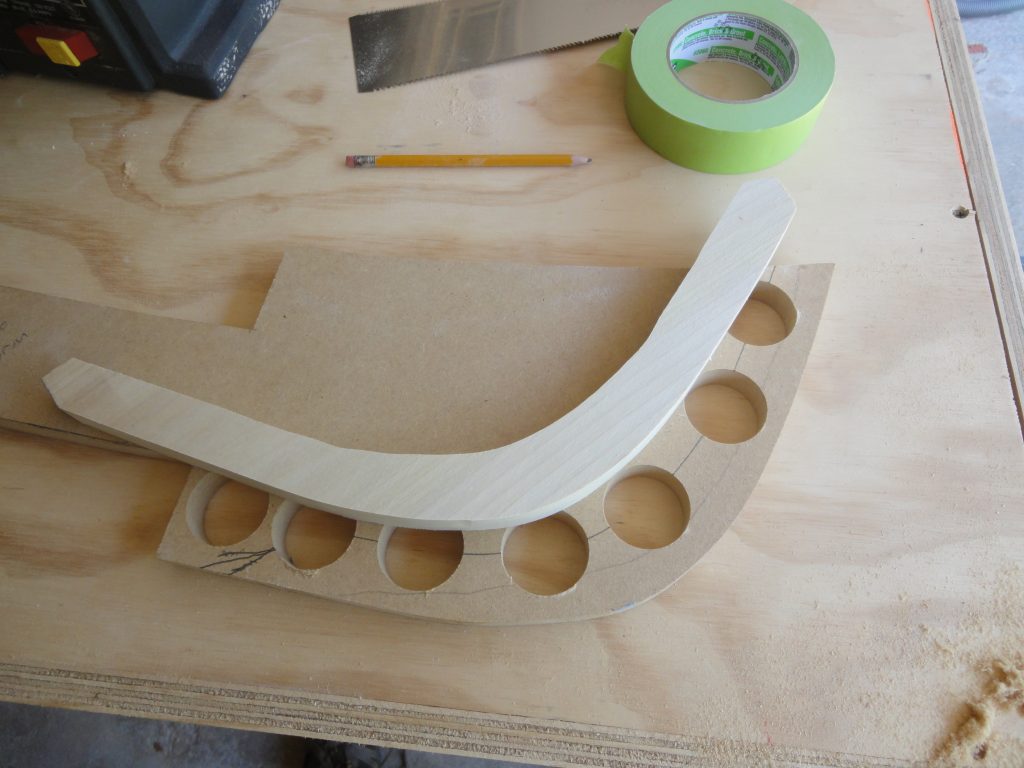
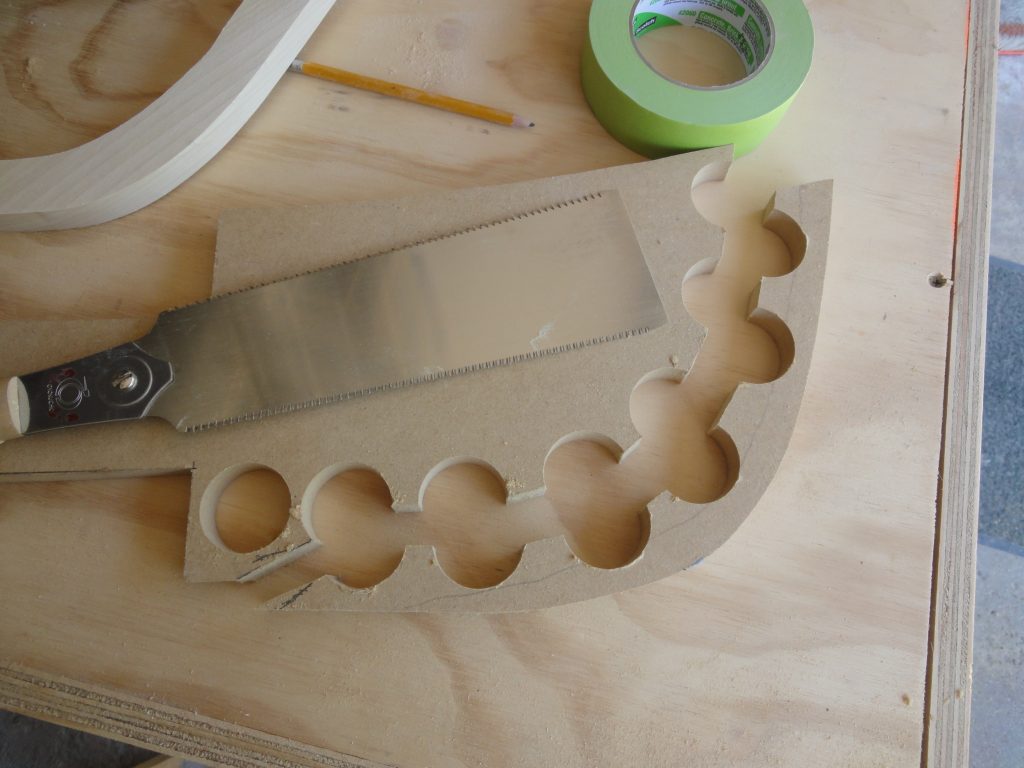
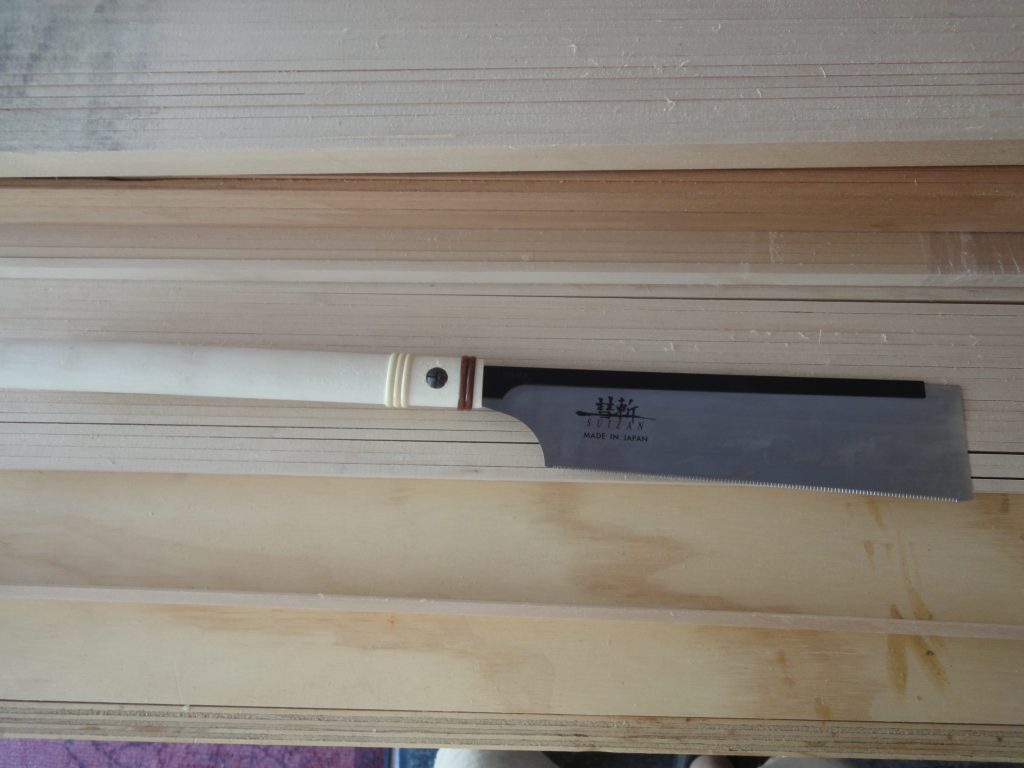
I forgot to get pictures of the sanding of the inner stem pieces. They were sanded to the line and the curves were smoothed out. These pieces were then laid on the bow and stern forms, traced and the the forms were cut to allow the inner stem to fit. Once nice feature of the Japanese pull saw is the ability to cut a curve.
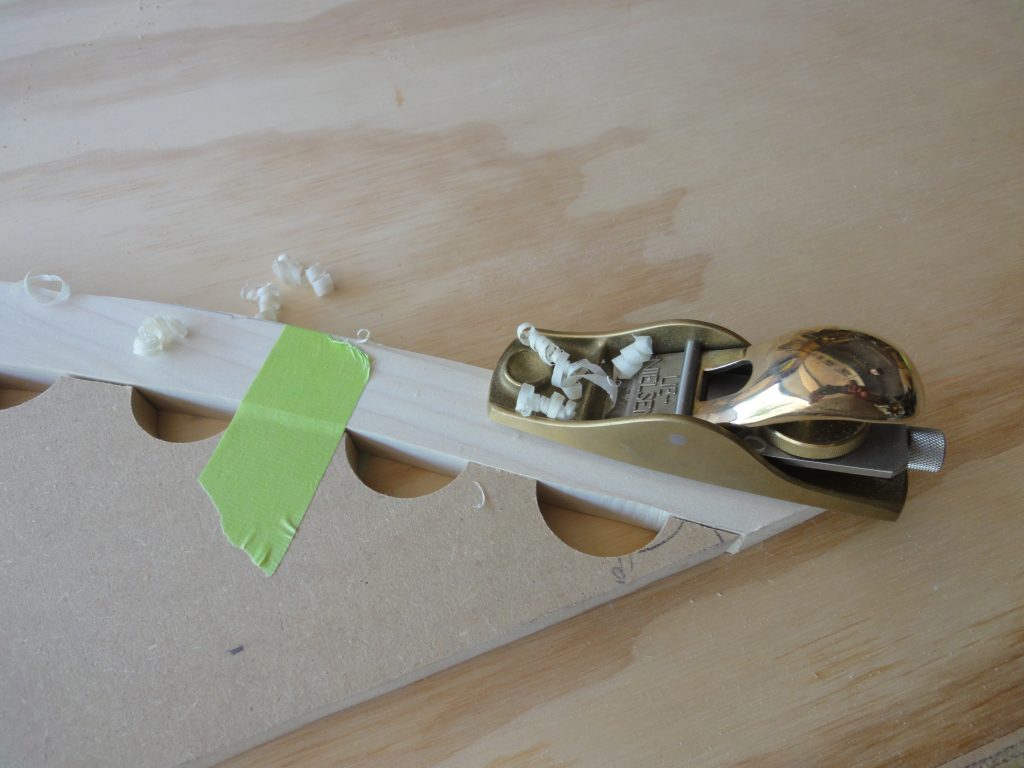
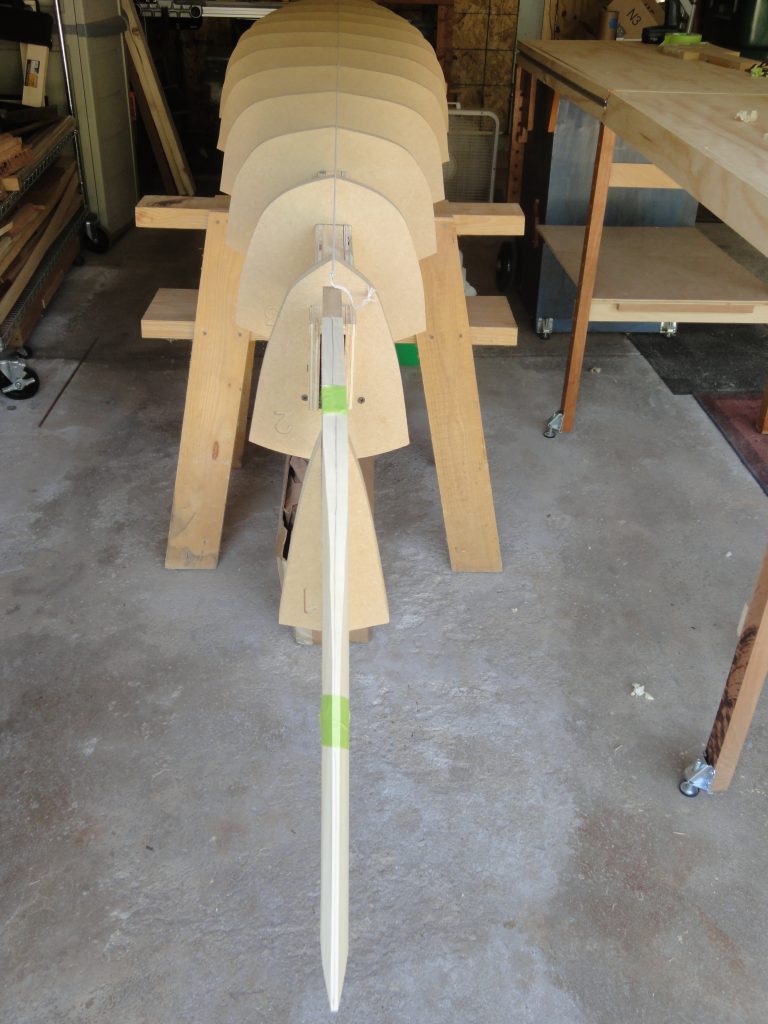
Next a center line was marked on the stem piece. In order for the strips to sit properly and meet at a point the stems have to be shaped to a wedge shape. It doesn’t have to come to an exact point but should be close. I started to plane down both sides until I had what I felt was an approximate shape. I added the bow and stern pieces to the strong back, flipped the entire framework over and then rechecked alignment. So far so good.
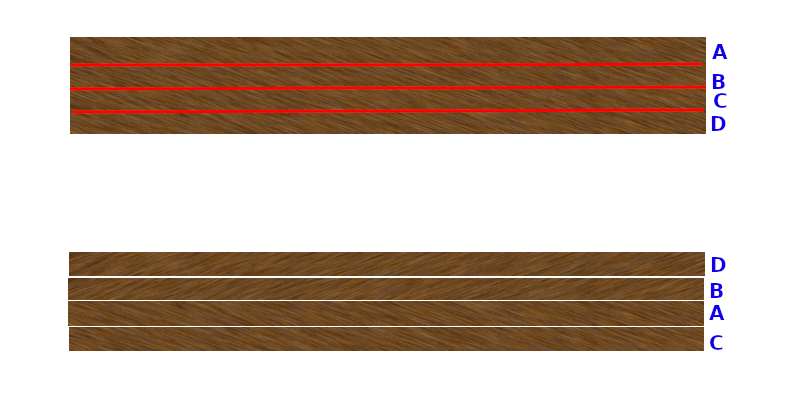
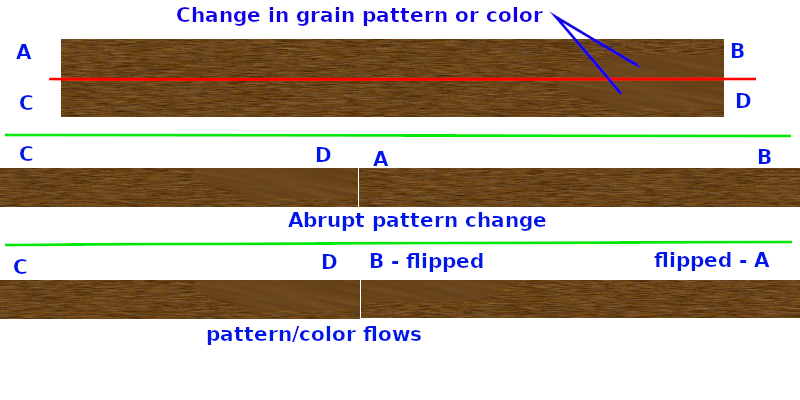
As promised, it’s time to discuss the reasons for keeping the strips in order. There are a few. First is if you plan to book match the strips. Basically alternate them and flip them over so, like a book, one side mirrors the other side. Basically in order A, B, C, D becomes D,B,A,C. Essentially you put down one strip. Take the next, flip it and put next to the first. Take the third and don’t flip and put on the other side of the first. Take the forth, flip and put on the other side of the second and so on. Probably easier to describe with a picture.
The other reason is if your strips are not long enough to make it fit in one run. In this case any variation in grain or pattern or color may show up where one strip meets the next one as an abrupt line. To make it transition from one to the next with almost no visible line you take strip one, flip strip two and connect the ends. This way both came from the same spot on the board and should be very close in matching both grain and color allowing for the splice to all but disappear. Again, let’s see a picture.
For the basswood sections of the hull it’s the grain matching that I’m looking for to make multiple pieces look like one long continuous piece. When I get to the deck with the cedar areas, no area should be longer than a single strip so I intended to go for the book matching look. Both reasons necessitate that I keep track of the strips order as they originally were.
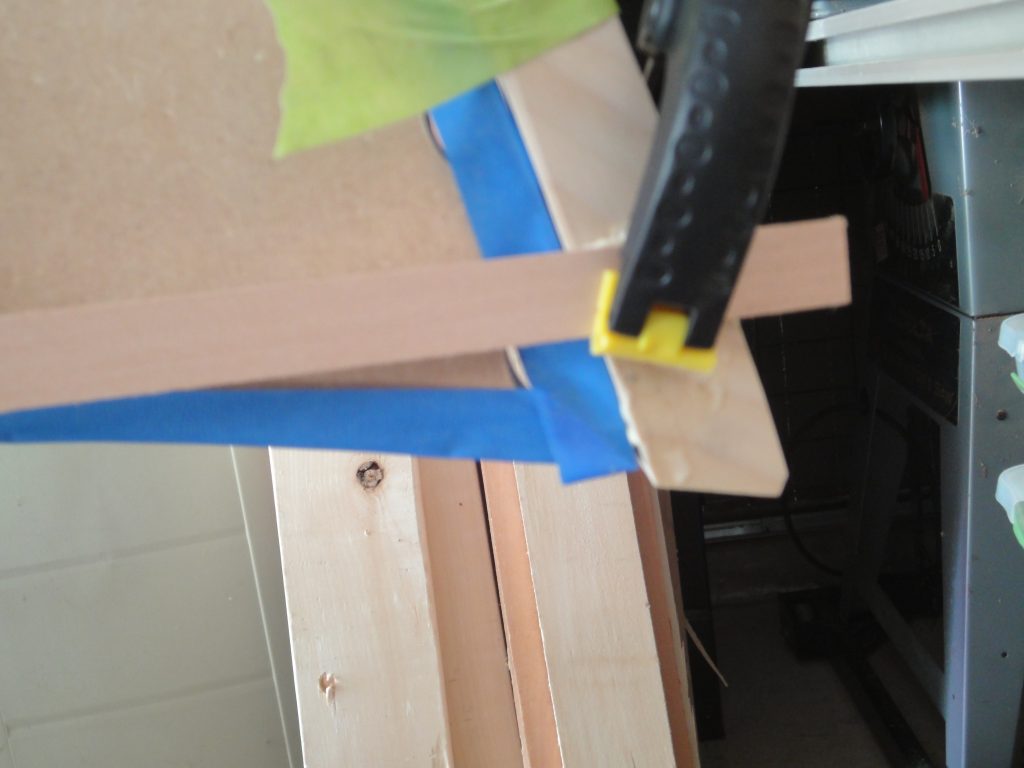
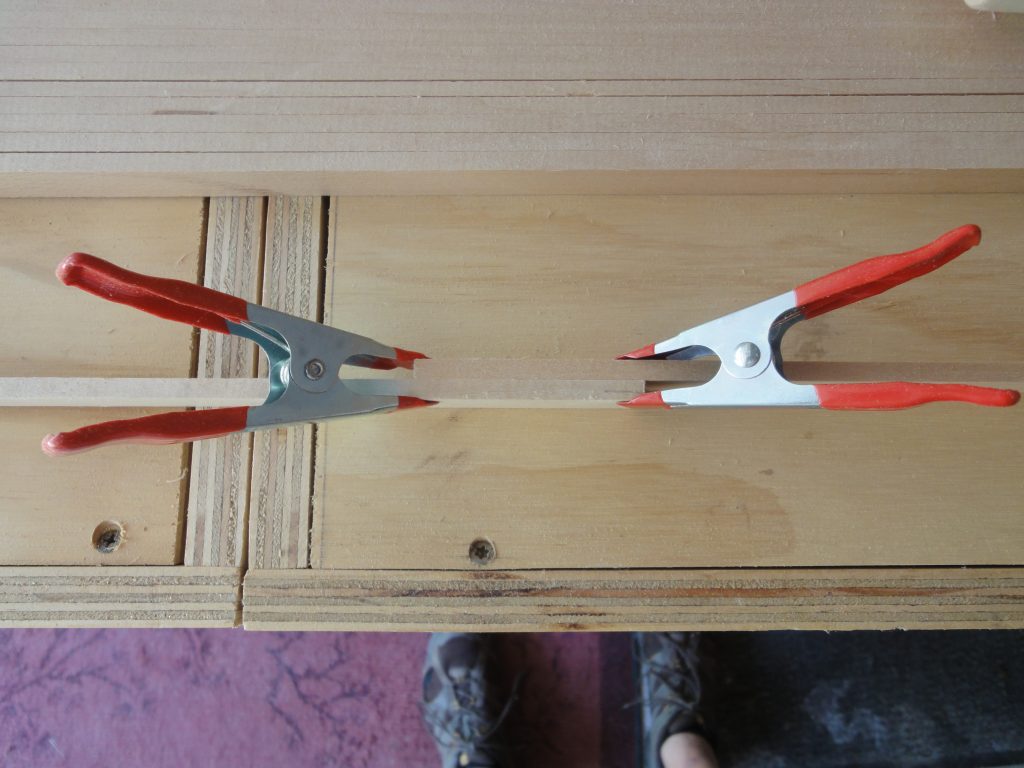
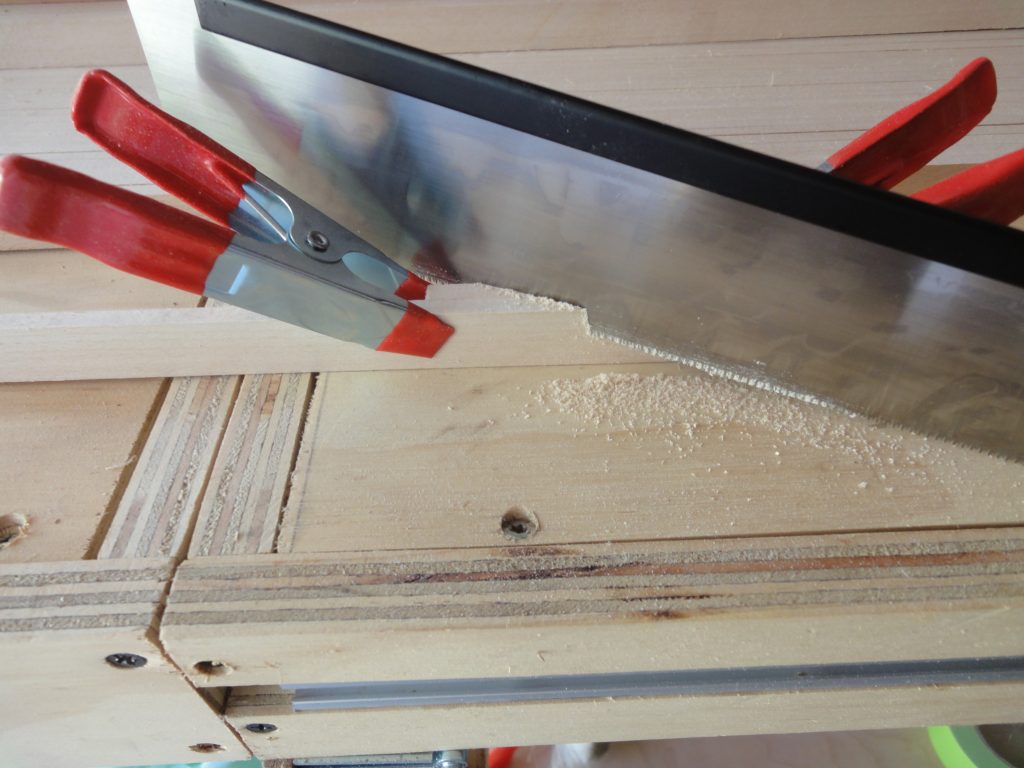
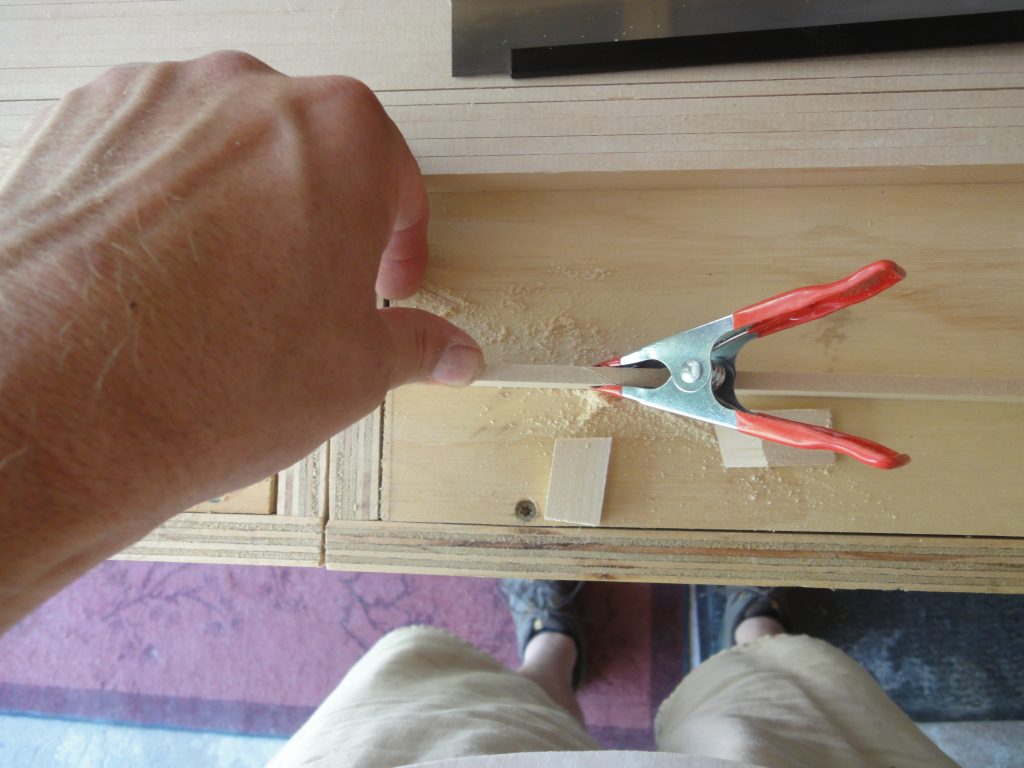
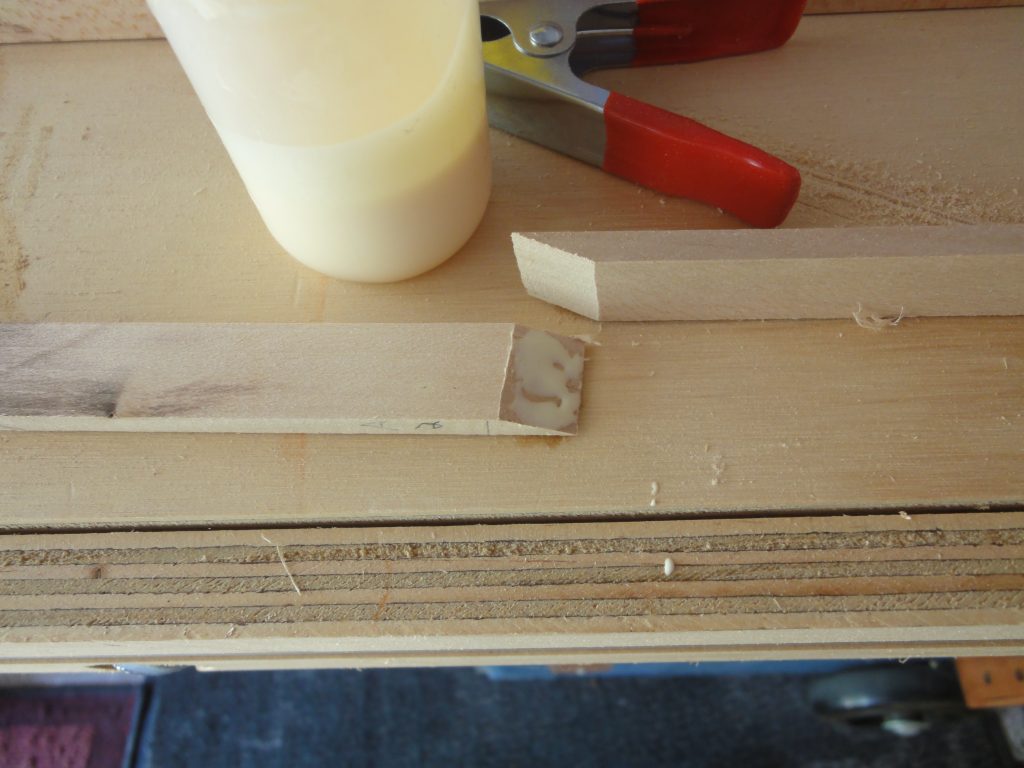
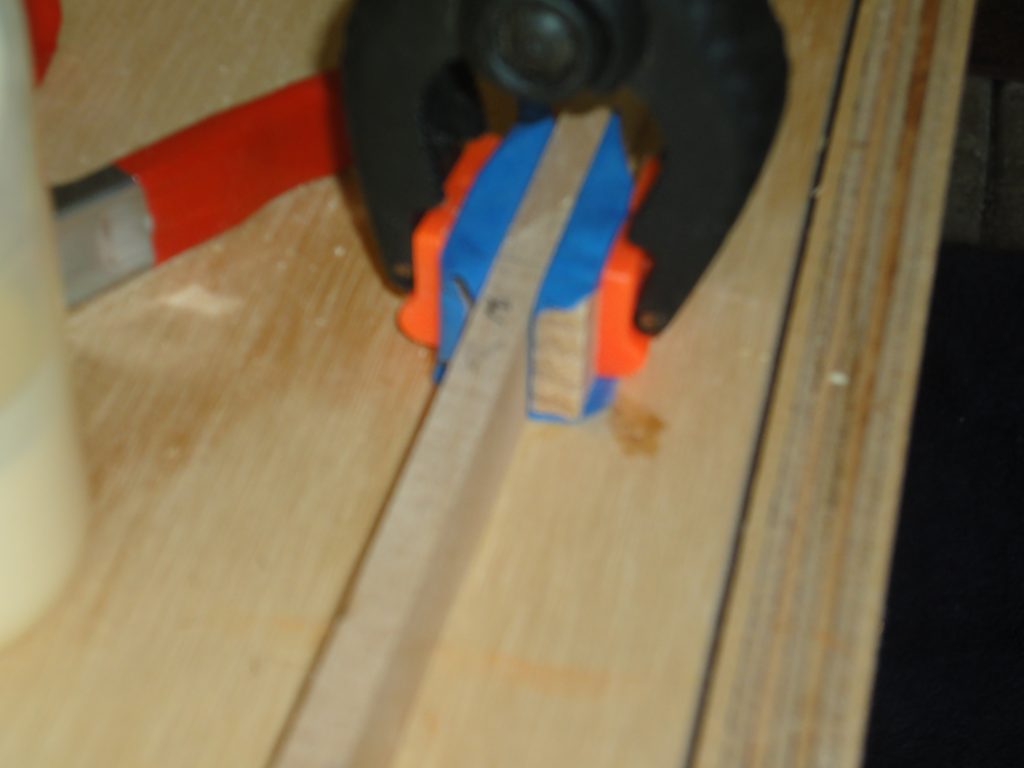
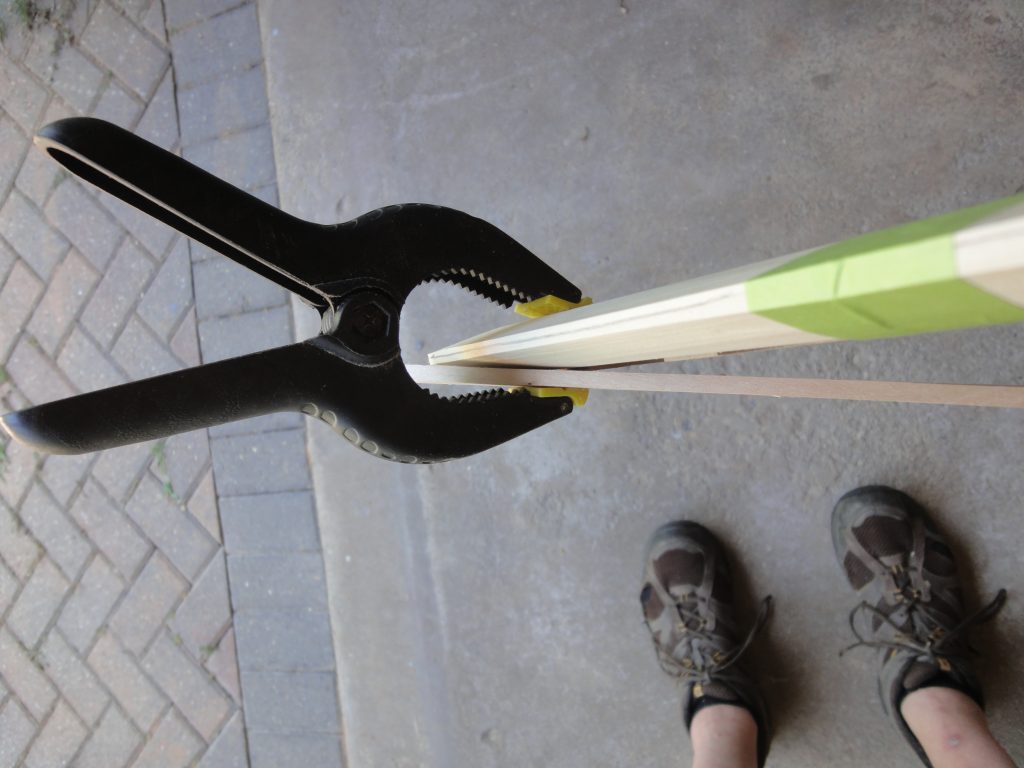
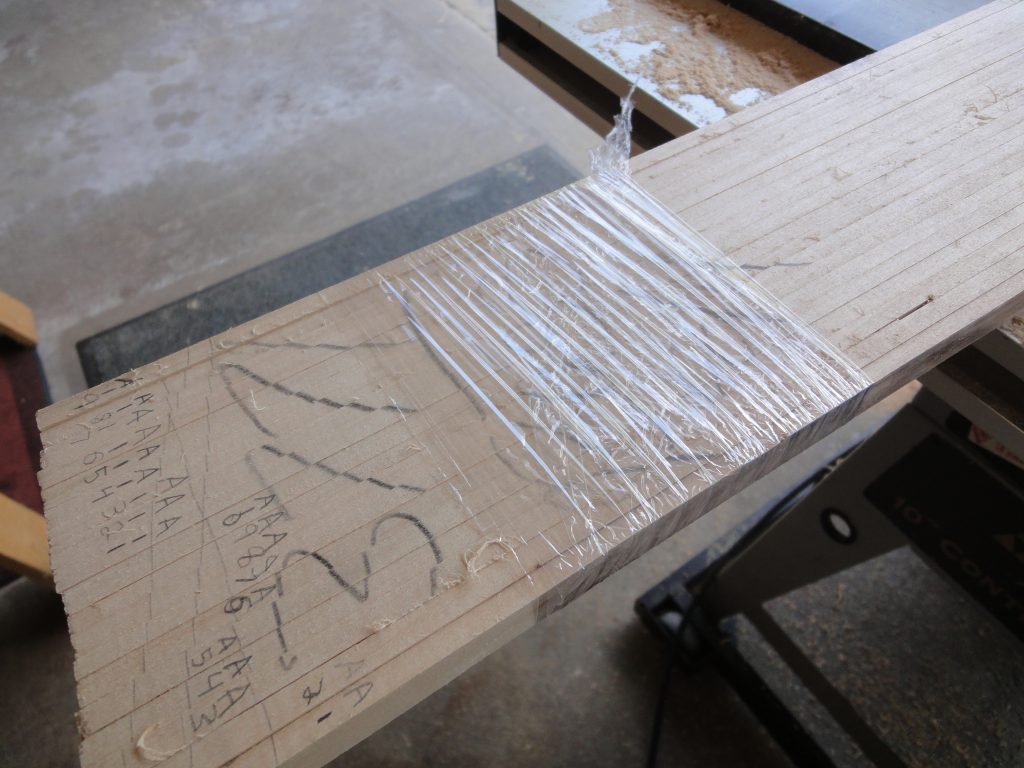
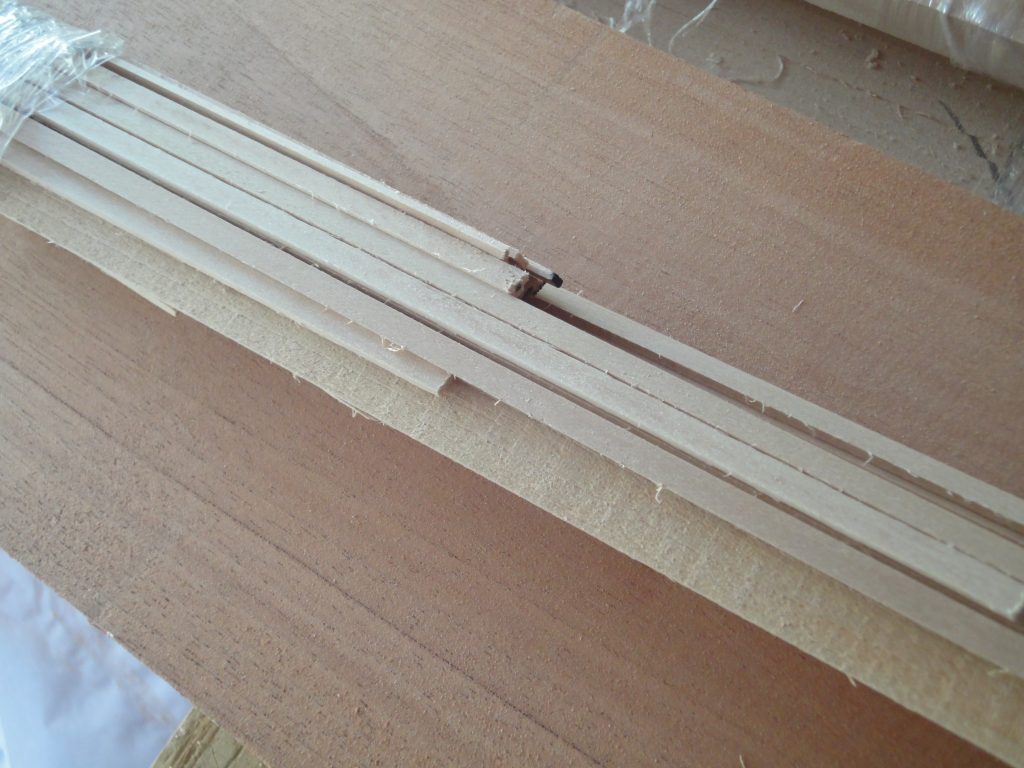
Putting this example into practice, I used a Japanese dovetailing saw to cut a scarf joint after clamping the two pieces together. Any clean cutting saw would work fine. By cutting both pieces at the same time you end up with a joint where both halves are going to be a perfect match. A test fit with the clamps shows it to be nearly invisible. Once the new longer strip is in place on the kayak and scraped/sanded the joint should disappear to all but the most close up careful inspection. I wrapped the off cuts in tape to use as alignment blocks, glued the joint and clamped it all together.
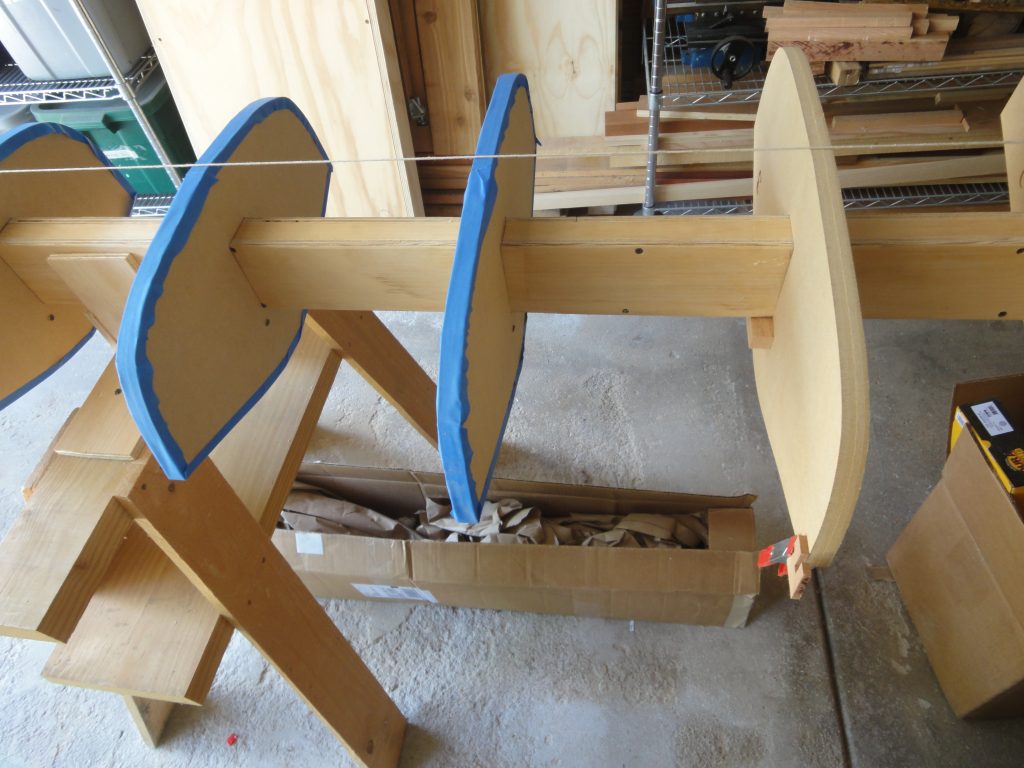
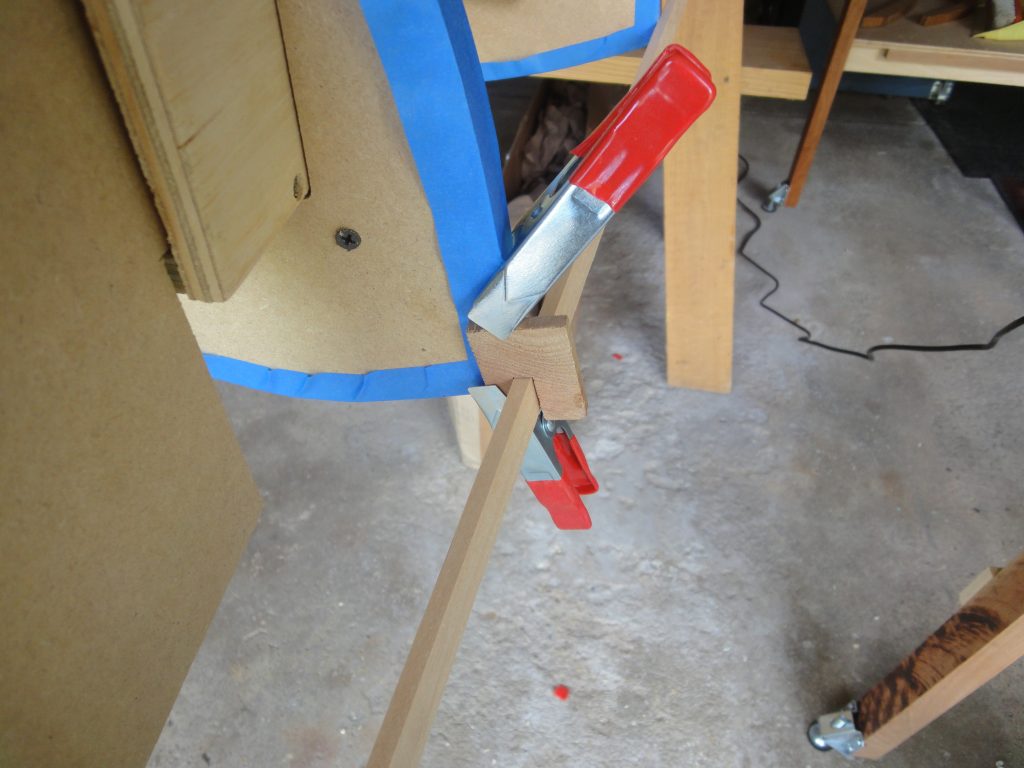
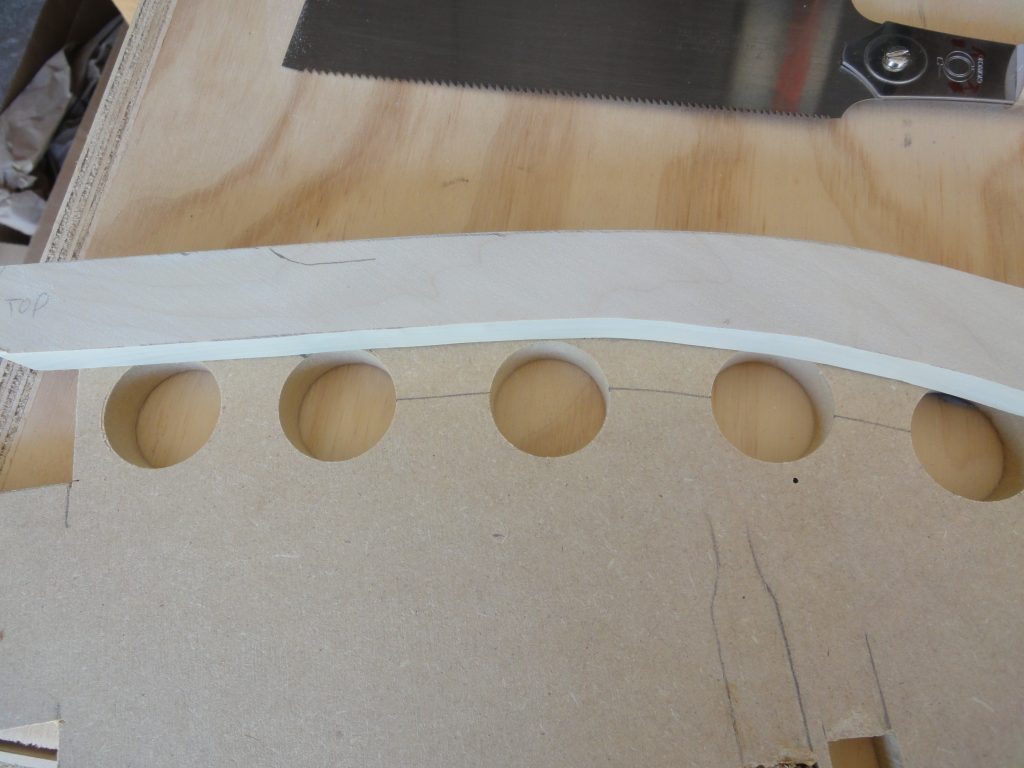
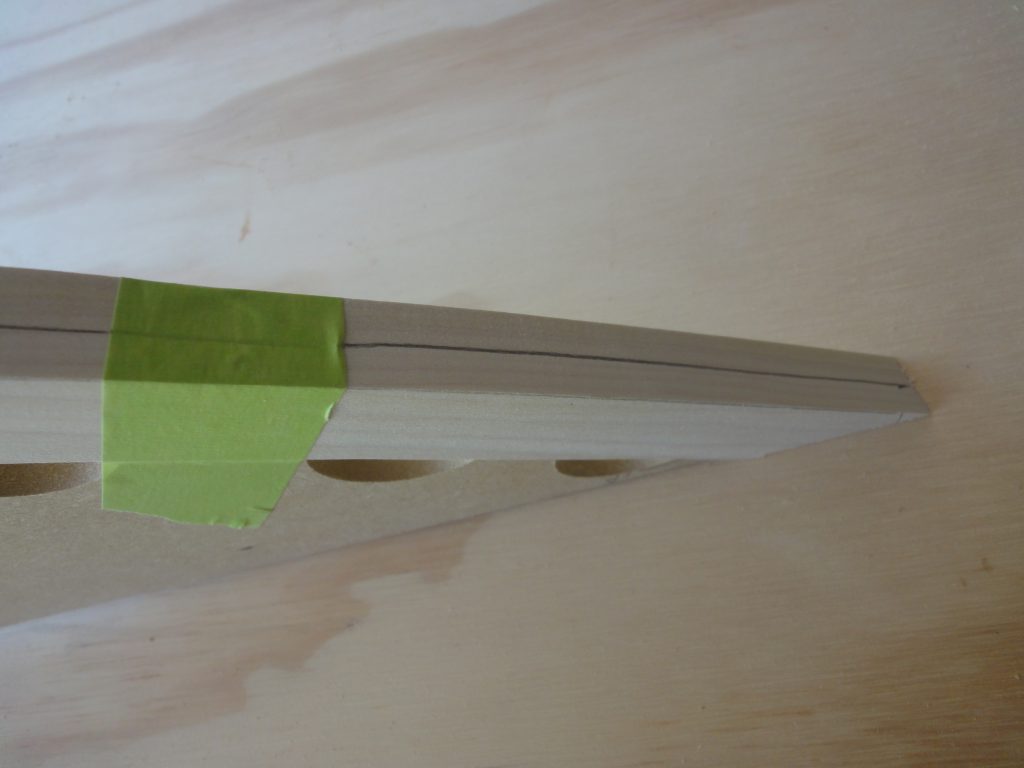
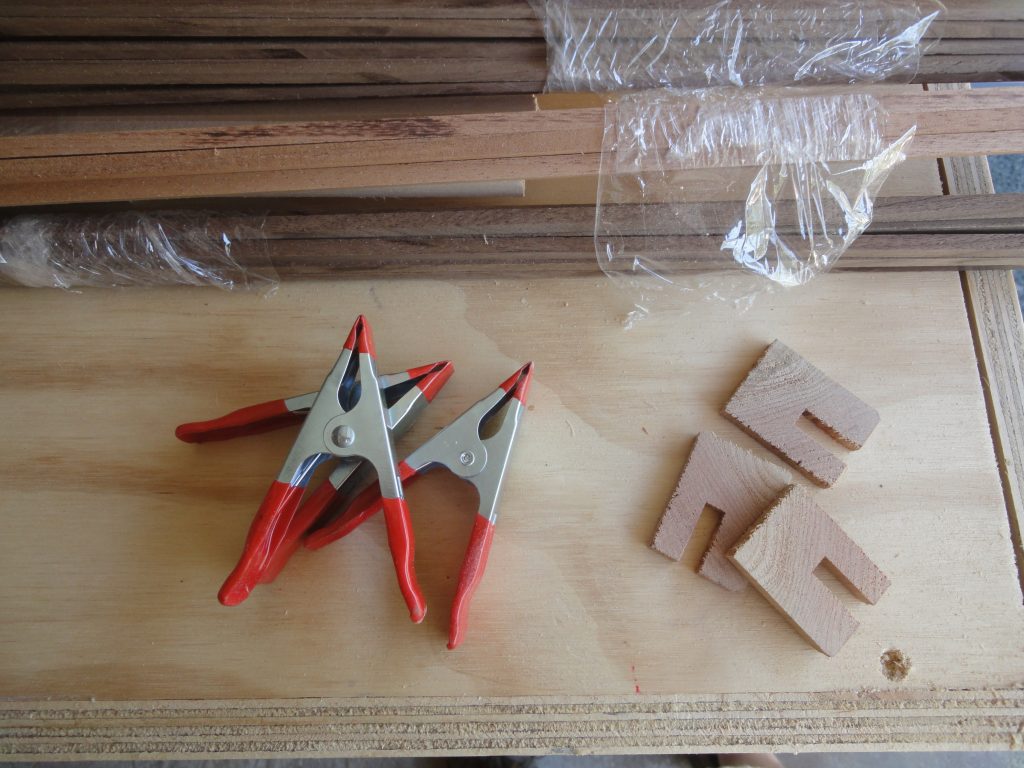
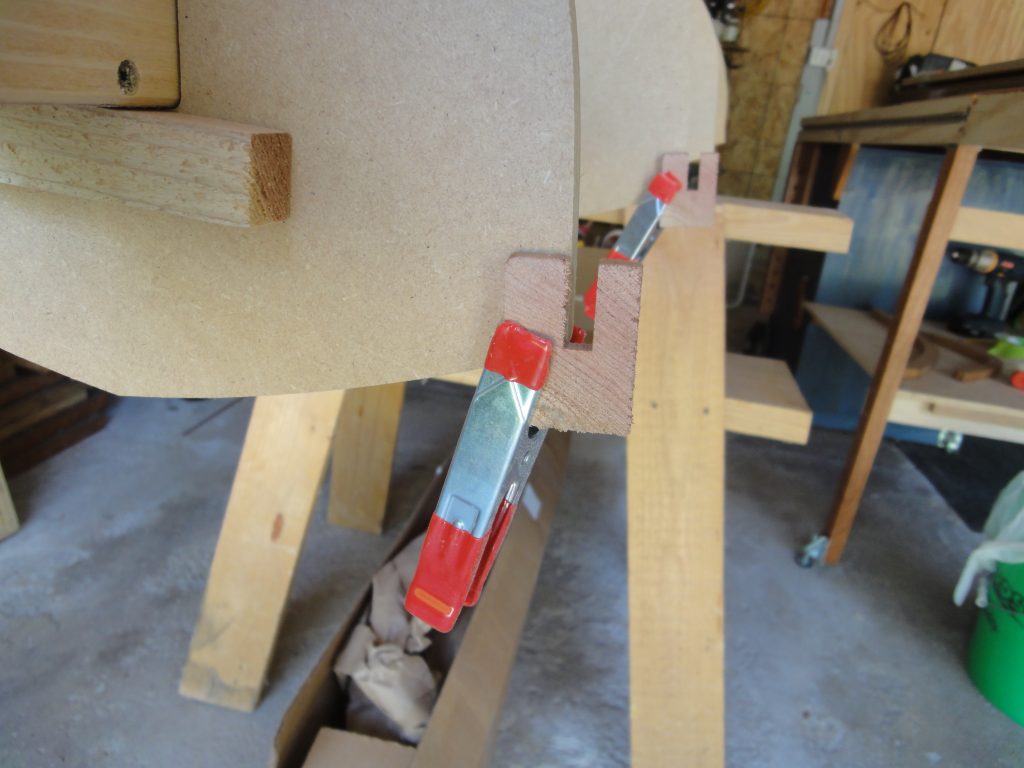
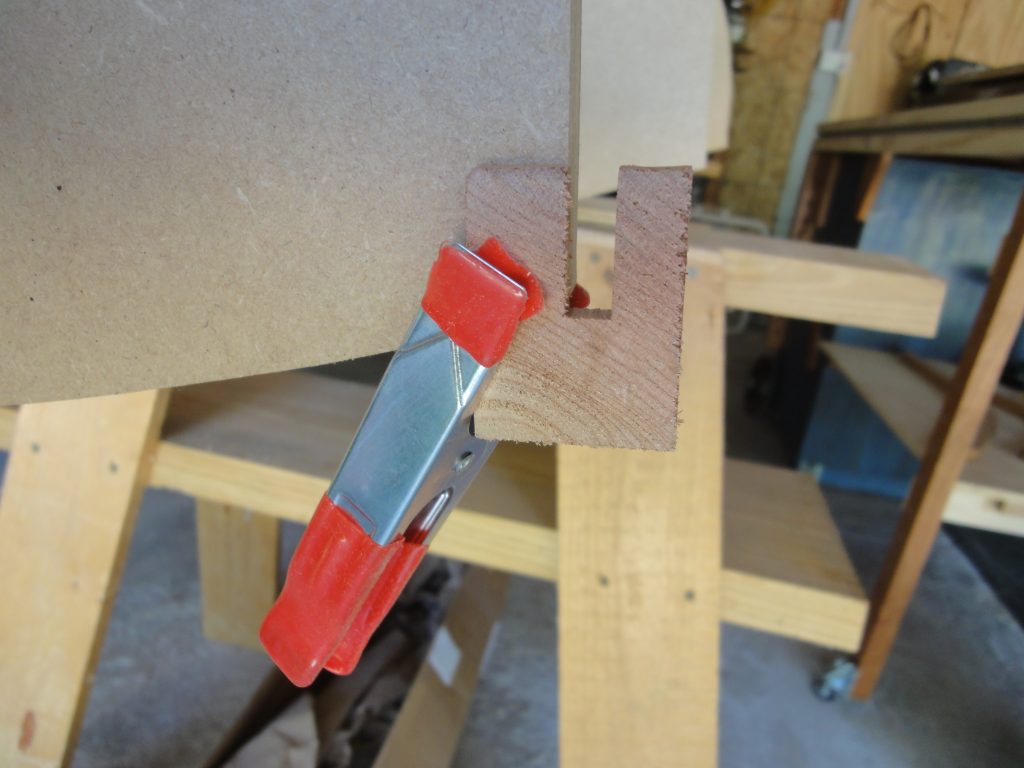
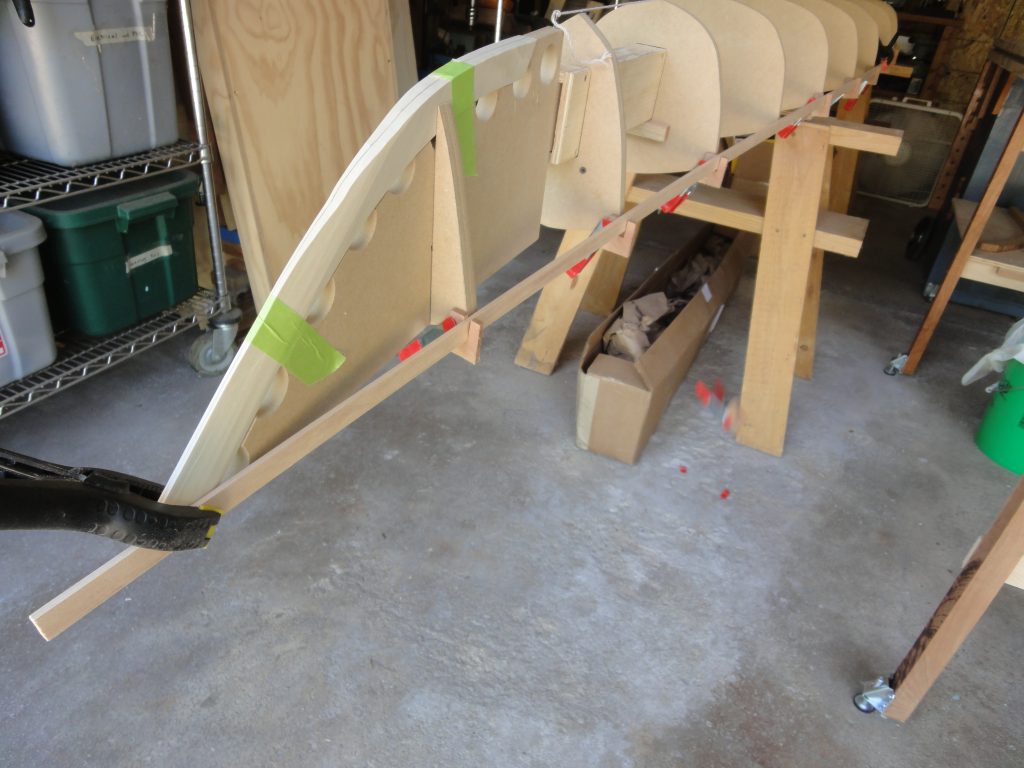
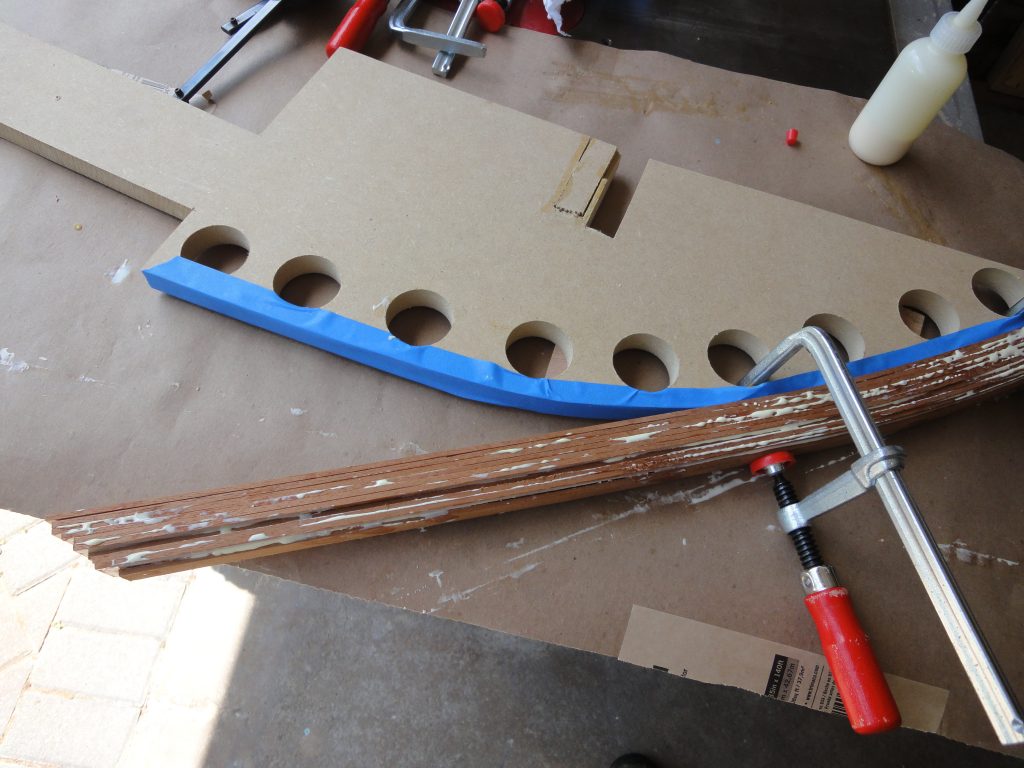
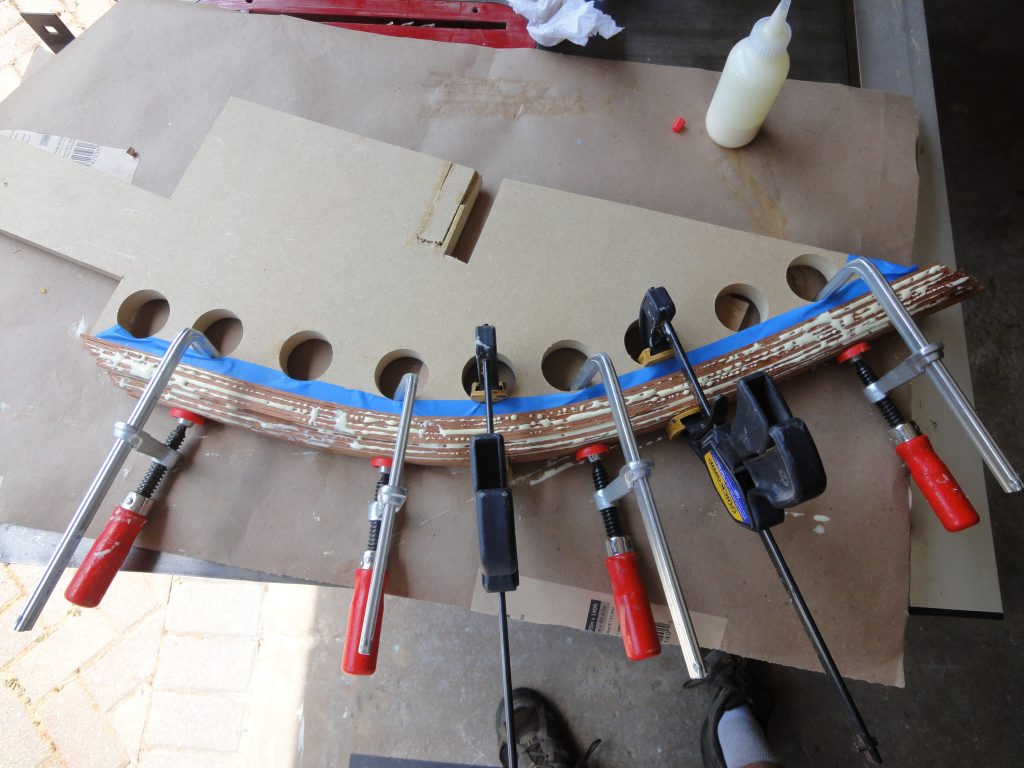
If you remember, in an earlier posting I made these square sort of C shaped pieces. Now I’m going to use them. Clamping each one to the form right at the sheer line (where the deck and hull will meet) I now have a slot to hold a strip. There will be another use for these later on. The first strip was loosely placed in the grooves and checked for alignment. A quick to reveal itself issue was that the planing I did at the front ended up in a slightly rounded shape preventing the strip from sitting tightly against it. I’ll have to take off the inadvertent rounding and continue to test fit the strip. Since this is the first strip and pretty much everything else goes up against it, getting this one close to perfect is a requirement. I’m going to save the final fitting of this strip for the next work session.
Today I turned large boards into sawdust… oh and some strips too.
The goal was to cut the four large boards (3 basswood and one spanish cedar) into the strips for the kayak. After 4+ hours of work only two boards were cut but since the processes is somewhat time consuming I’m not complaining. Hopefully tomorrow I can complete the cutting of the other two.
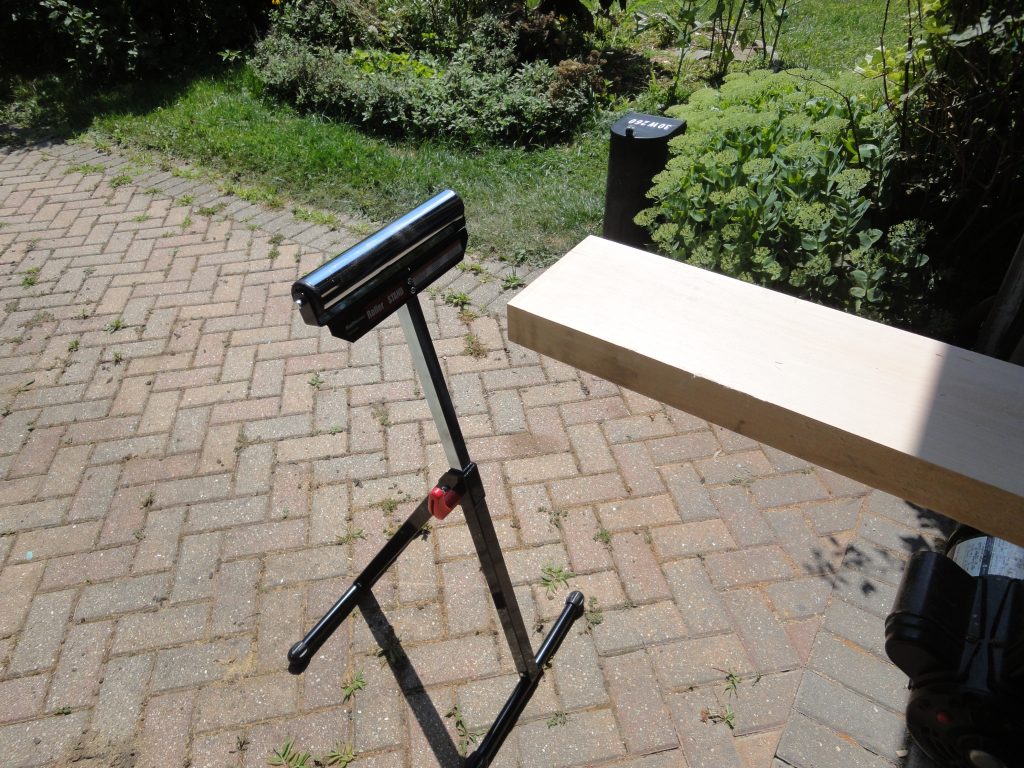
Yesterday I picked up a couple of in feed/out feed support stands from Harbor Freight. The link is to Amazon but if you have a local HF you can get the exact same thing for about $4.50 cheaper each. They are pretty light weight which on the in feed side was fine but on the out feed side the board had a tendency to push these stands a little bit each time. Two large bricks behind the legs solved that problem. I also went to get a piece of ash for the inside stems but decided on poplar instead. It was lighter in weight and being on the inside, it is mostly used as a landing place for the end of the strips to attach to. The hardness of the ash and the extra weight should not be needed.
I started and ended with working on the stems and in the middle cut the strips. For continuity I’ll start with the strip notes first then the stem notes.
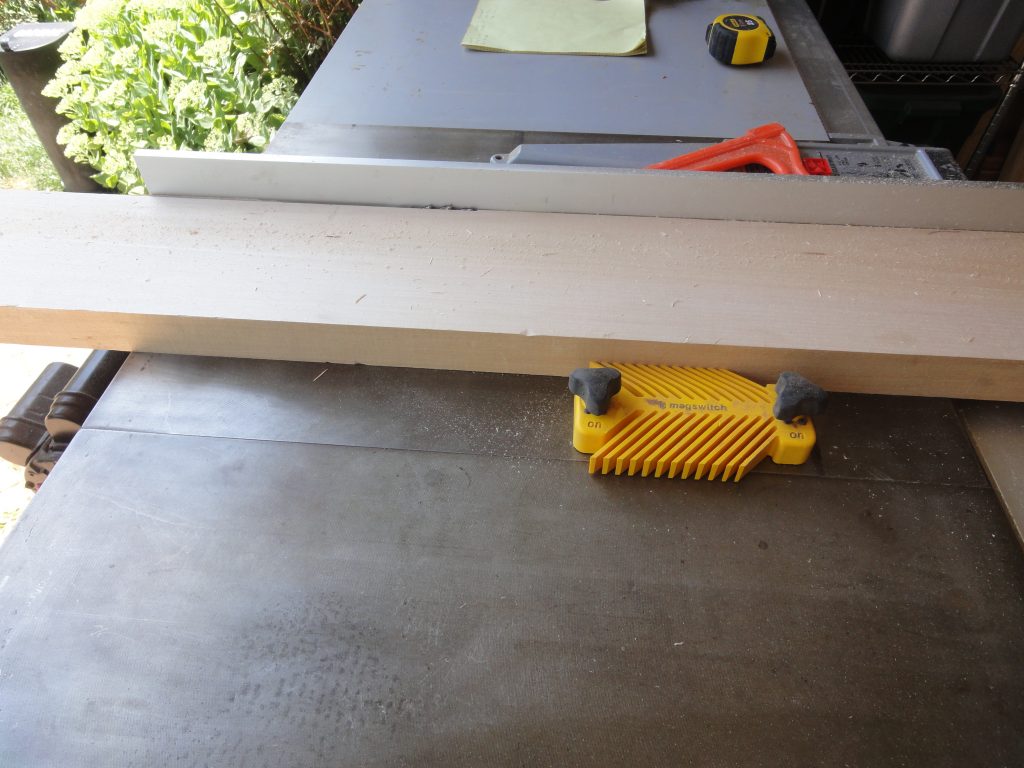
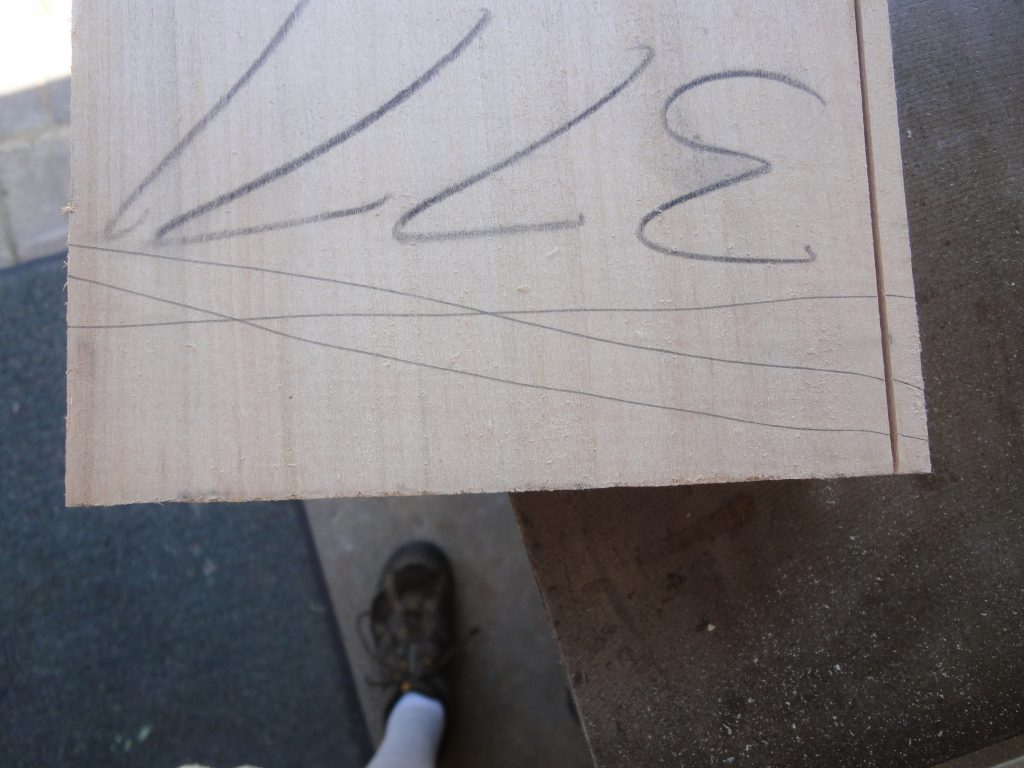
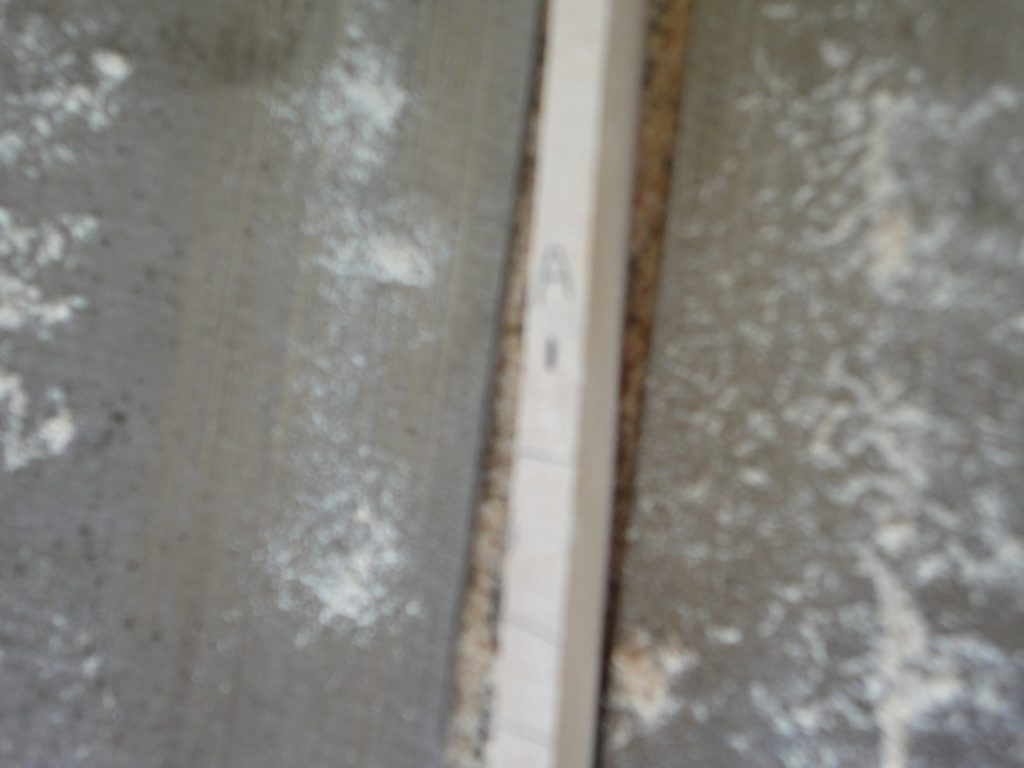
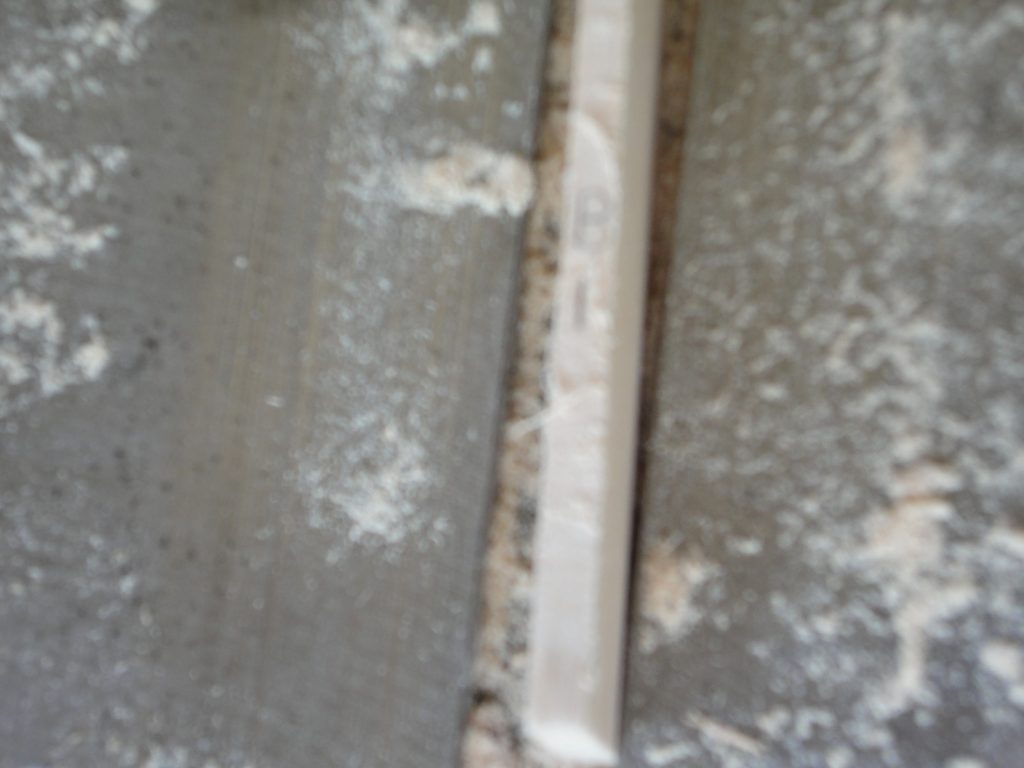
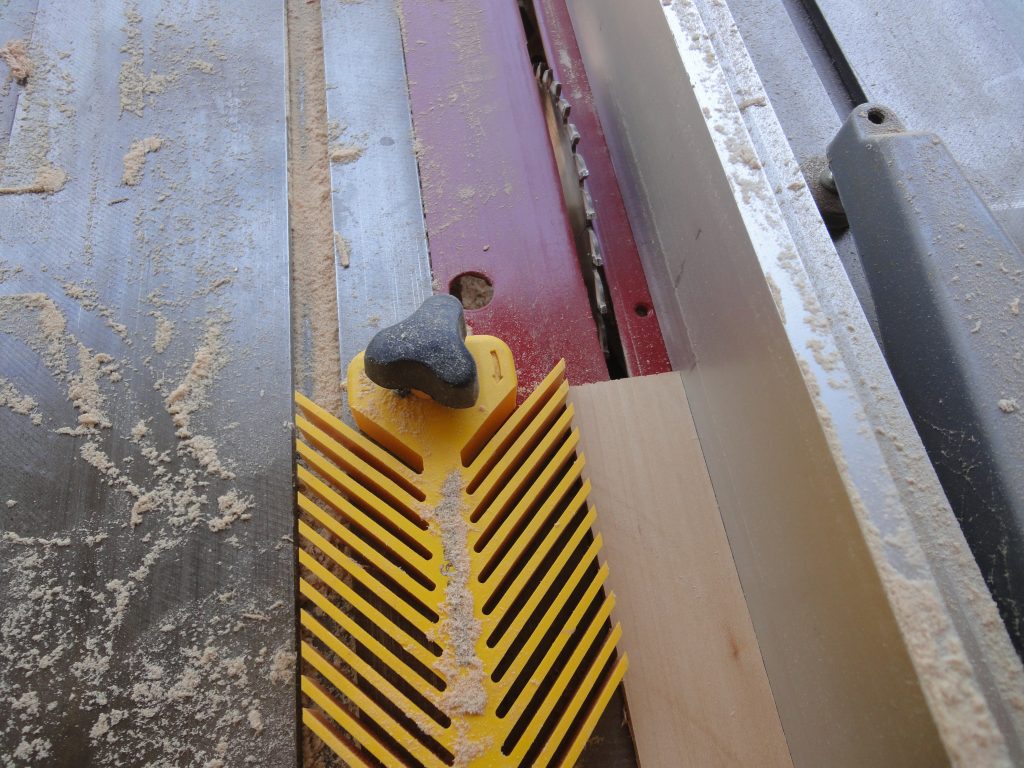
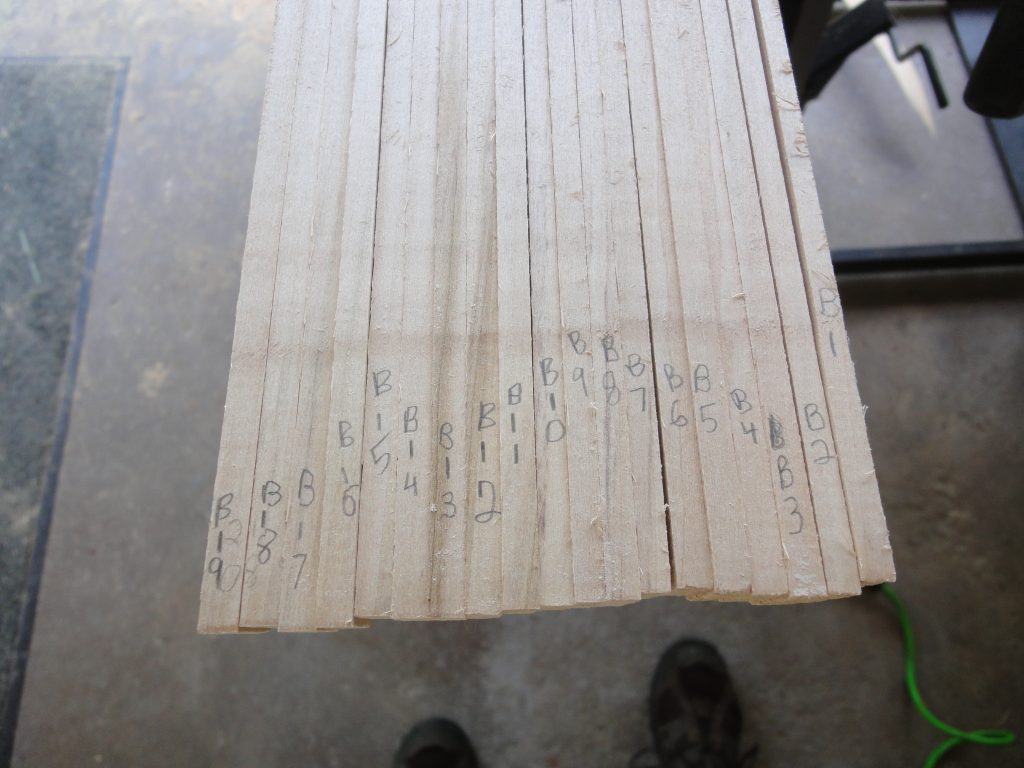
The setup is pretty straight forward. In feed to support the board, out feed to support the board as it leaves the saw. Feather board to keep it tight to the fence and a push stick for that last few feet of each cut. To begin I sliced off the edge of the board to get a straight clean face for riding against the fence. I probably could have run it across a planer to get the same affect but for these strips the table saw was sufficient to get it close enough. Once it was straight I then set the fence for a 1/4″ cut and ran the board through. As it was nearly 2 inches in thickness a slow feed was required. Optionally I could have done it in two or more passes with raising the blade after each pass but the wood was easy enough to cut that one slow and steady pass worked fine. Before cutting each slice I labeled it. First board, first side is “A” and first strip is “1”. After cutting it off I flipped the strip and labeled the other side “B1”. Next strip is A2/B2, etc. There were also registration lines put across the board just in case I missed labeling a board. The registration lines would let me put the pieces back in the same order after cutting. The second board was C/D.
After all the 1/4″ by almost 2″ strips were cut from a board the fence was reset to 3/4″ and the strips were run through twice. Once with the “A” face against the fence and again with the “B” face against the fence. This would yield two strips. Below is a video of this process. As each strip was ripped I grouped them into an “A” pile and a “B” pile.
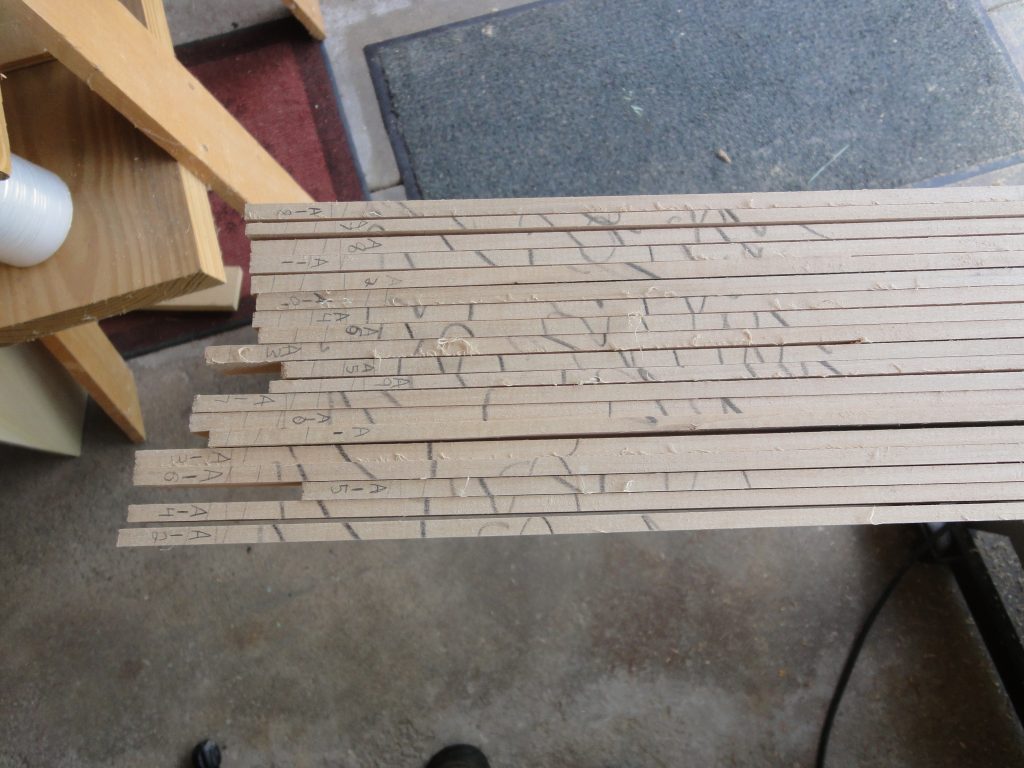
Each set of strips was re-assembled back into order and then wrapped with stretch wrap to keep them together and in order. Since tomorrow’s cutting will be essentially a repeat of today’s work I’ll discuss why I’m labeling, organizing and keeping the strips in sequence then. I also saved all the narrow pieces that were off cuts just in case I need a filler piece or decide to incorporate these into accent strip areas.
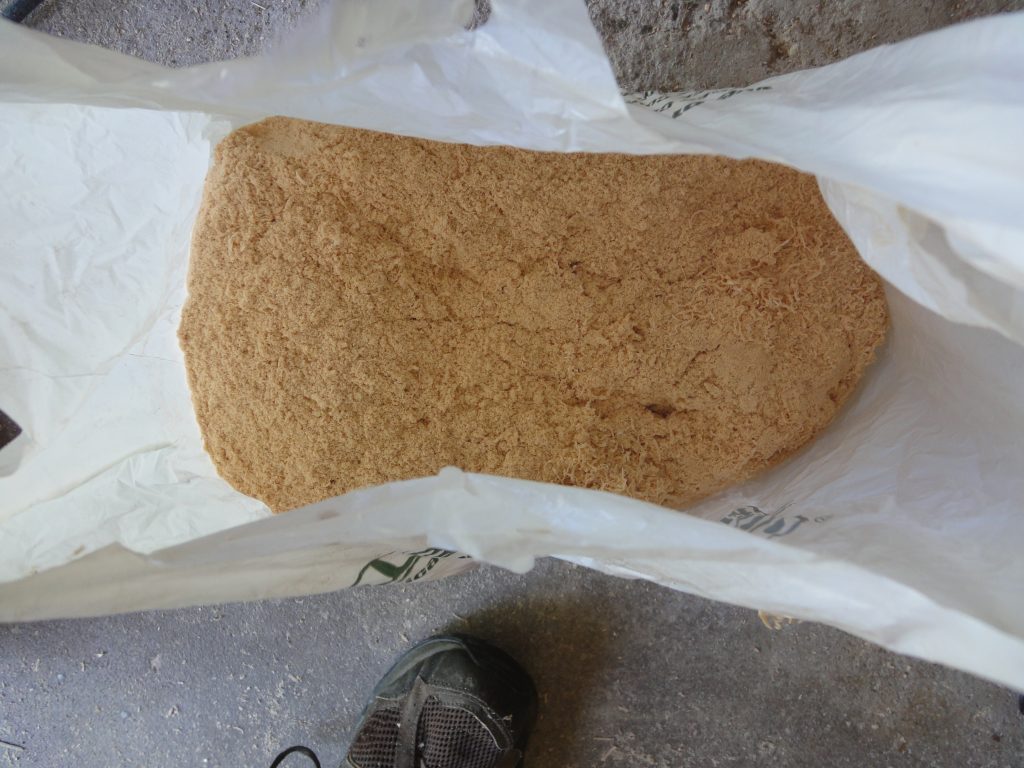
While cleaning up there was a LOT of sawdust in the table saw. Some went into our compost bin but I also saved a full bag worth of it. This will probably be used later as filler either for minor dings that occur during building and/or as an additive to the epoxy. When it needs to be used I’ll discuss it further, for now I’m saving some.
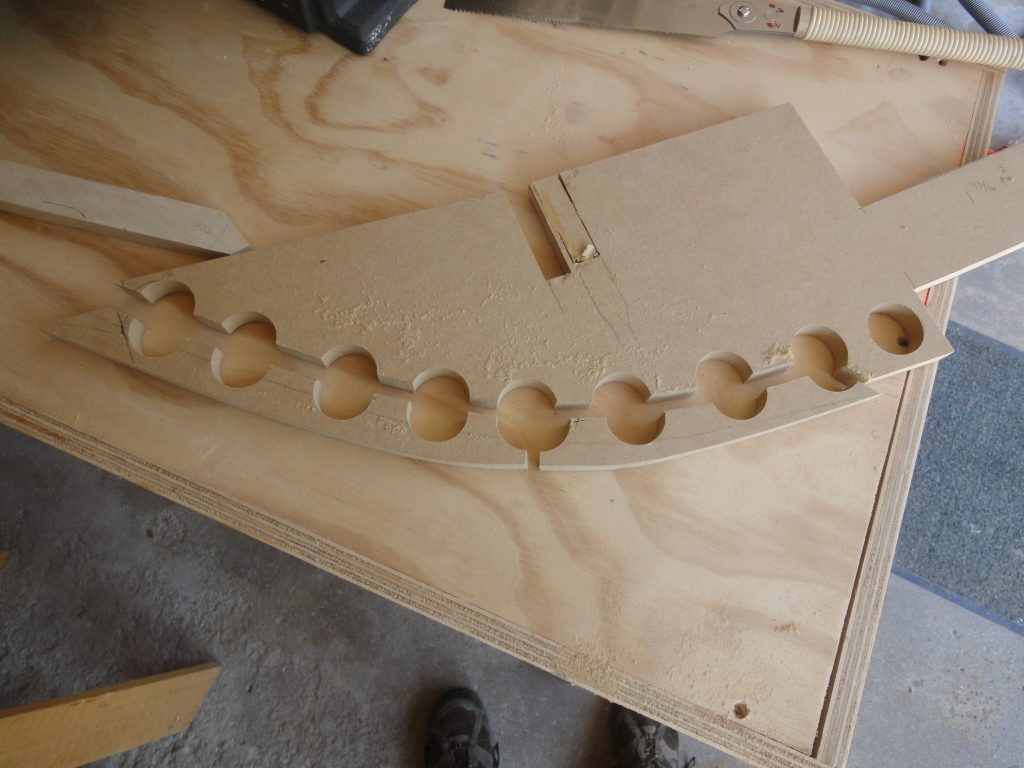
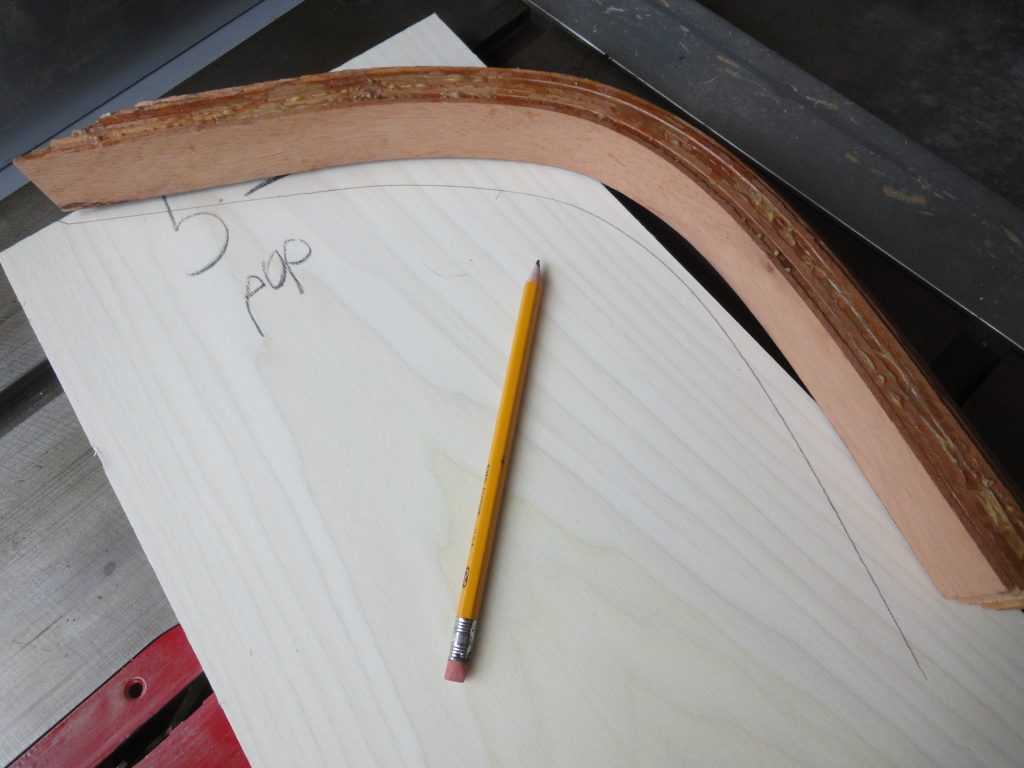
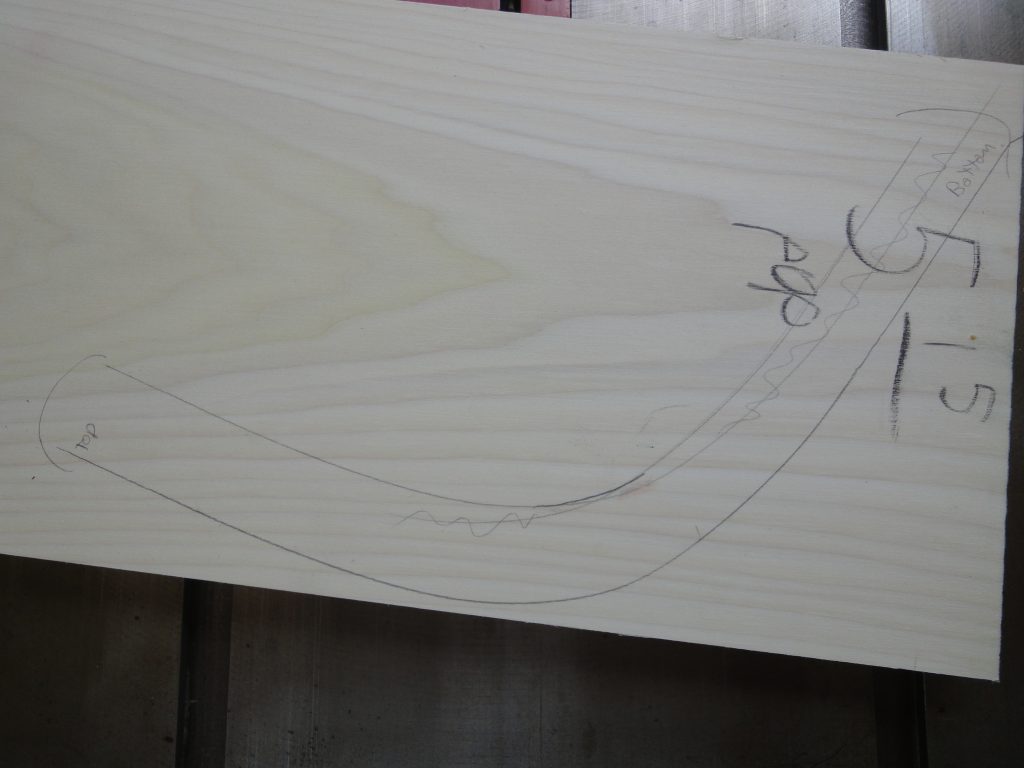
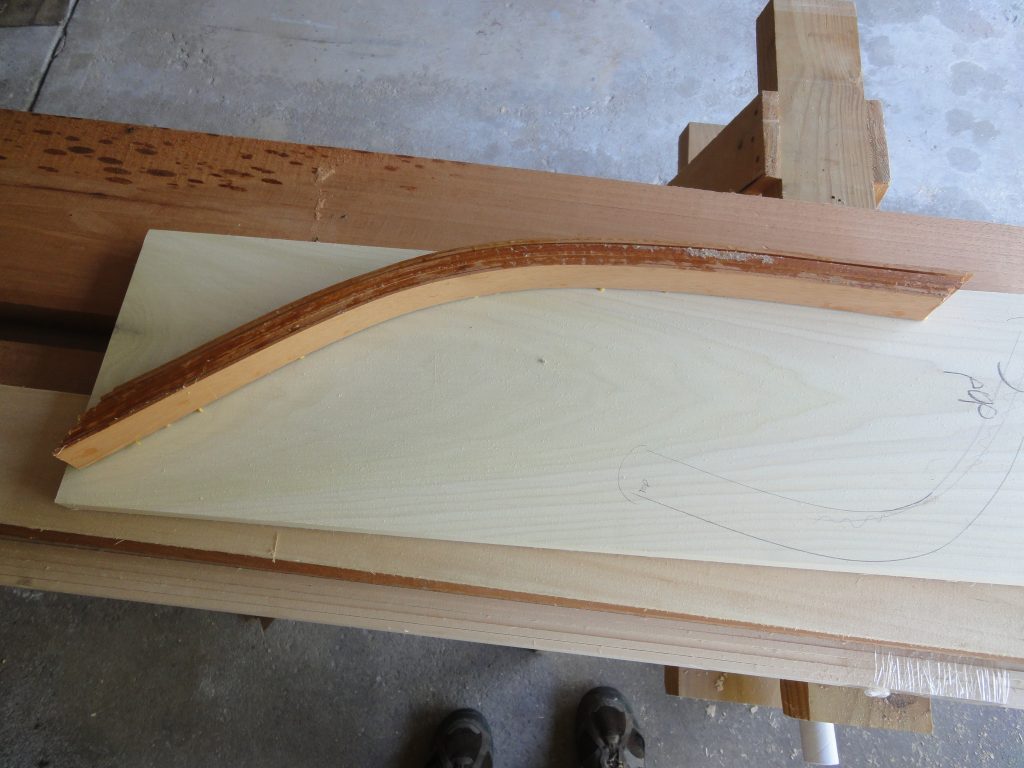
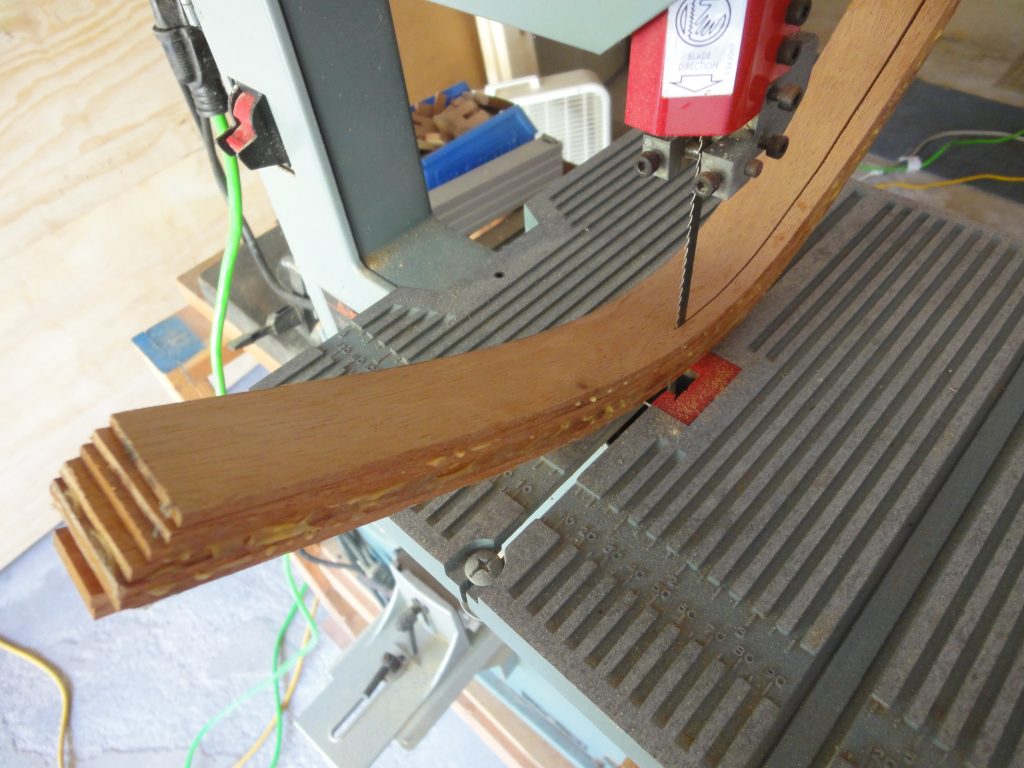
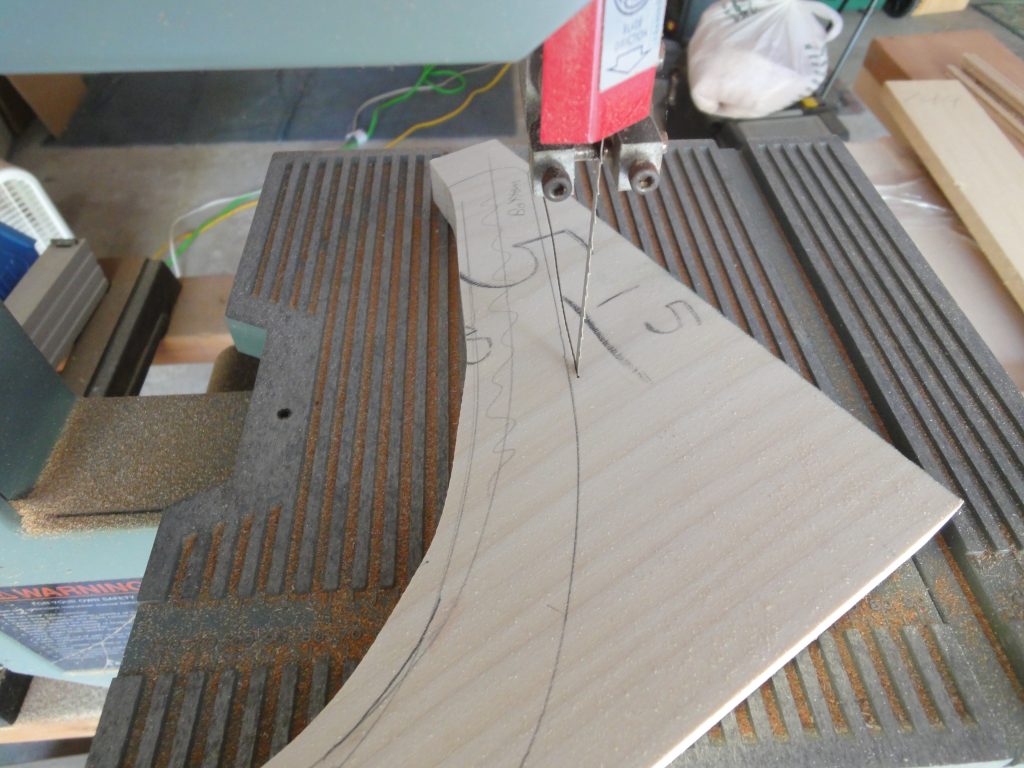
Initially I glued up the bow stem, then while it was drying did the above strip cutting. Afterwards it was dry and set so I removed it from the form, trimmed both and used the inside to create an outline on the poplar board. I then extended that line about an inch and a half. The resulting shapes were then cut out at the band saw to yield the inner stem pieces.
The cut was short of the line. Tomorrow I plan to sand these down to the line and trim the forms to fit them. The remaining two boards will be cut into strips and if all goes well I’ll finally have all the prep work done and be ready to move on to actually applying the first strip to the kayak. Another big looming issue is the cockpit size. I have a good idea on the size but I need to draw this out, print a full size pattern and then use that to work on the placement of the deck boards. More on this at a later date too.