
Today I turned large boards into sawdust… oh and some strips too.
The goal was to cut the four large boards (3 basswood and one spanish cedar) into the strips for the kayak. After 4+ hours of work only two boards were cut but since the processes is somewhat time consuming I’m not complaining. Hopefully tomorrow I can complete the cutting of the other two.
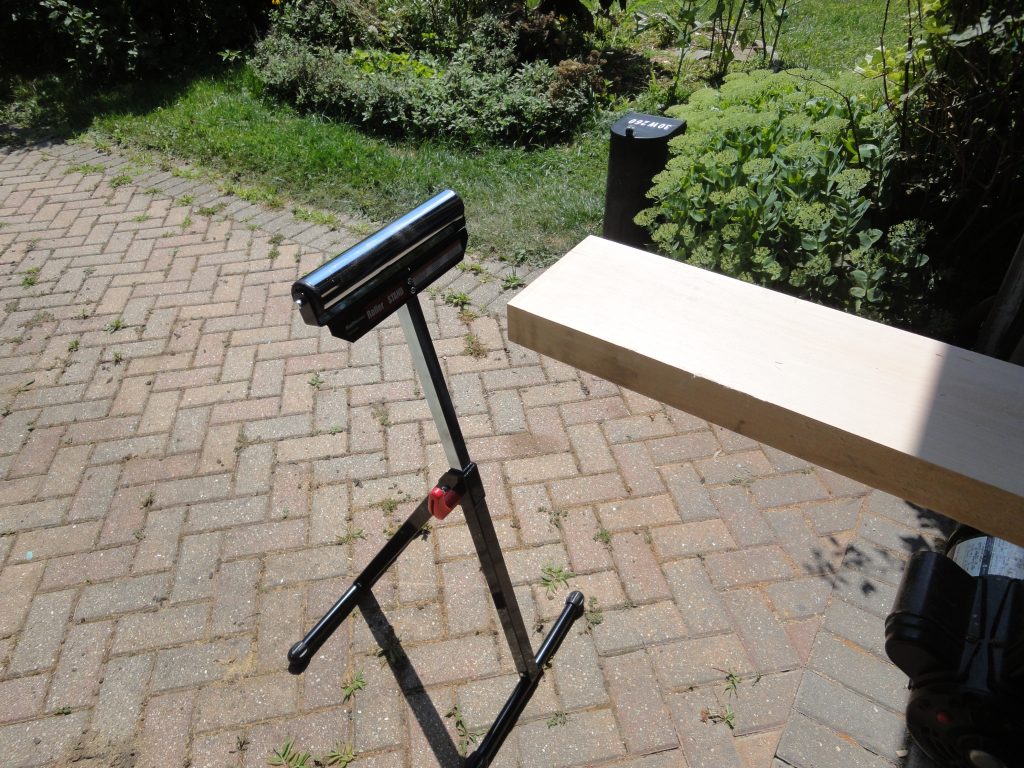
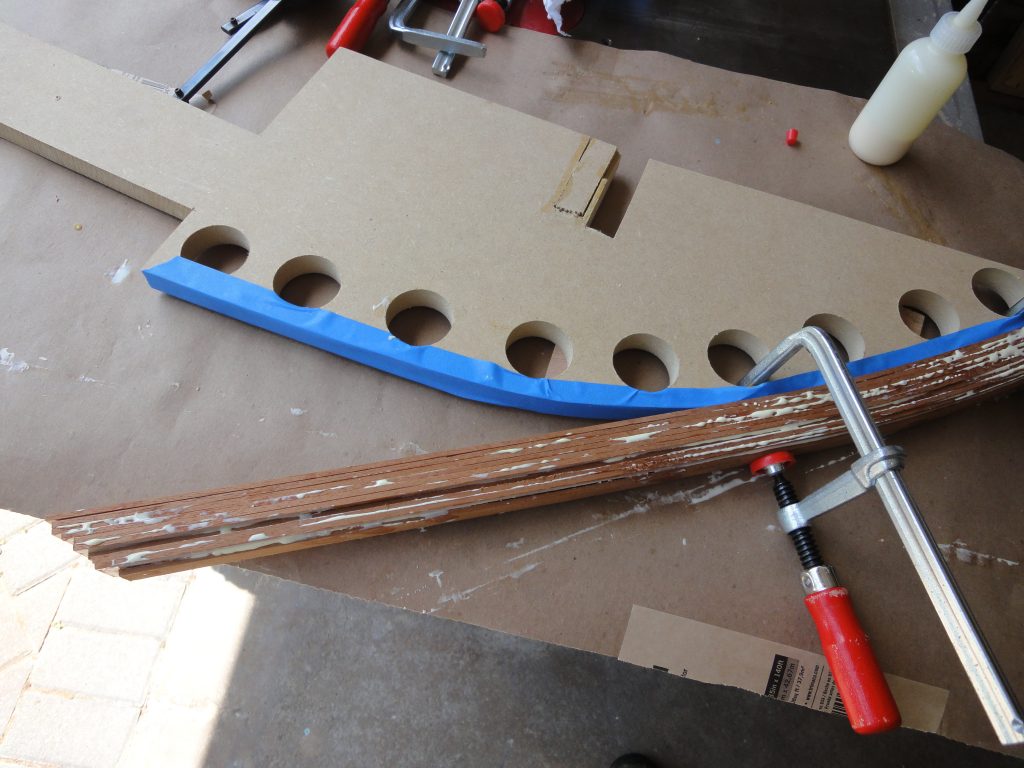
Yesterday I picked up a couple of in feed/out feed support stands from Harbor Freight. The link is to Amazon but if you have a local HF you can get the exact same thing for about $4.50 cheaper each. They are pretty light weight which on the in feed side was fine but on the out feed side the board had a tendency to push these stands a little bit each time. Two large bricks behind the legs solved that problem. I also went to get a piece of ash for the inside stems but decided on poplar instead. It was lighter in weight and being on the inside, it is mostly used as a landing place for the end of the strips to attach to. The hardness of the ash and the extra weight should not be needed.
I started and ended with working on the stems and in the middle cut the strips. For continuity I’ll start with the strip notes first then the stem notes.
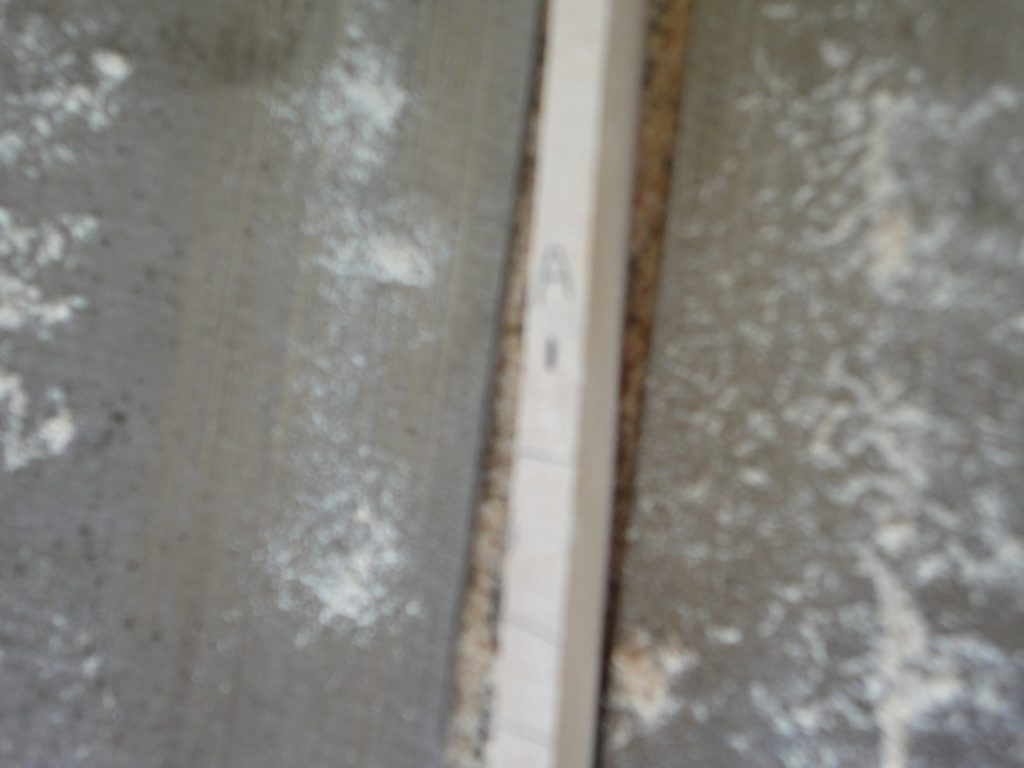
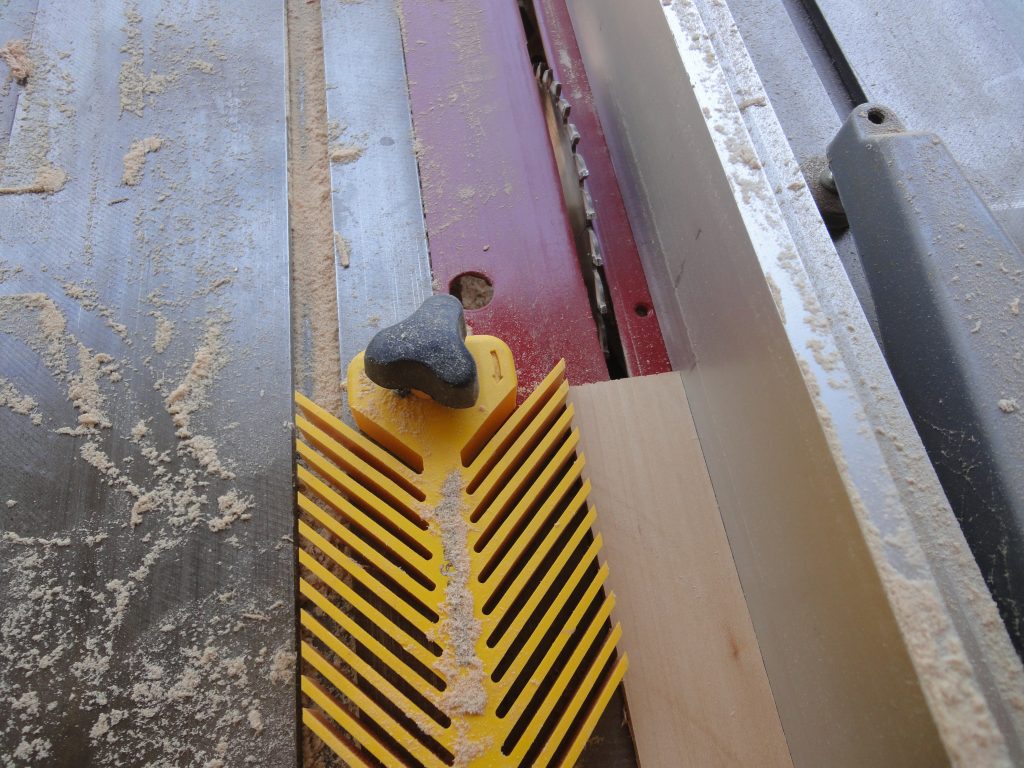
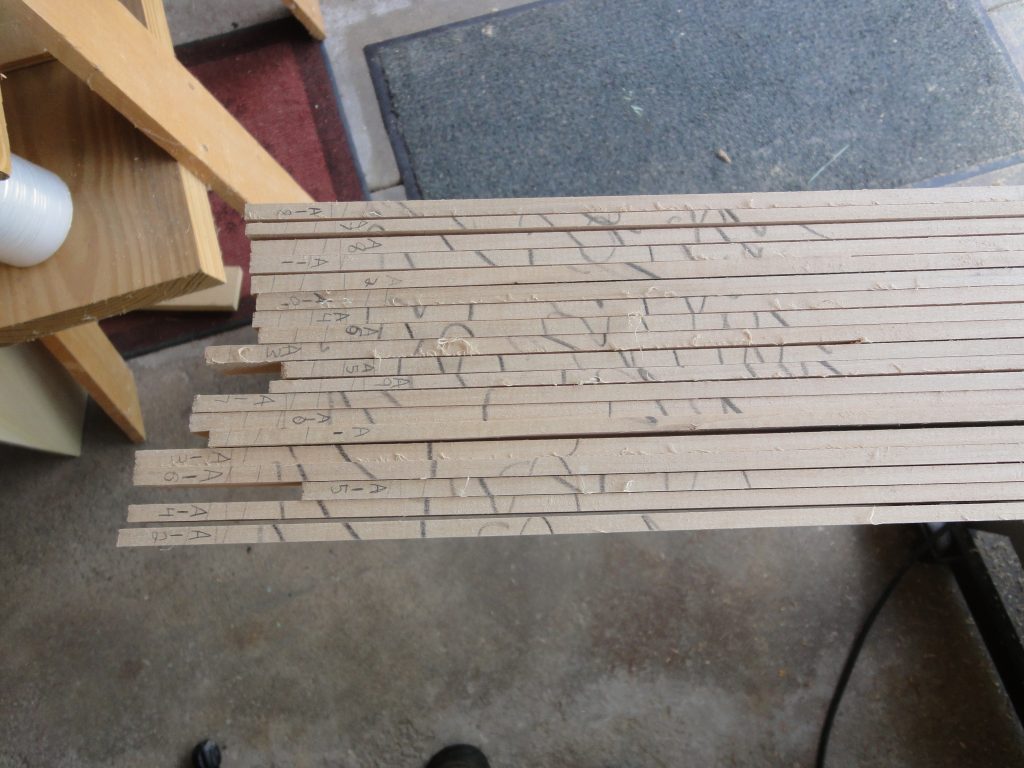
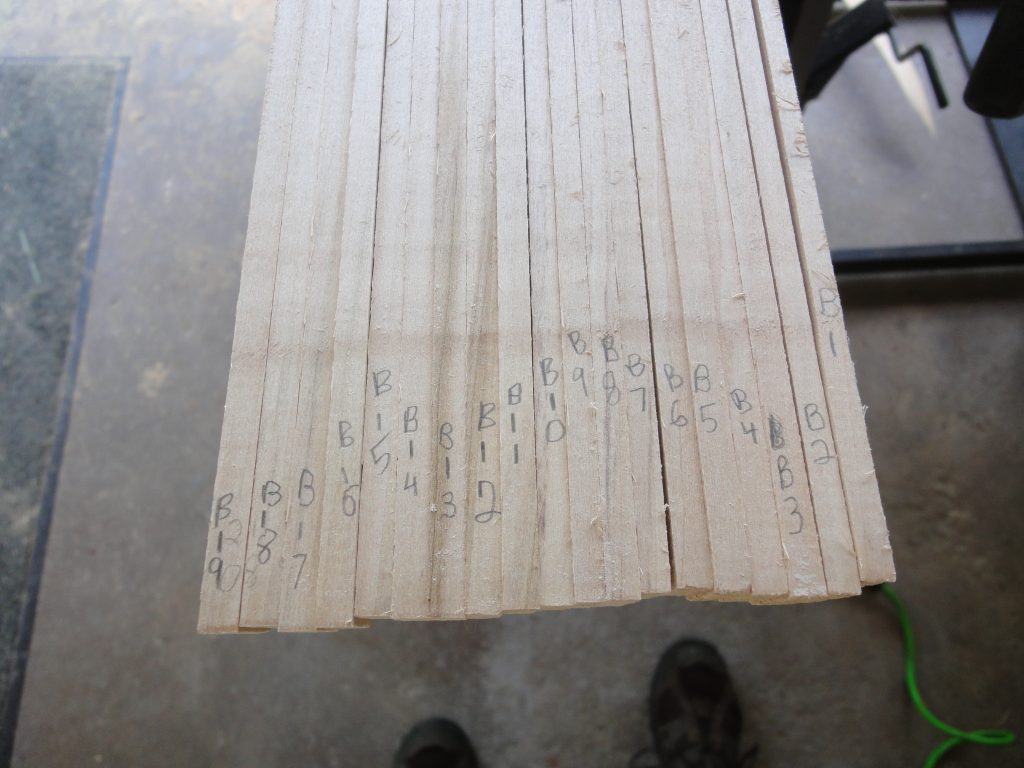
The setup is pretty straight forward. In feed to support the board, out feed to support the board as it leaves the saw. Feather board to keep it tight to the fence and a push stick for that last few feet of each cut. To begin I sliced off the edge of the board to get a straight clean face for riding against the fence. I probably could have run it across a planer to get the same affect but for these strips the table saw was sufficient to get it close enough. Once it was straight I then set the fence for a 1/4″ cut and ran the board through. As it was nearly 2 inches in thickness a slow feed was required. Optionally I could have done it in two or more passes with raising the blade after each pass but the wood was easy enough to cut that one slow and steady pass worked fine. Before cutting each slice I labeled it. First board, first side is “A” and first strip is “1”. After cutting it off I flipped the strip and labeled the other side “B1”. Next strip is A2/B2, etc. There were also registration lines put across the board just in case I missed labeling a board. The registration lines would let me put the pieces back in the same order after cutting. The second board was C/D.

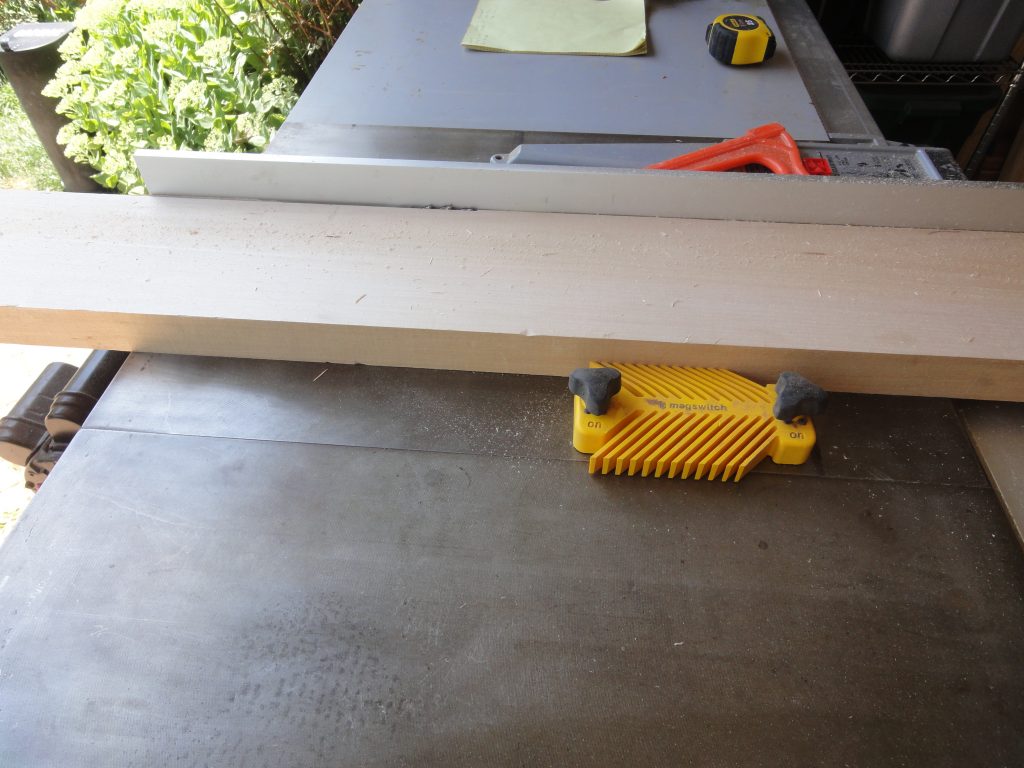


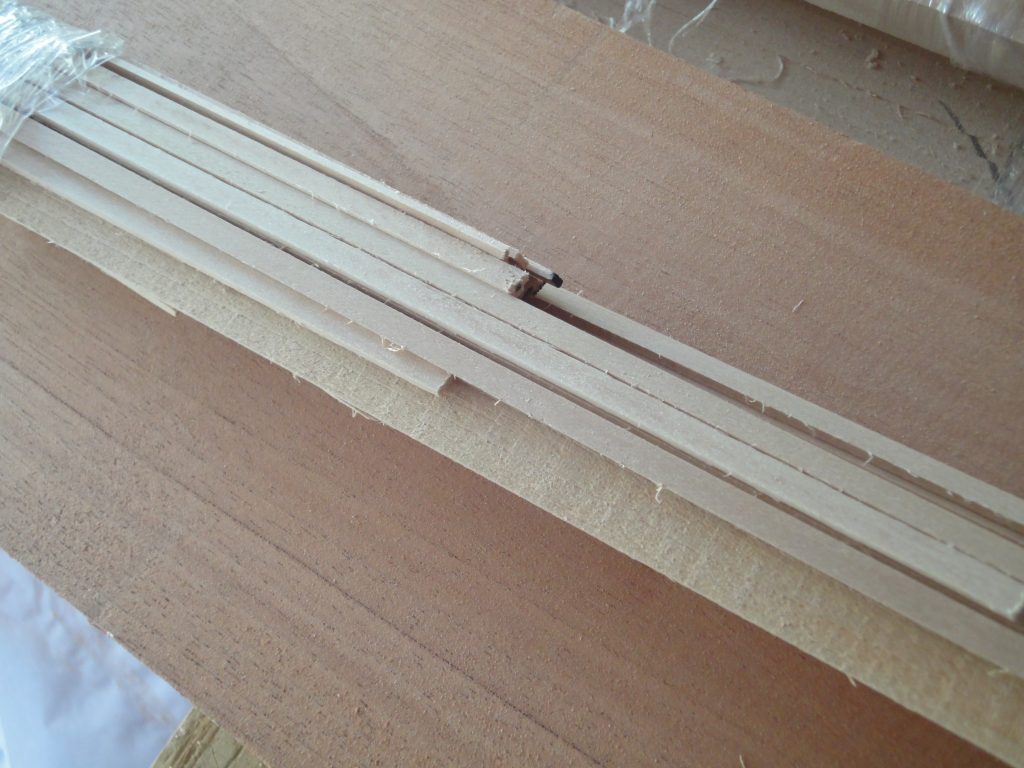
After all the 1/4″ by almost 2″ strips were cut from a board the fence was reset to 3/4″ and the strips were run through twice. Once with the “A” face against the fence and again with the “B” face against the fence. This would yield two strips. Below is a video of this process. As each strip was ripped I grouped them into an “A” pile and a “B” pile.
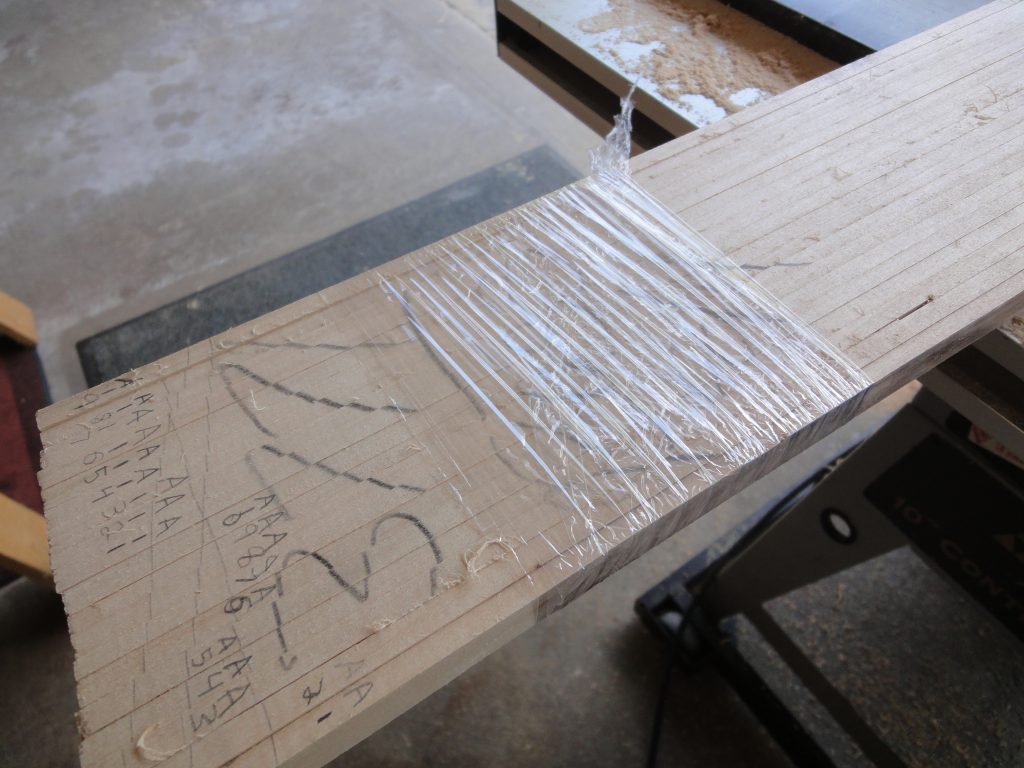
Each set of strips was re-assembled back into order and then wrapped with stretch wrap to keep them together and in order. Since tomorrow’s cutting will be essentially a repeat of today’s work I’ll discuss why I’m labeling, organizing and keeping the strips in sequence then. I also saved all the narrow pieces that were off cuts just in case I need a filler piece or decide to incorporate these into accent strip areas.

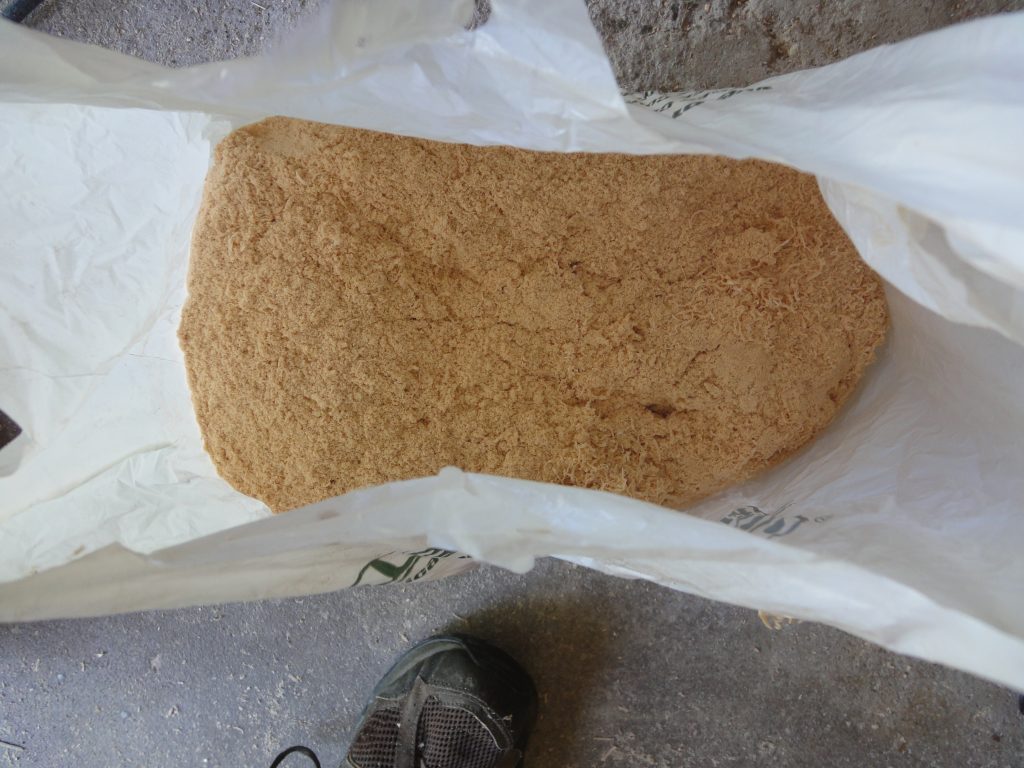
While cleaning up there was a LOT of sawdust in the table saw. Some went into our compost bin but I also saved a full bag worth of it. This will probably be used later as filler either for minor dings that occur during building and/or as an additive to the epoxy. When it needs to be used I’ll discuss it further, for now I’m saving some.

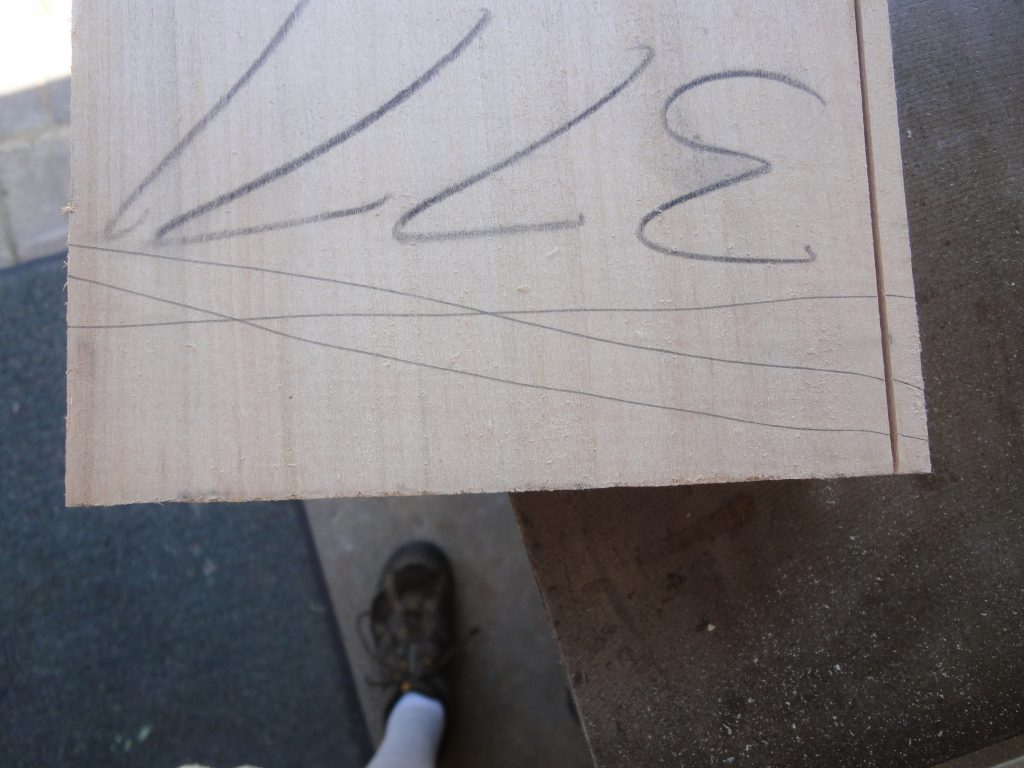
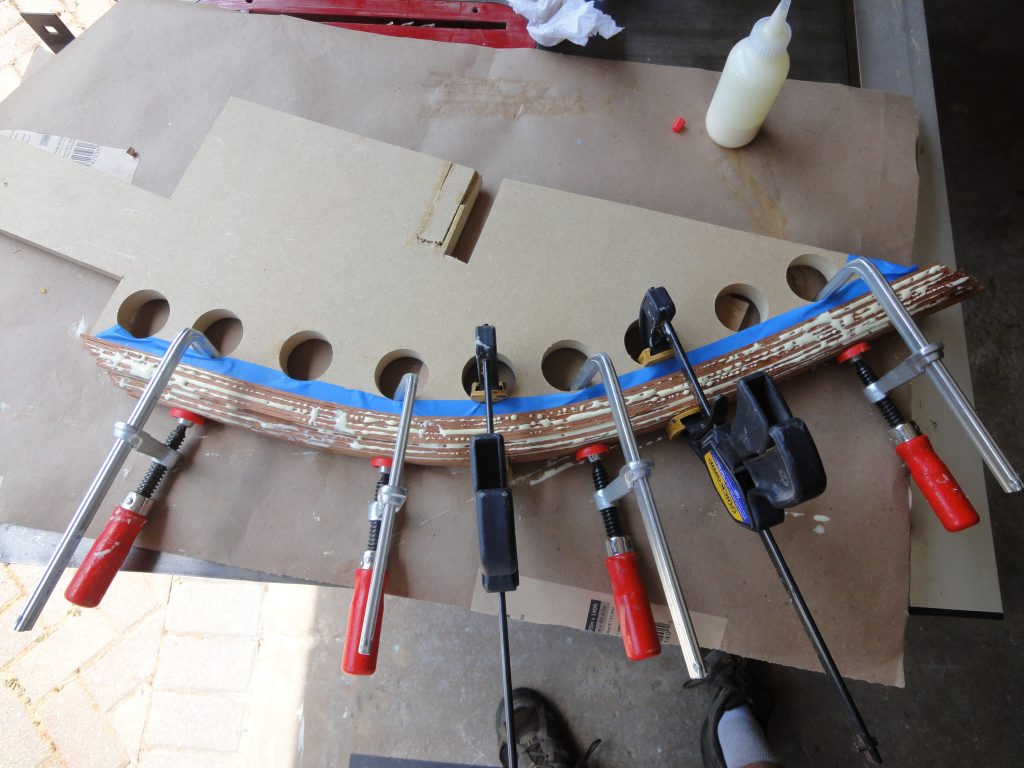
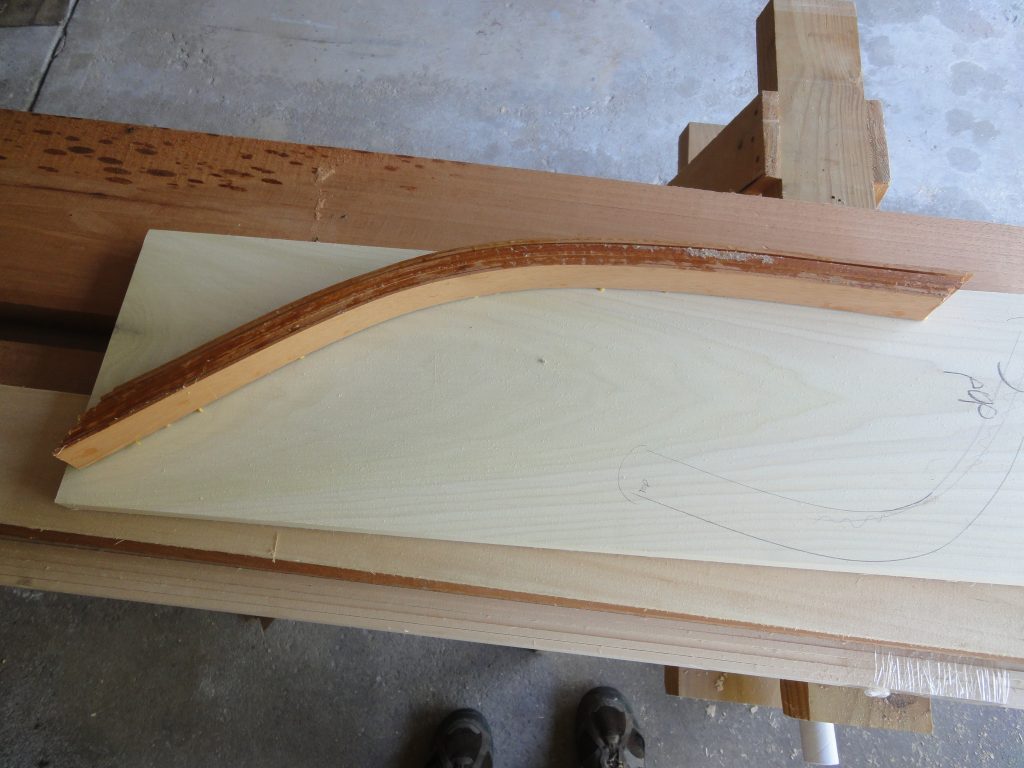
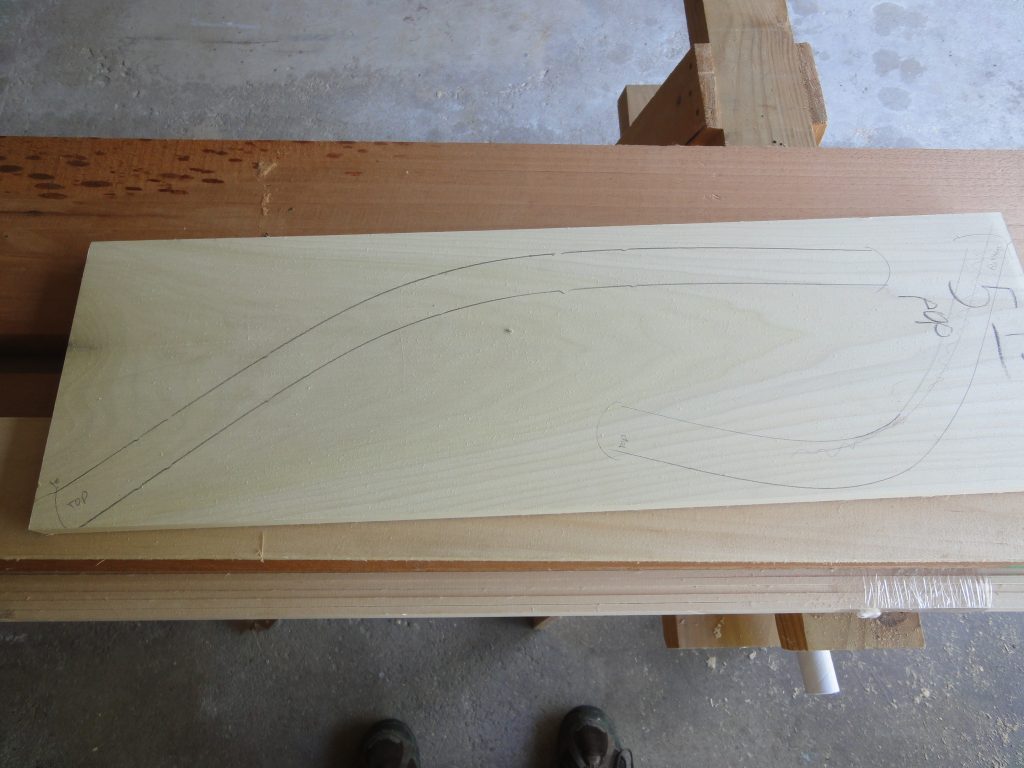
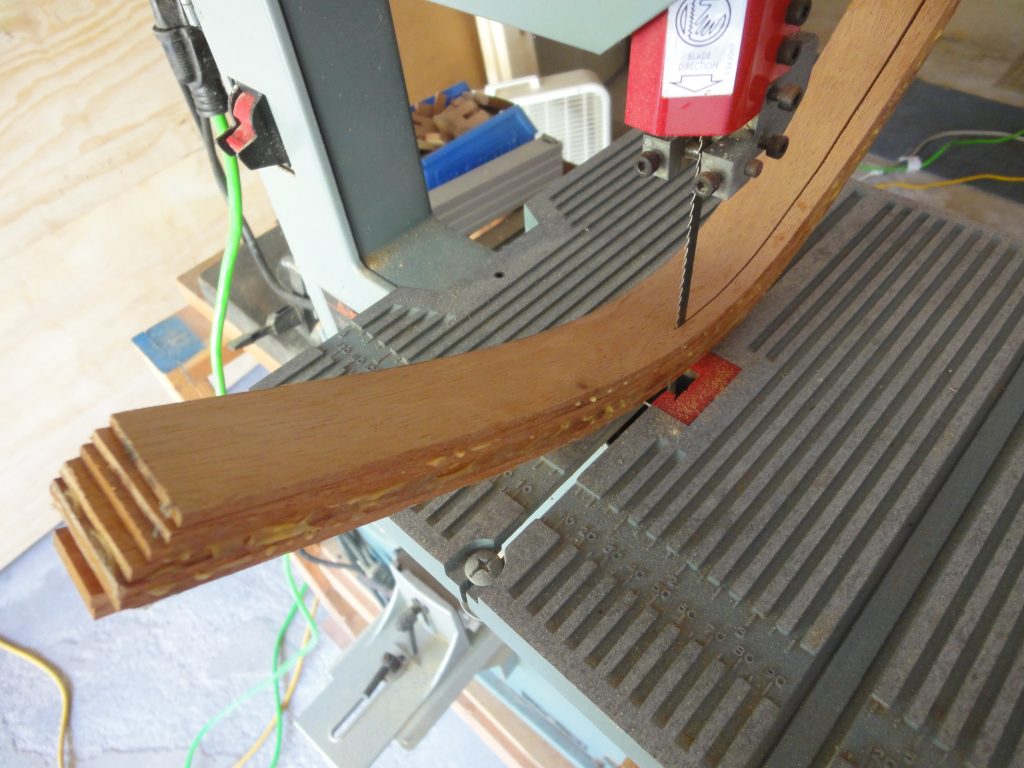
Initially I glued up the bow stem, then while it was drying did the above strip cutting. Afterwards it was dry and set so I removed it from the form, trimmed both and used the inside to create an outline on the poplar board. I then extended that line about an inch and a half. The resulting shapes were then cut out at the band saw to yield the inner stem pieces.
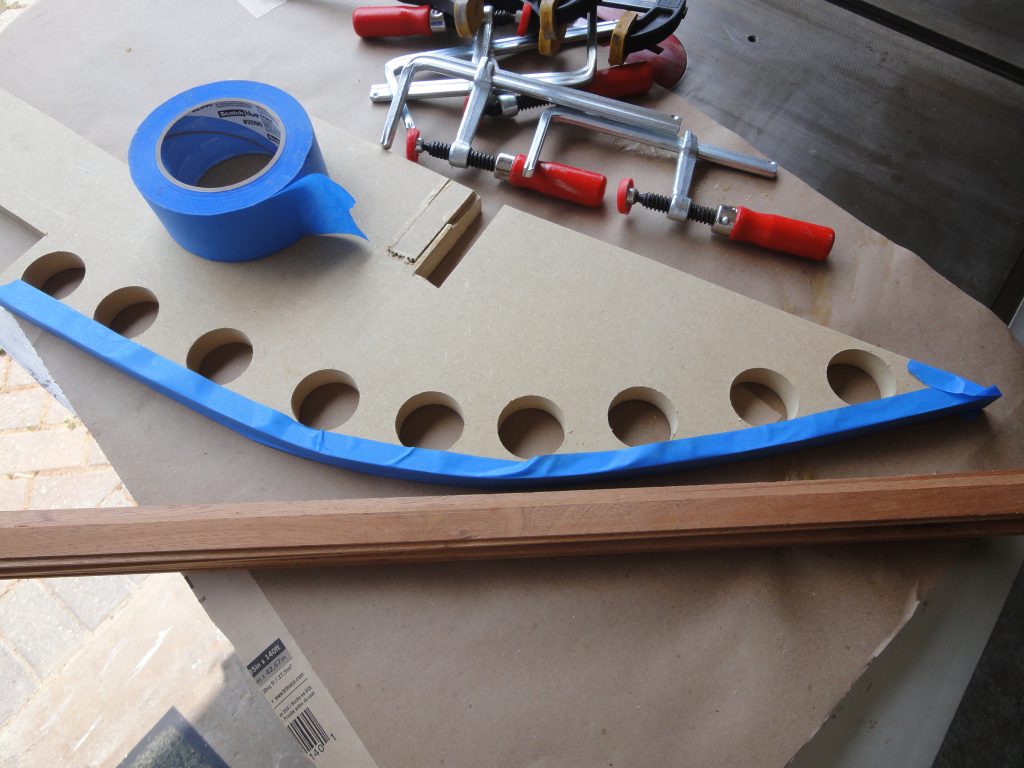
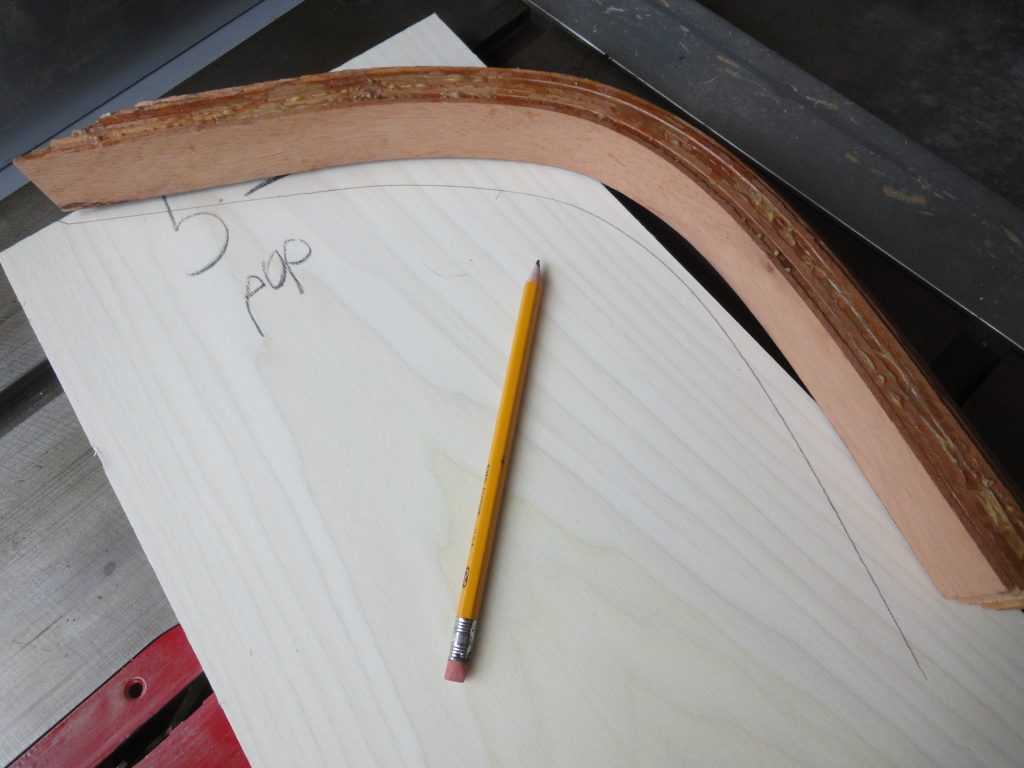
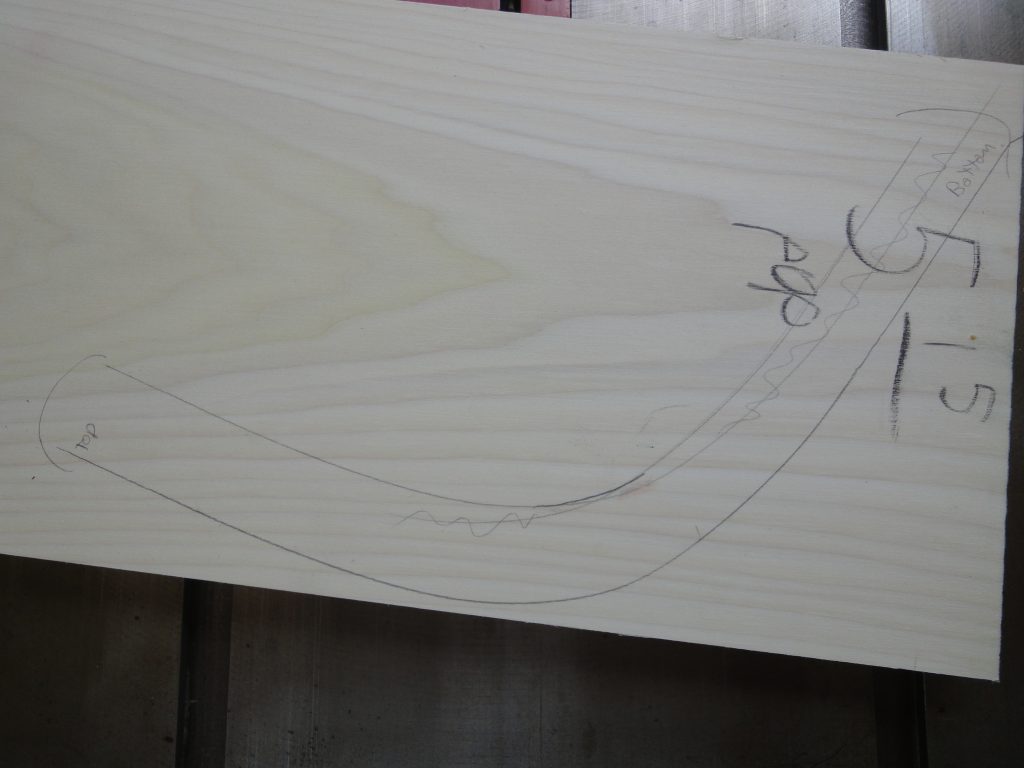

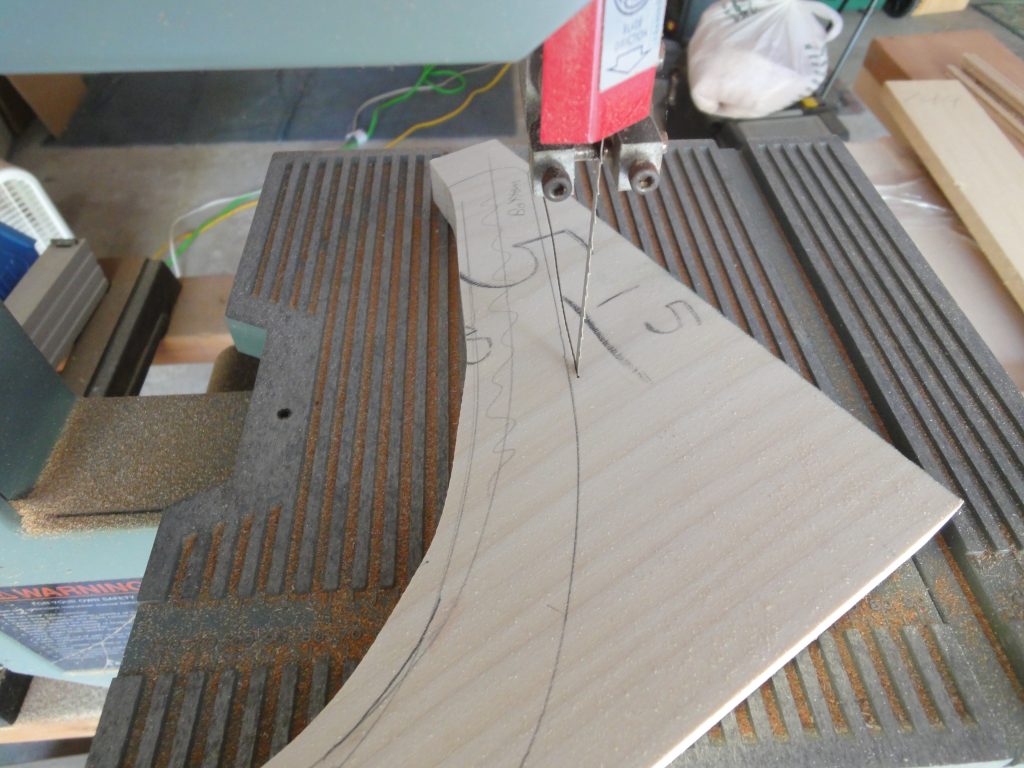
The cut was short of the line. Tomorrow I plan to sand these down to the line and trim the forms to fit them. The remaining two boards will be cut into strips and if all goes well I’ll finally have all the prep work done and be ready to move on to actually applying the first strip to the kayak. Another big looming issue is the cockpit size. I have a good idea on the size but I need to draw this out, print a full size pattern and then use that to work on the placement of the deck boards. More on this at a later date too.