
To get a feel for the appearance, I did a mock up today. Basically I stuck a simple 1×4 in the mounting holes and set the whole thing in the drive way to see what it would look like. No effort was made to ensure proper spacing or alignment. This was just a “let’s see what it looks like”. Although given the two board lengths I used, it shouldn’t be that far off from the finished length.
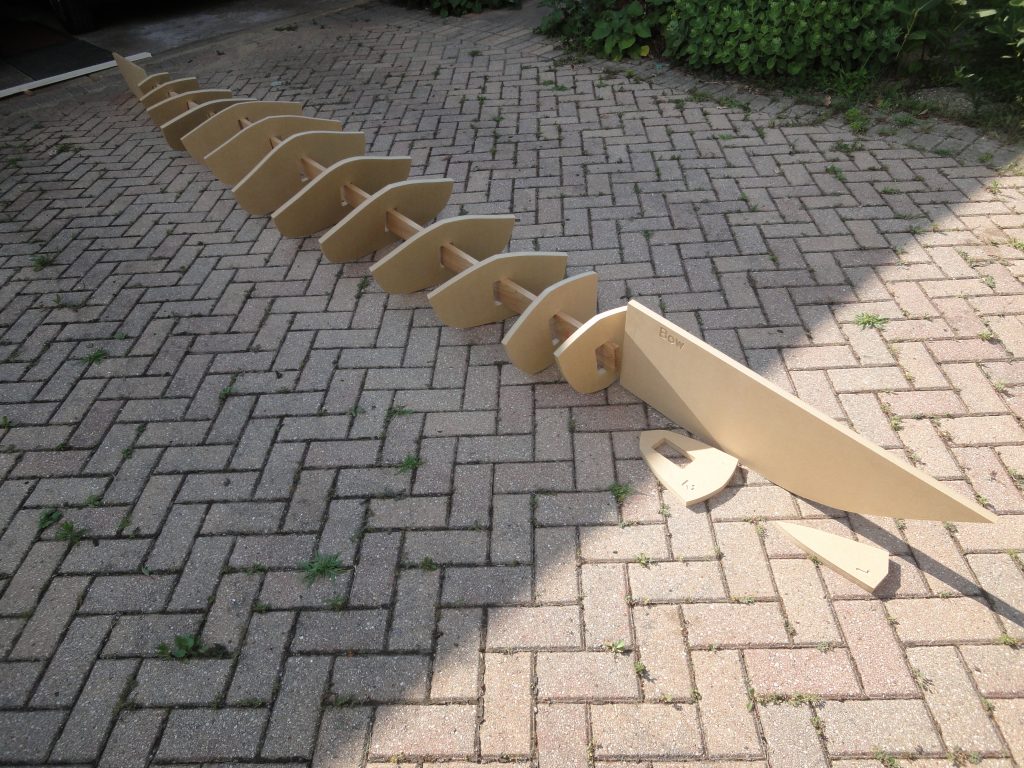
The bow (right side) needs to be trimmed down and shortened as does the stern and form #1 needs to be notched to fit the bow. There actually is a form #0 but it was so small that I’ll just make it by hand and fit it to the bow. I don’t remember if there was a similar form #16 at the other end or not. If so I’ll need to make that one too. Hopefully tomorrow I’ll be able to get the strong back assembled and start to mount and align the forms to it.
However this brings me to house-keeping #1. The work will be done in my garage. I like to keep our cars in the garage. It’s only a 2 car garage. So, some how I’m going to have to try to accommodate 2 cars and a kayak build in space designed for only 2 cars. Ultimately when the kayak is finished I’ll also need to store it when not in use and recommendations are to keep it out of the sun. Our shed is no where near big enough so keeping it in the garage looks to be the solution. But how you might ask?
Using a ceiling mounted storage system I believe I can get it up over the door (just barely) and this would work for both the build when I’m not working on it and the finished kayak.
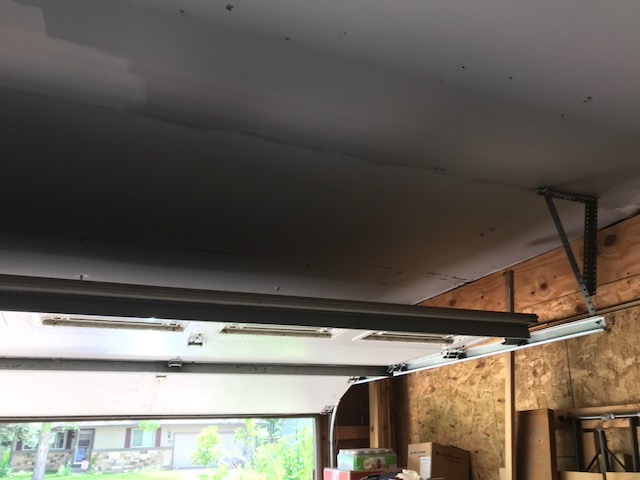
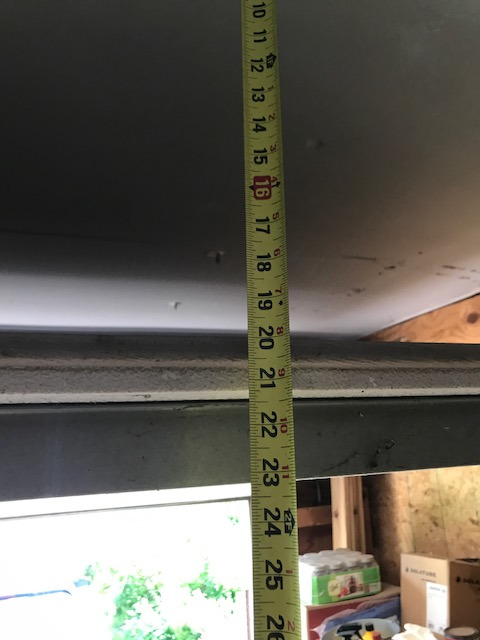
The space above the door is at least 19 inches. The deepest point on the Kayak is about 12″ plus coaming, so around 14″. This leaves about 5 inches to work with. A company called Harken makes a system with various weight ratings. I believe the lighter 45lb model would be enough but just in case I’m considering the 90 lb version. It is designed to mount to your ceiling. You then have four ropes that strap around the kayak and all go to a single pulley that you then raise/lower from a single rope. On this YouTube video, it looks like you lose about 3 inches due to the eye bolts and the 2x mounting plate. So I have 5 inches, I need 3, that leaves me 2 inches to spare. Should be more than enough.
Now I’m not sold on the Harken unit/brand yet as I need to research alternatives, but from what I’ve seen so far I know I at least have this option available to me.
House-keeping #2. I should mention and provide links to the the building method I am planning on following. Nick Schade is a well known name in the hand built kayak circles. He owns and runs Guillemot Kayaks and has produced many YouTube videos. For a relatively quick view (only a few hours in total) the Petrel Play strip built with staples is a good warm up series. However the Micro Bootlegger Sport 70 video series covering many hours (I’d estimate 20+) is an amazing how to series from Nick covering literally every step of the way from buying lumber all the way through the final paddling of the finished product. In this series he builds using a staple-less construction method with hot glue as a temporary fastener and uses beveled strips, not bead and cove. Both of these are methods I will be employing in my build process.
At the end, I expect much of my build process will be very similar to Nick’s, although I also am working in the deck design which I haven’t seen in his videos so it’s not entirely a duplication. Of course most strip built kayaks (and canoes) all follow more or less the same process, just with various builders employing their own preferences or adaptations to keep the project within their skill sets and to match their design ideas.